|
 The
Maginot Line, named after the French
Minister of War
André Maginot, was
a line of concrete
fortifications,
tank obstacles, artillery
casemates, machine
gun posts, and other defences, which
France constructed
along its borders with Germany and Italy after
World War I, their
grand intention being to render their country impregnable against attack for
evermore. Those fortifications which face Germany tend to be referred to
as 'The Maginot Line' and the fortifications strung out across the Alps
facing Italy tend to be known as
'The
Alpine Line'. The
Maginot Line, named after the French
Minister of War
André Maginot, was
a line of concrete
fortifications,
tank obstacles, artillery
casemates, machine
gun posts, and other defences, which
France constructed
along its borders with Germany and Italy after
World War I, their
grand intention being to render their country impregnable against attack for
evermore. Those fortifications which face Germany tend to be referred to
as 'The Maginot Line' and the fortifications strung out across the Alps
facing Italy tend to be known as
'The
Alpine Line'.
The theory behind the
construction of the fortifications was to give France time to mobilise
whilst funnelling invading German forces into open land, the better to be
engaged there in a war of movement. In the autumn of 1914 the
opposing armies had fought to a standstill just short of Paris and then
raced north west to the Belgian coast constantly attempting to outflank
each other. The result was that by October 1914 a stalemate existed with
the creation of a line of static trenches running all the way from the
North Sea to the Swiss border, a stalemate which would not be broken until
the British army employed radical new tactics following the German army's
exhaustion after their so called 'Kaiserschlacht'
spring offensive in March 1918.
|
The construction of the Maginot
Line was intended to fulfil several purposes:
- To avoid a surprise attack and to raise the alarm.
- To provide time for the mobilisation of the French Army
(which took between 2 and 3 weeks).
- To save manpower (France had a population of 39 million, Germany 70
million.
- To protect the Departments of
Alsace and
Lorraine which had been returned
to France after the post Great War Treaty of Versailles.
- To be used as a base from which to mount a
counter-offensive.
- To force an invading enemy to go the long way round the line
and thus violate the neutrality of either
Switzerland or
Belgium.
- To occupy the enemy whilst the French army could be
brought up to reinforce the line.
- To demonstrate a none aggressive posture.
- To compel the British as signatories to the guarantee of
Belgian neutrality to help France if Belgium was invaded again as
it had been in 1914.
|
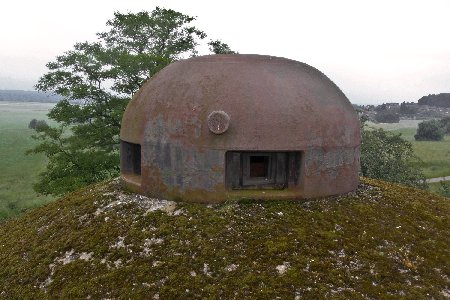
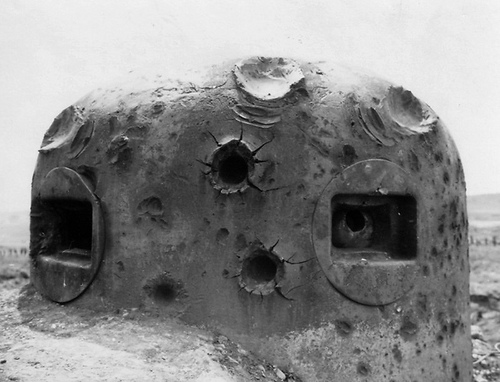 The
line was without doubt an imposing obstacle to the potential progress of
an invading army as can clearly be seen
-
RIGHT - on this period
photograph of one of the armoured 'cloches' which has been hit numerous
times with some quite sizeable ordnance, and yet is still perfectly
functional. But paradoxically the theory that the massive strength and virtual
impregnability of the fortification system would successfully dissuade an
aggressor from invading France proved to be a huge strategic blunder. The Germans
simply invaded through Belgium instead, exactly as they had done in 1914,
flanking the
Maginot Line in a matter of only a few days, whilst limited attacks
mounted upon
sections of the line led the French to believe that their master plan was
actually working. What the French had singularly failed to appreciate was
the speed and fire power of the modern German army who had learned
valuable lessons from the British army's tactics after March 1918. Our radical new
approach just 22 years earlier integrated every available facet of the war matérielle available to the generals of the time, and was referred to as
'All Arms' warfare. The Germans with characteristic flair, studied it,
refined it and re-named it 'Blitzkrieg' which translates as 'lightning
war'. Perversely the French had even had an early warning of what was to come
in September, 1939 when the Wehrmacht invaded and knocked out Poland in
just 35 days. The
line was without doubt an imposing obstacle to the potential progress of
an invading army as can clearly be seen
-
RIGHT - on this period
photograph of one of the armoured 'cloches' which has been hit numerous
times with some quite sizeable ordnance, and yet is still perfectly
functional. But paradoxically the theory that the massive strength and virtual
impregnability of the fortification system would successfully dissuade an
aggressor from invading France proved to be a huge strategic blunder. The Germans
simply invaded through Belgium instead, exactly as they had done in 1914,
flanking the
Maginot Line in a matter of only a few days, whilst limited attacks
mounted upon
sections of the line led the French to believe that their master plan was
actually working. What the French had singularly failed to appreciate was
the speed and fire power of the modern German army who had learned
valuable lessons from the British army's tactics after March 1918. Our radical new
approach just 22 years earlier integrated every available facet of the war matérielle available to the generals of the time, and was referred to as
'All Arms' warfare. The Germans with characteristic flair, studied it,
refined it and re-named it 'Blitzkrieg' which translates as 'lightning
war'. Perversely the French had even had an early warning of what was to come
in September, 1939 when the Wehrmacht invaded and knocked out Poland in
just 35 days.
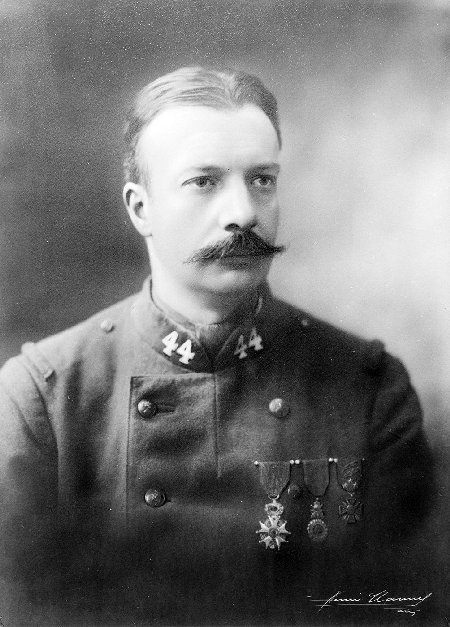
André Maginot, -
LEFT ABOVE - a prominent
politician before the outbreak of the Great War, had left the French
government for the duration of the war and served as a soldier within a fort in the Verdun ring.
His experiences there were to greatly influence many aspects of the design
and construction of the new line of forts, now known as "ouvrages", indeed
many component parts of the Maginot Line were practically identical to
their counterparts from almost half a century before. Other aspects
differed radically though, for example the relatively crude Verdun
fortress accommodation originally did not even have proper latrines where
as the Maginot Line ouvrages had state-of-the-art living conditions for
the garrison troops, including air conditioning with filters to extract
poison gas, comfortable barrack blocks, modern ablutions and kitchens.
There were even underground railways to facilitate the movement of
ammunition and men the considerable distances around within the massive
subterranean labyrinths.
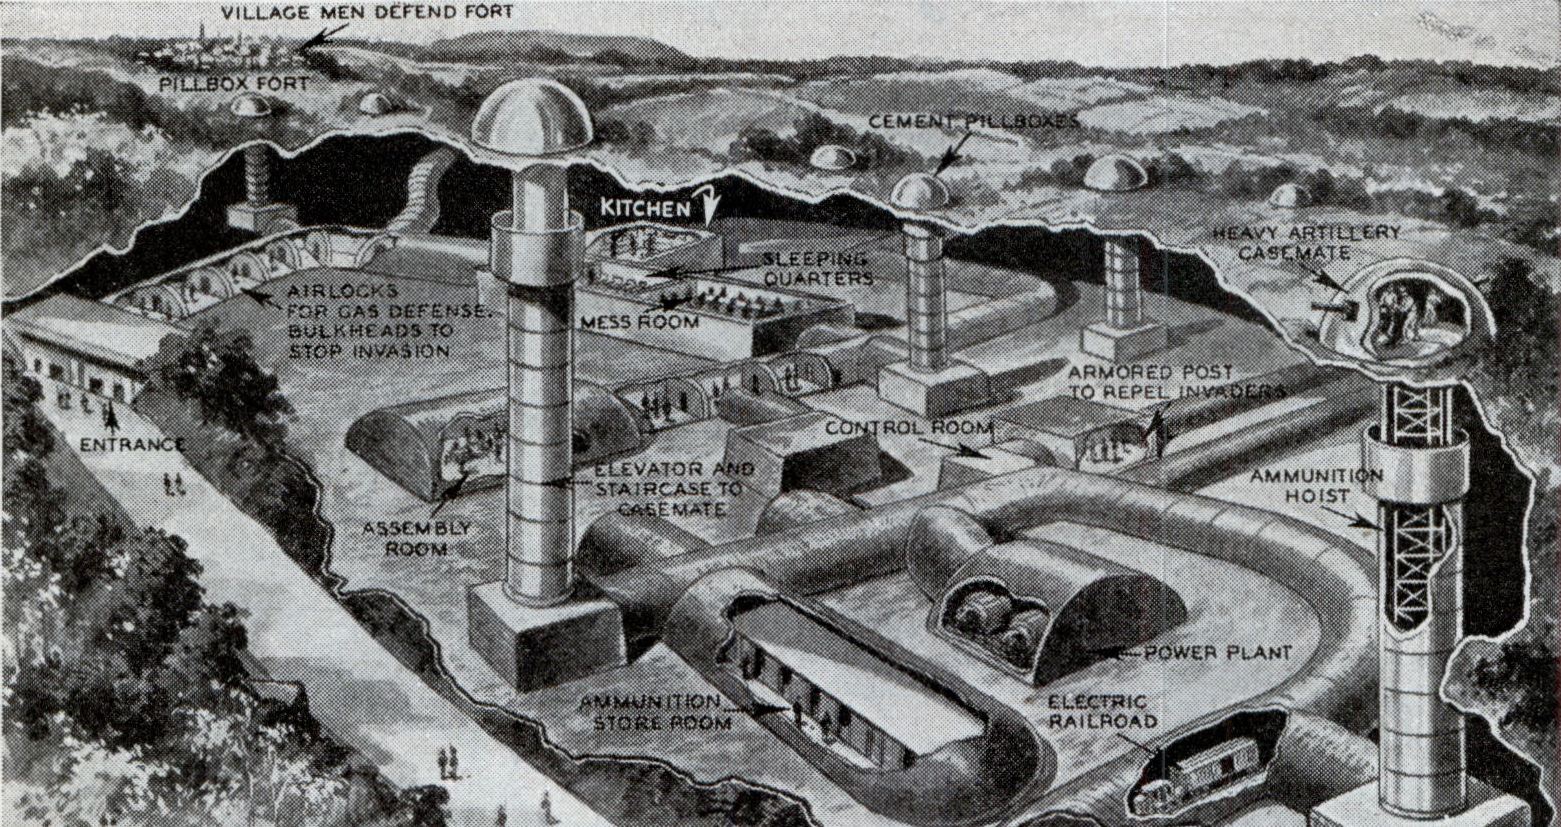
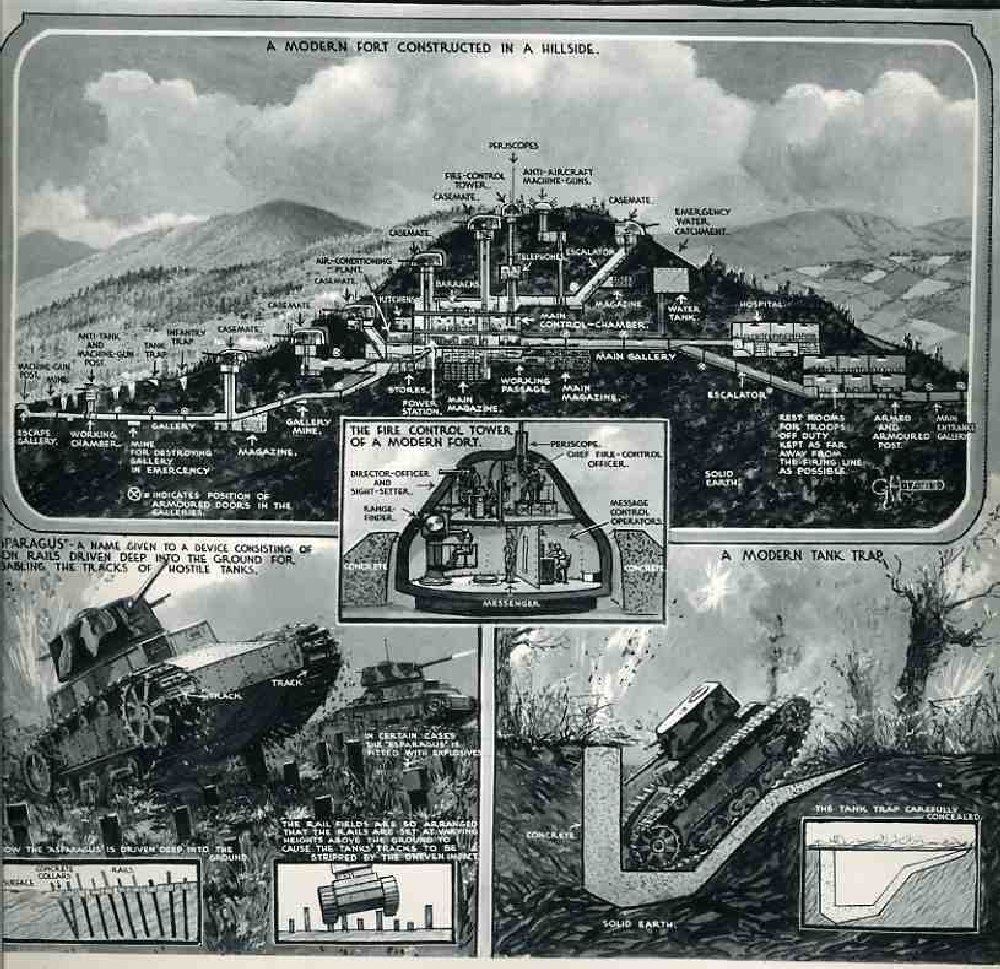
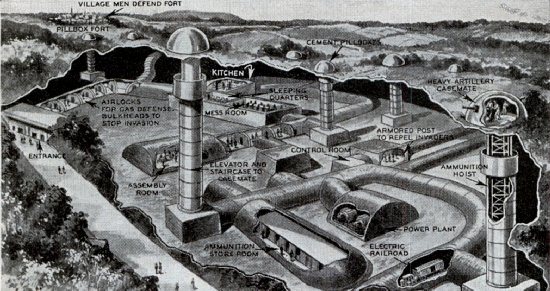 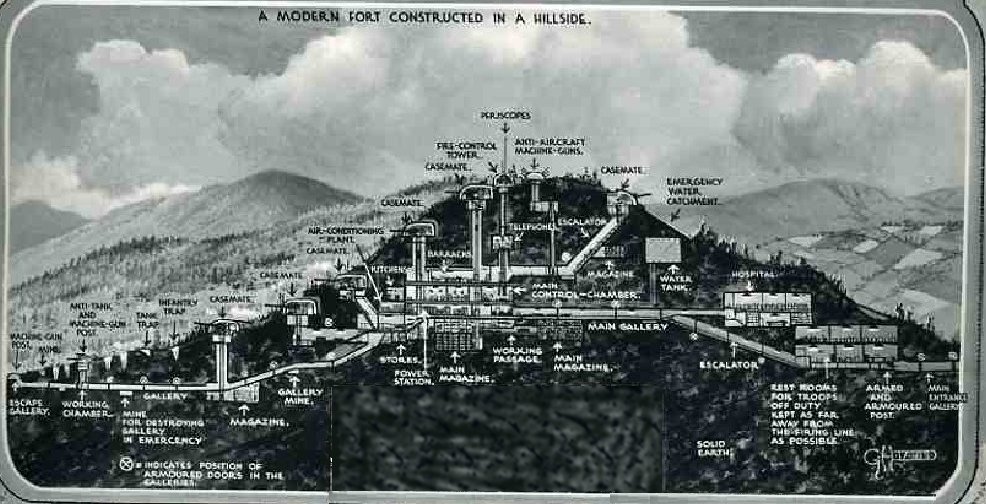 These
rather fanciful illustrations shown here were only two of the many which
appeared in the press of the time - you may view much larger versions by
clicking on these pictures. But artist's
impressions they undoubtedly were for the
very simple
reason that the real details of the line were a closely guarded military
secret. Propaganda is an important part of the dubious and often highly
mendacious 'art'
of warfare; after all, if you can convince your enemy that your weapons
are far more formidable than they might actually prove to be in reality by
'leaking'
valuable 'information'
via the world press, and if you do it convincingly enough, then you can steal a march.
Nothing is new, the Iraqi dictator Saddam Hussein attempted to put the
frighteners on the coalition forces before the first Gulf war by similar
means. The illustration shown on the right is very similar to an illustration in a
book I bought from a friend at the age of 11 in my first year of secondary school which sparked my interest in the Maginot Line and
would lead
ultimately to my even greater interest in the earlier fortifications
situated around the city of Verdun. These
rather fanciful illustrations shown here were only two of the many which
appeared in the press of the time - you may view much larger versions by
clicking on these pictures. But artist's
impressions they undoubtedly were for the
very simple
reason that the real details of the line were a closely guarded military
secret. Propaganda is an important part of the dubious and often highly
mendacious 'art'
of warfare; after all, if you can convince your enemy that your weapons
are far more formidable than they might actually prove to be in reality by
'leaking'
valuable 'information'
via the world press, and if you do it convincingly enough, then you can steal a march.
Nothing is new, the Iraqi dictator Saddam Hussein attempted to put the
frighteners on the coalition forces before the first Gulf war by similar
means. The illustration shown on the right is very similar to an illustration in a
book I bought from a friend at the age of 11 in my first year of secondary school which sparked my interest in the Maginot Line and
would lead
ultimately to my even greater interest in the earlier fortifications
situated around the city of Verdun.
|

To read our reports
from Verdun click the photo link above. |
Even though these fanciful illustrations were a long way away from the
reality of the ouvrages in the line, for example there were few
multi-level forts constructed except for a handful in the Alpine part of
the line, it doesn't take a quantum leap of imagination to realise
just how large, complex and labour intensive they actually were to build,
especially when you multiply the effort and cost by the huge number of
ouvrages in the line. Another odd concept in many of the illustrations can
be seen in the left illustration. The reality is that most of the ouvrages
were constructed to a very linear in plan rather than compacted into a
small footprint as seen above.
Whatever their design though they
were massively expensive to build, maintain and run, and as a consequence
the French government had to divert funding from every other area of
military expenditure with the inevitable result that the French armed
forces became effectively the poorest in Europe suffering dramatically
right across the board. This of course would have a dramatic effect upon
their ability to fight effectively beyond the limits of the line. The responsibility for
design and implementation of the work was given to an organisation known
as CORF (Commission d'Organisation des Régions Fortifiées) and
construction began in 1930. By the completion of the initial phases in
1939 it had cost in excess of three
billion
French francs.
The strongest part of the line stretched from
Switzerland to
Luxembourg, and a second much lighter
section was built in 1934 to continue the line across to the coast at the
Strait of Dover. The line did not cover
the area eventually chosen by the Germans for their invasion of France,
through the Belgian Ardennes forest, due to the fact that the heavily
wooded and mountainous countryside in this area was considered by the
French to be impassable to armoured vehicles and thus an attack was
regarded as impossible through this area.
Sadly they were
very, very wrong.
|
After the Second World War the
line was repaired and extensively modified in order to present a barrier
to the Soviet Union if a new war were to break out. With
France's acquisition of it's own nuclear deterrent
in 1960 the line became an expensive
white elephant and so it began to be progressively abandoned with the
exception of a few of the larger ouvrages which were converted to nuclear
attack proof command centres. When France withdrew its commitment from
NATO in 1966 almost
the entire line was abandoned with many of the ouvrages being auctioned
off to the public or simply left to decay.
Ouvrage Latiremont
is a gros
(large) ouvrage located in the
Fortified Sector of the Crusnes, a
sub-sector of Arrancy. It is situated between the gros ouvrage
Fermont and the petit ouvrage
Mauvais Bois, facing the
Belgian border. The village of
Doncourt-Cités is nearby. Latiremont saw limited action, coming under
direct attack in late June, 1940. It surrendered to German forces on the
27th. June. Some of the fortresses within the line were
occupied by the German army and saw action
against American forces under General Patton in 1944 but Latiremont was
not one of them.
Latiremont was completed at a
cost of 88 million francs by the contractor Monod of Paris. Designed from
the outset as a gros ouvrage
with casemate-mounted 75mm guns, a
second build phase was planned during which additional 75mm and 135mm gun turret
blocks were to be installed. By the late 1930s though the financial resources
for the expansion had
been allocated elsewhere so the extra turret blocks were never built.
There are more than 1,200 metres of
underground tunnels connecting the two entry blocks, one for munitions.
one for personnel, to the internal structures and the fighting blocks, at
an average depth of 30 metres. An 'M1'
type magazine, arranged with parallel
galleries connected by cross galleries, is located close to the ammunition
entrance, whilst the underground barracks, usine (power house) and utility
areas are located just beyond the personnel entry. The gallery system was served
by a narrow-gauge (60 cm) railway that was connected externally to
the regional
military railway system for the re-supply of the line forts just a few
kilometres to the rear. Several stations along the gallery system,
located in wider sections of the main gallery, permitted trains to pass.
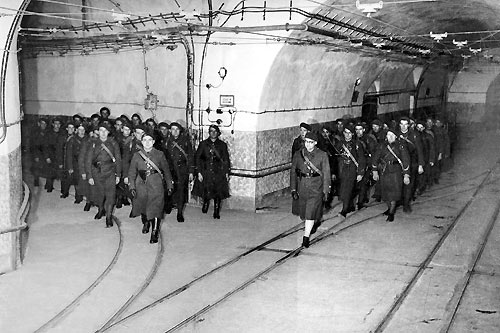 |
|
Above -
the French fortress garrison troops were the elite of their day. |
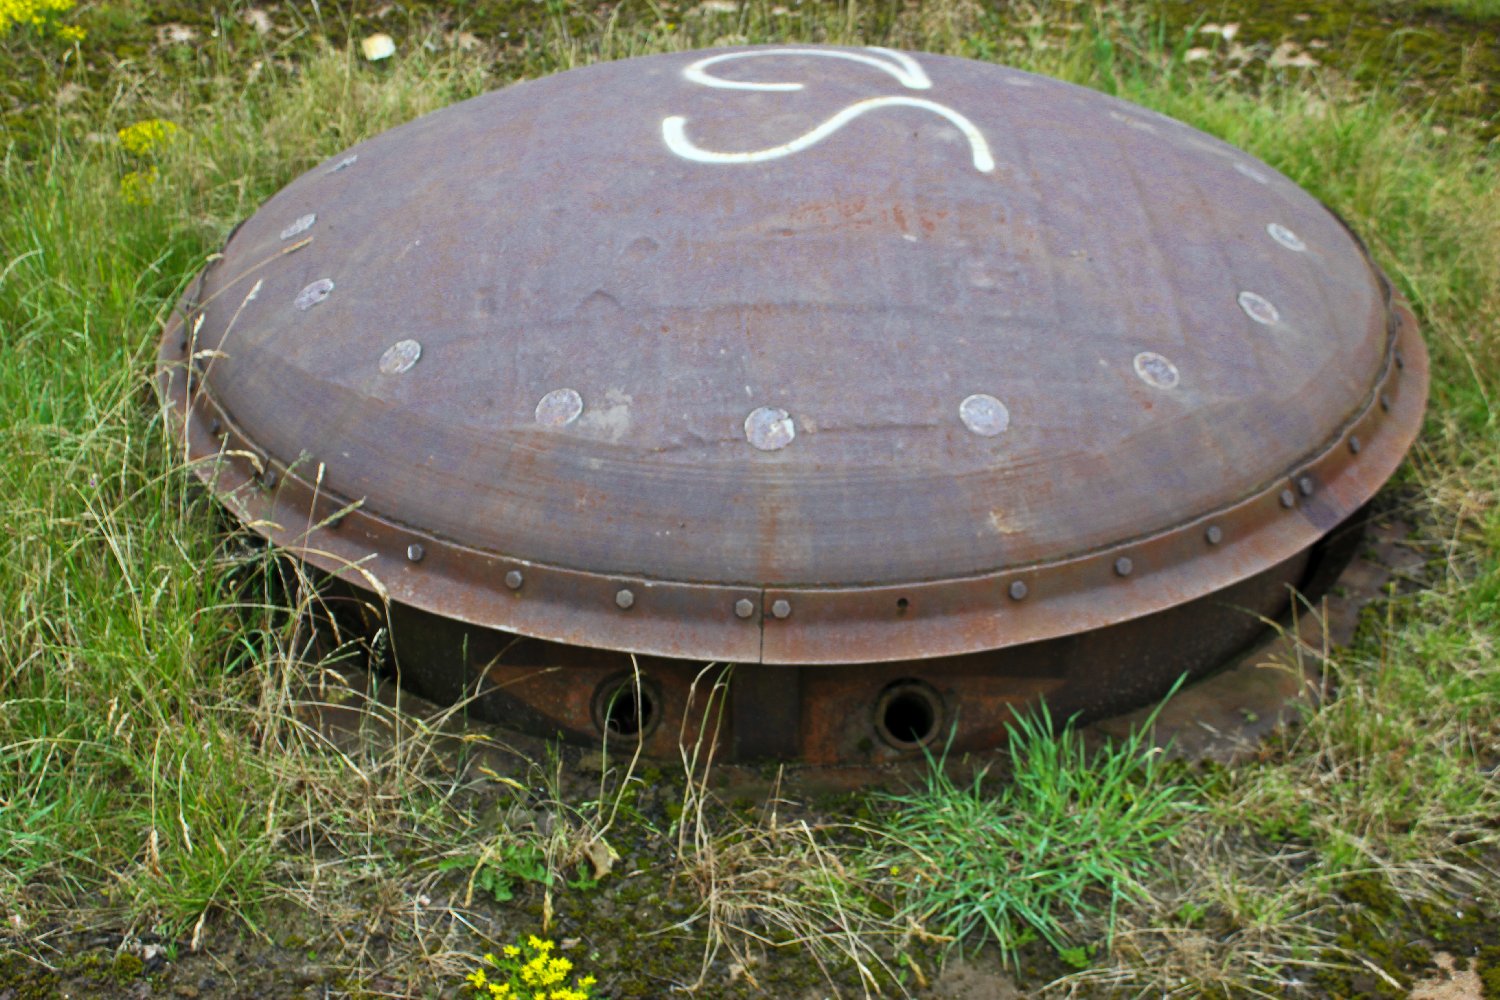
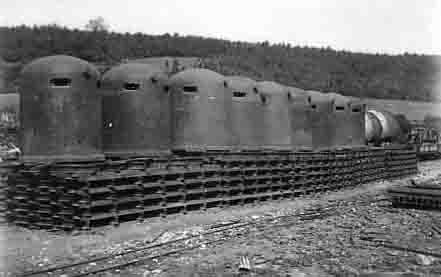 |
|
Above
- machine gun 'cloches' waiting to be built into the forts. |
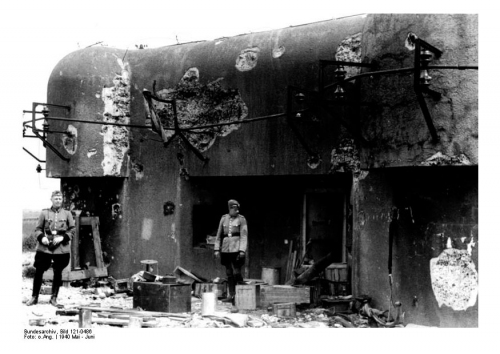 |
|
Above
- German soldiers standing by an artillery casemate after the fall
of France. |
|
Latiremont has two entrances and
six combat blocks.
Most of the blocks are in and
around the Bois de Pracourt.
|
Ammunition entrance:
|
two
automatic rifle cloches (GFM),
one machine gun/anti-tank
embrasure (JM/AC47). |
|
Personnel entrance: |
one GFM cloche, one grenade launcher cloche, one JM/AC47 embrasure |
|
Block 1:
|
Infantry block with two
machine gun cloches (JM) and one
GFM cloche. |
|
Block 2:
|
Infantry block with one machine-gun turret, one GFM cloche, one JM
cloche and one
periscope cloche (VDP). |
|
Block 3:
|
Infantry block with one machine-gun turret and one GFM cloche. |
|
Block 4:
|
Artillery block with one 81mm mortar turret, one JM embrasure, one
JM/AC47 embrasure and one GFM cloche. |
|
Block 5:
|
Artillery block with three 75mm gun embrasures, two GFM cloches
and one LG cloche/grenade launcher cloche (LG). |
|
Block 6:
|
Artillery block with three 75mm gun embrasures and two GFM
cloches. |
|
Unbuilt
blocks: |
|
|
Block 7: |
(unbuilt): Artillery block with a twin 75mm gun turret and
two GFM cloches. |
|
Block 8: |
(unbuilt): Artillery block with a twin 135mm gun turret, one
grenade launcher cloche and one
GFM cloche. |
Casemates and shelters - a series of detached
casemates and infantry shelters
surround Latiremont, including the:
|
Casemate de Jalaumont
Ouest: |
Single block with one JM/AC47
embrasure, one JM embrasure and one GFM cloche. |
|
Casemate du Haut-de-l'Anguille
Ouest: |
Single block with one JM/AC47 embrasure, one JM embrasure
and two GFM cloches. |
|
Casemate du Haut-de-l'Anguille
Est: |
Single block with one JM/AC47 embrasure, one JM embrasure
and two GFM cloches. |
|
Casemate du Bois-de-Tappe
Ouest: |
Single block with one JM/AC47 embrasure, one JM embrasure
and two GFM cloches. |
|
Casemate du Bois-de-Tappe
Est:
|
Single block with one JM/AC47 embrasure, one JM embrasure
and two GFM cloches. |
|
Casemate de l'Ermitage
Saint-Quentin: |
Single block with one JM/AC47 embrasure, one JM embrasure,
one mortar cloche and one GFM cloche. |
|
Casemate de Pracourt:
|
Single block with one JM/AC47 embrasure, two mortar cloches
and two GFM cloches. |
NB: none of these are connected to the ouvrage or to each
other. The Casernement de Doncourt provided peacetime above-ground
barracks and support services to Latiremont and other ouvrages in
the area.
|
|
Below is a
selection of the photographs we took in and around the Gros Ouvrage Latiremont in June 2012.
To
view any of the photographs in a far bigger size then click on the
image of your choice and it will open in a new window.
Click right on the
BACK
button if you wish to return to our urb-ex
site front page... |
 |
|
The photographs on this
website MAY NOT BE USED WITHOUT THE EXPRESS PERMISSION of the
website author... |
 |
 |
 |
|
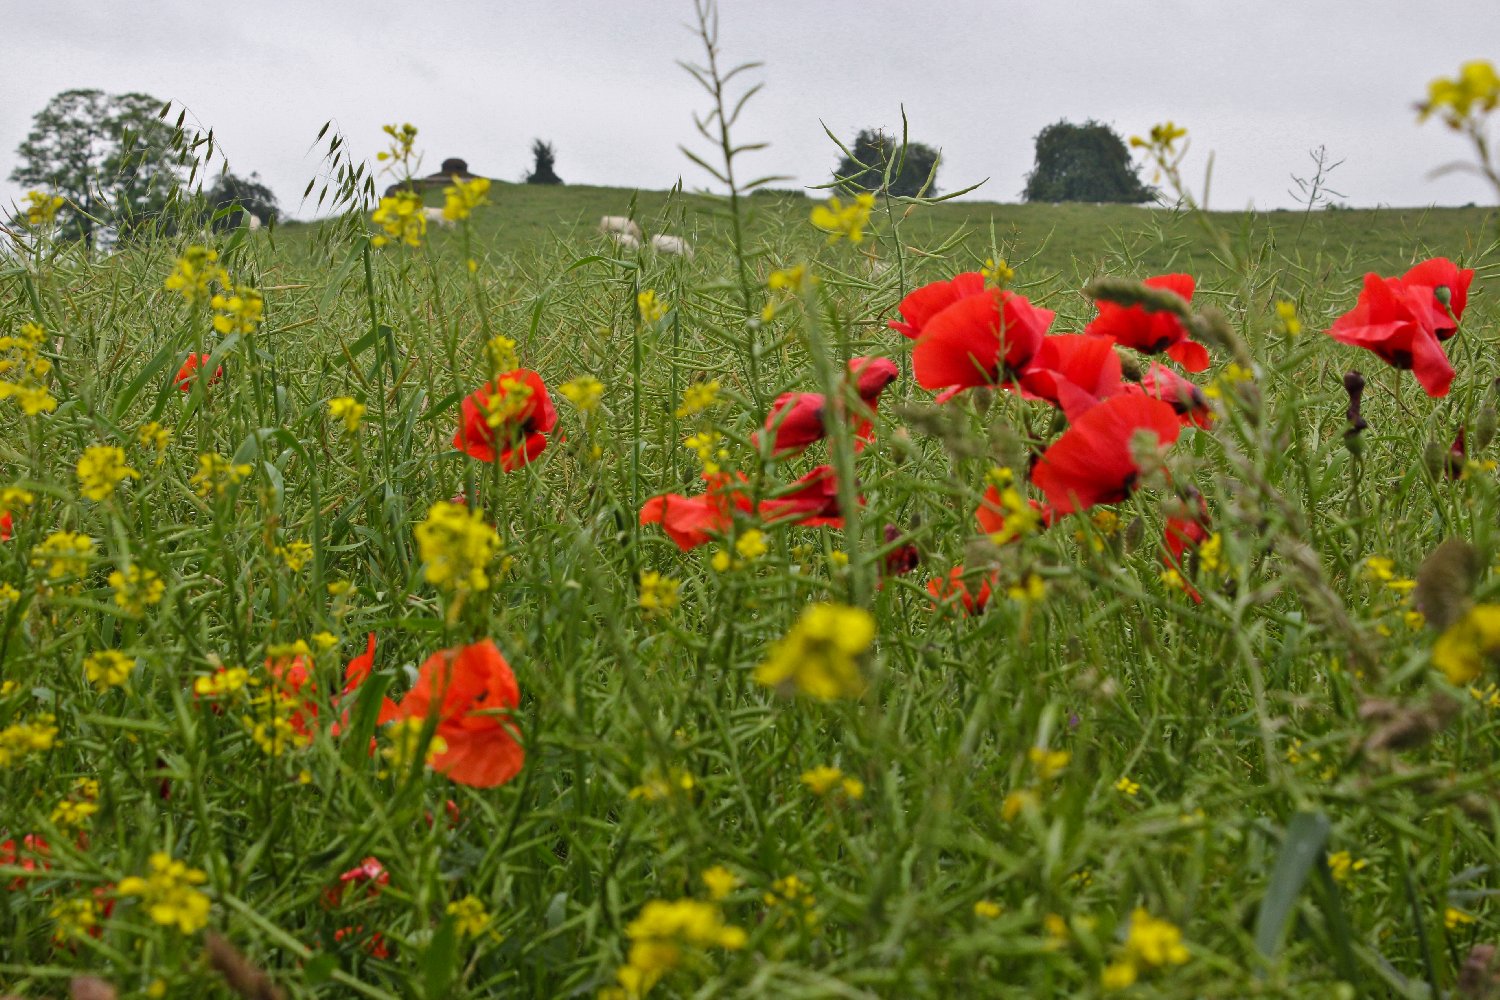
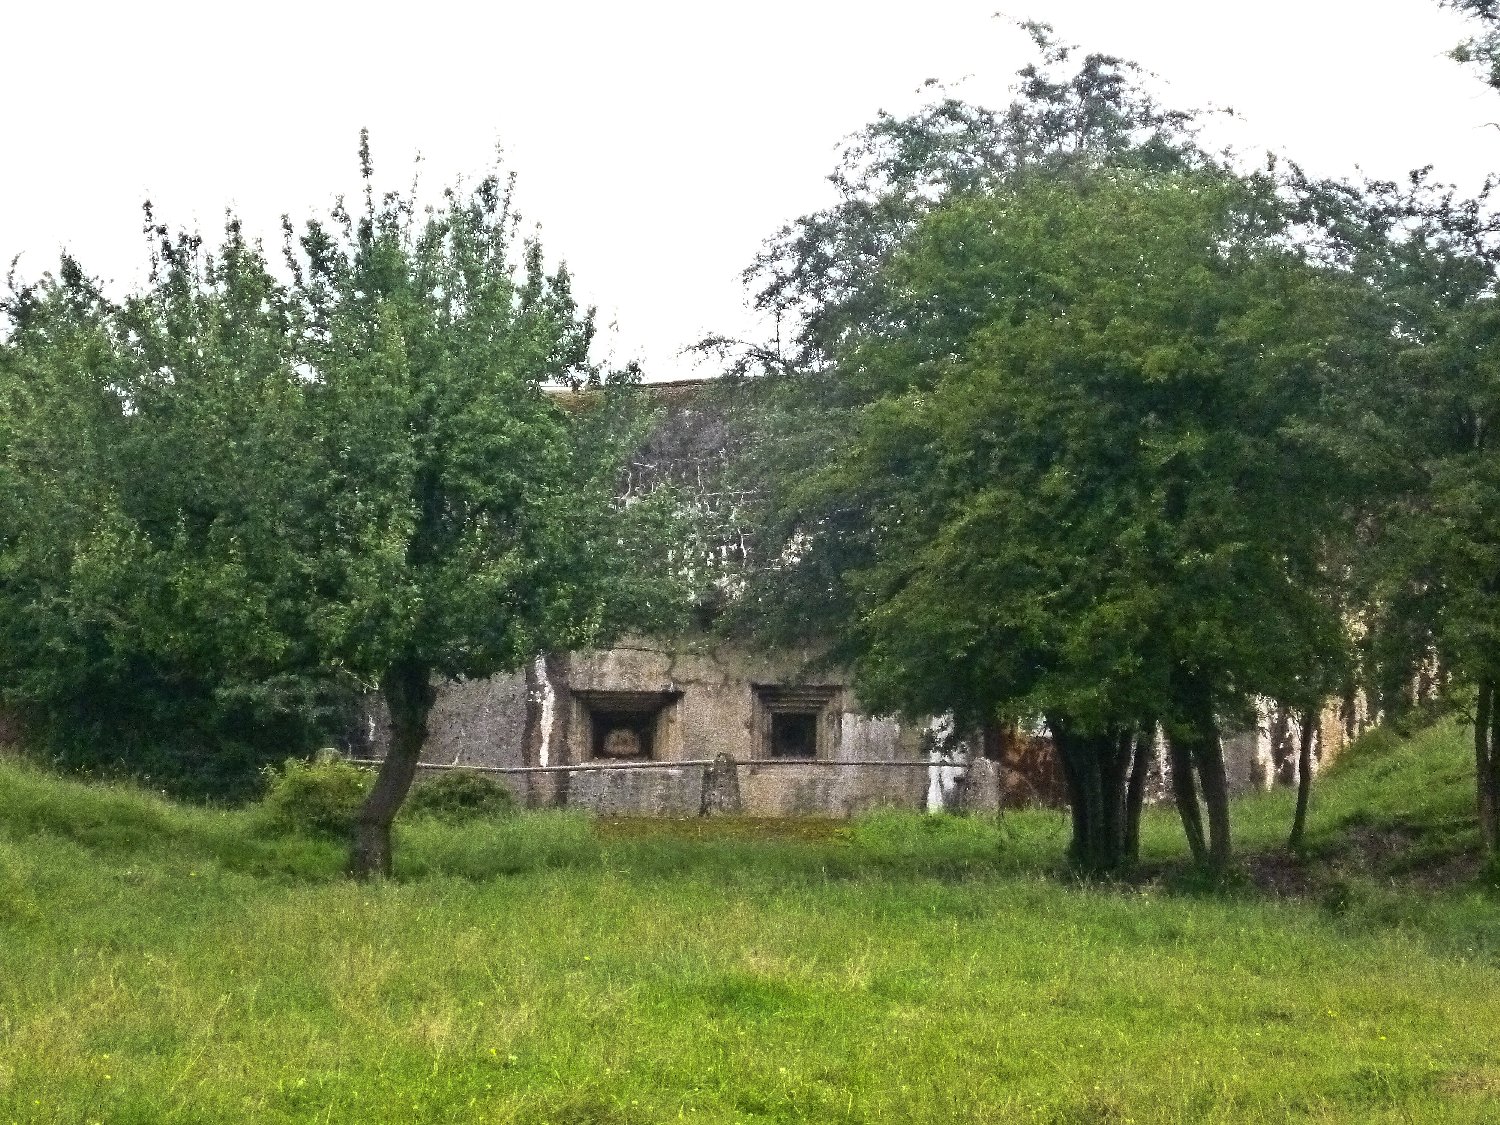
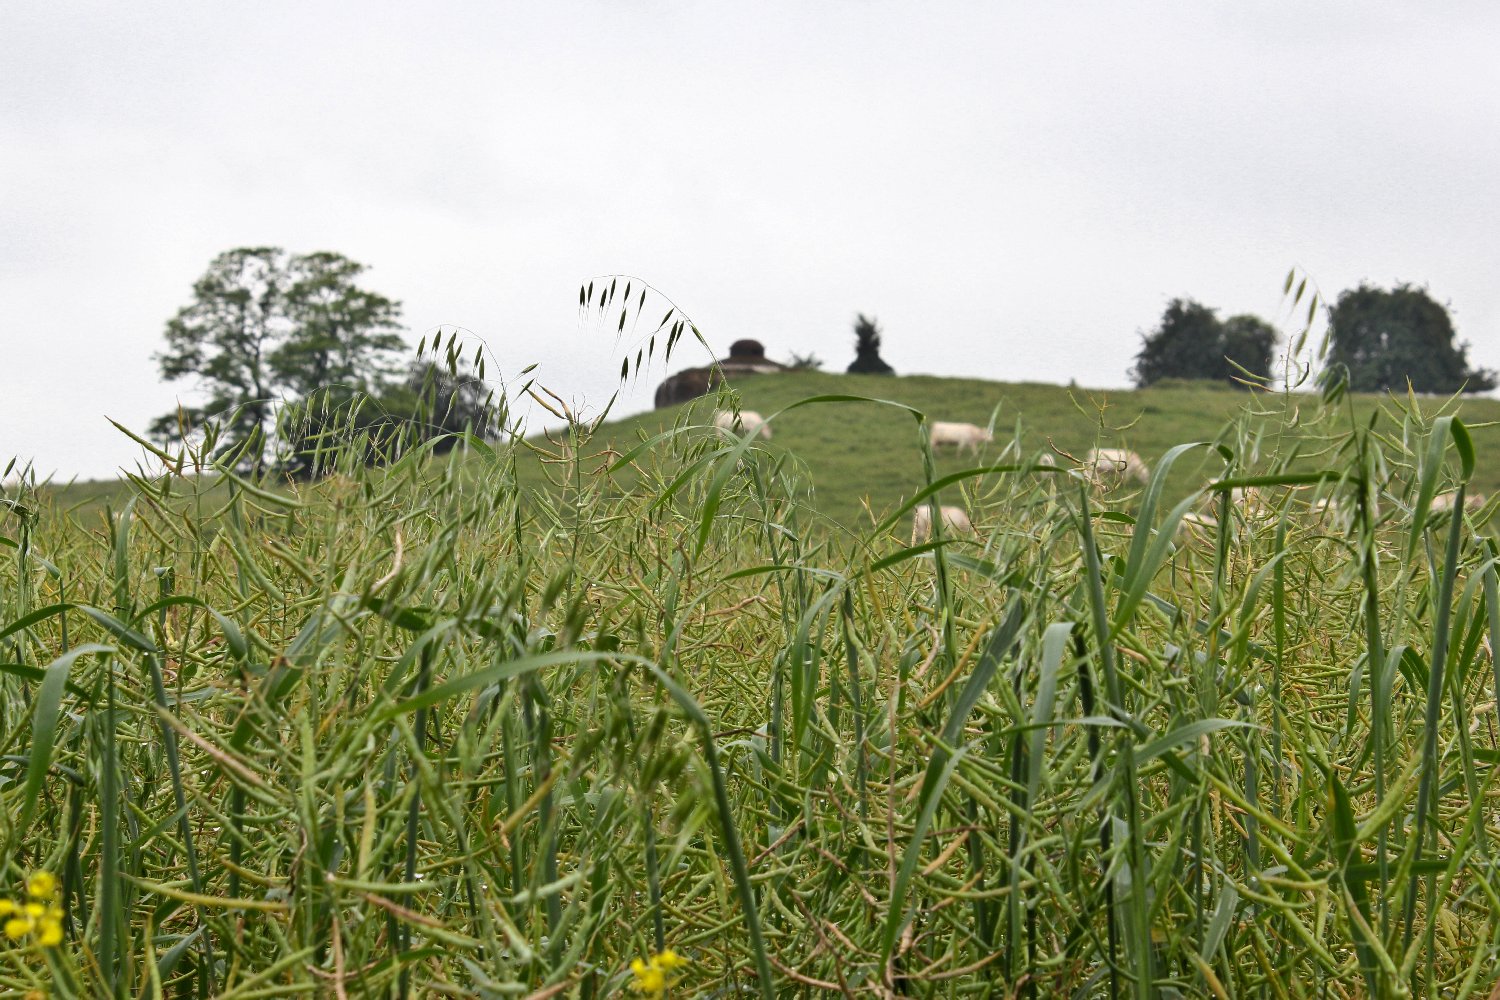
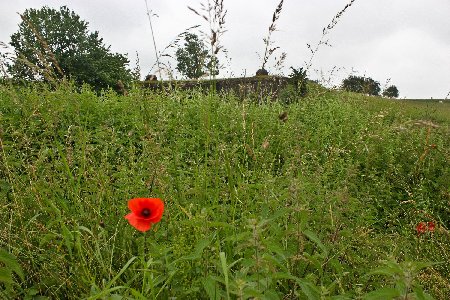
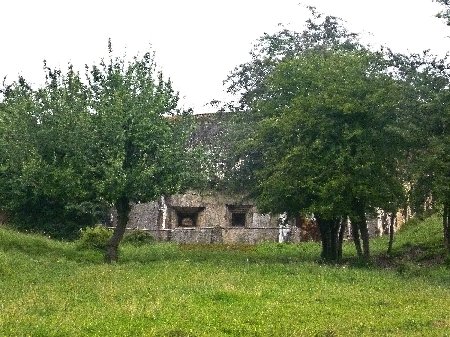
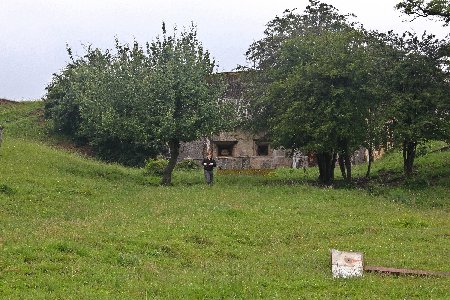
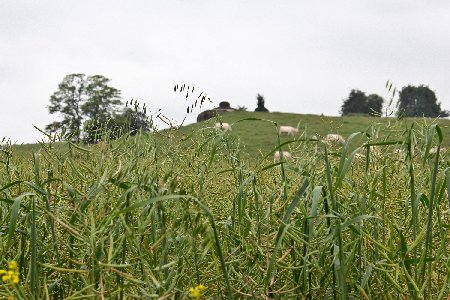
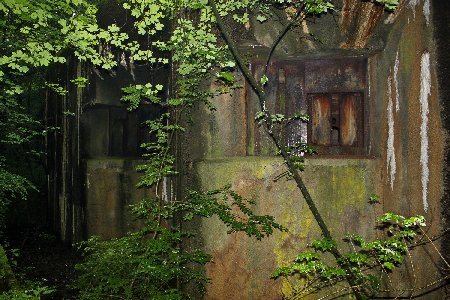
There is very little to
see of the Maginot Line, even from just a short distance away.
|
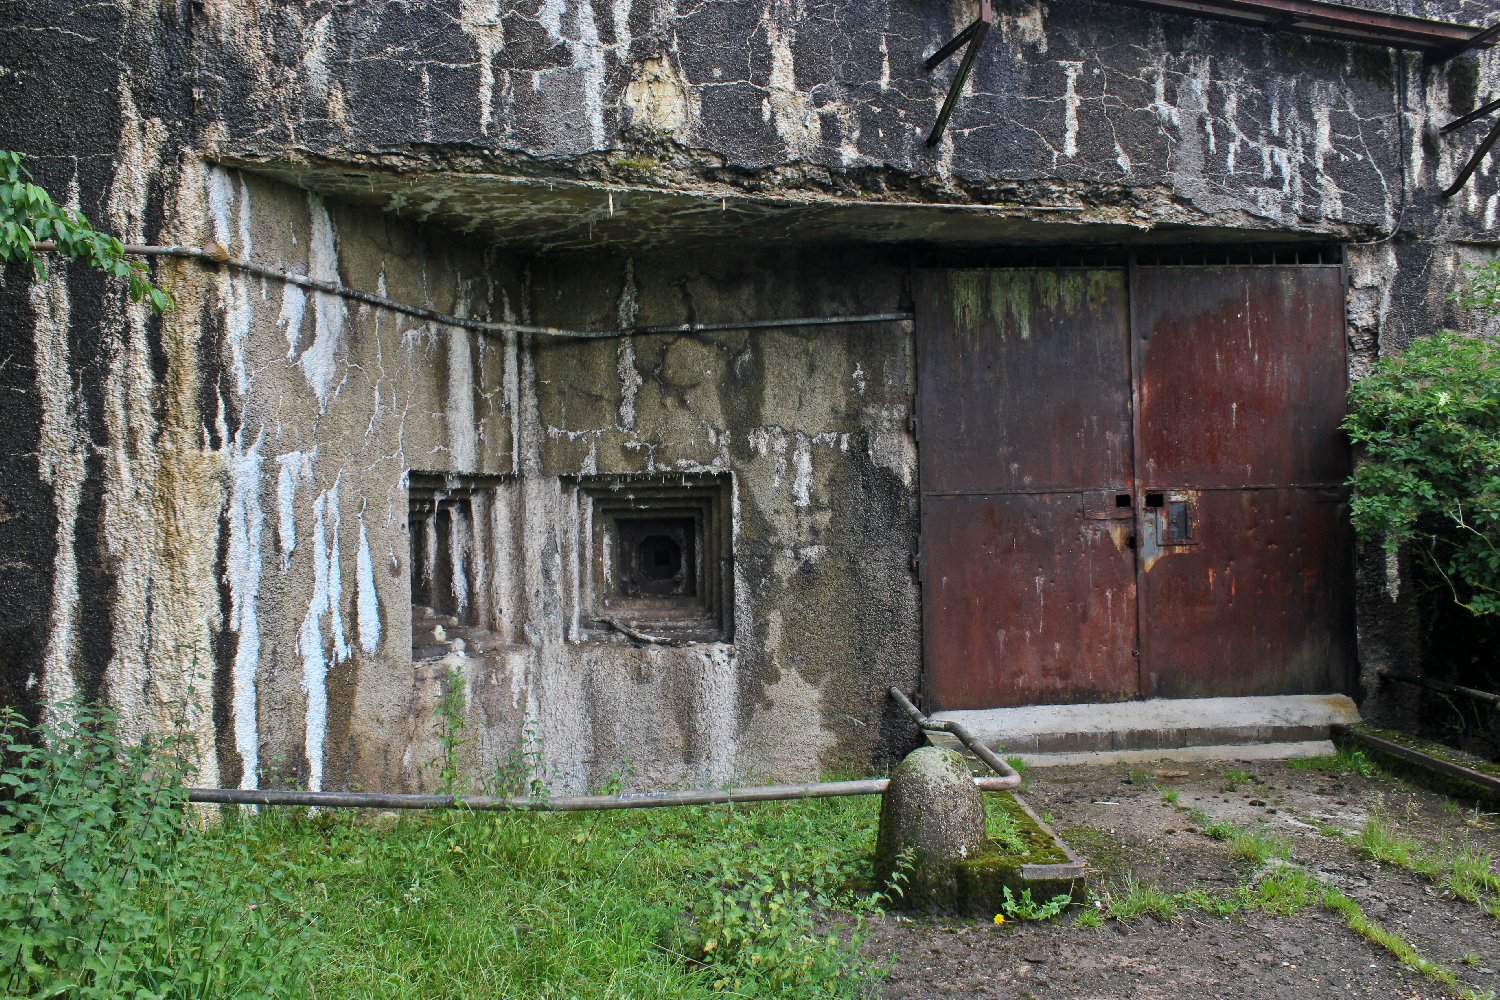
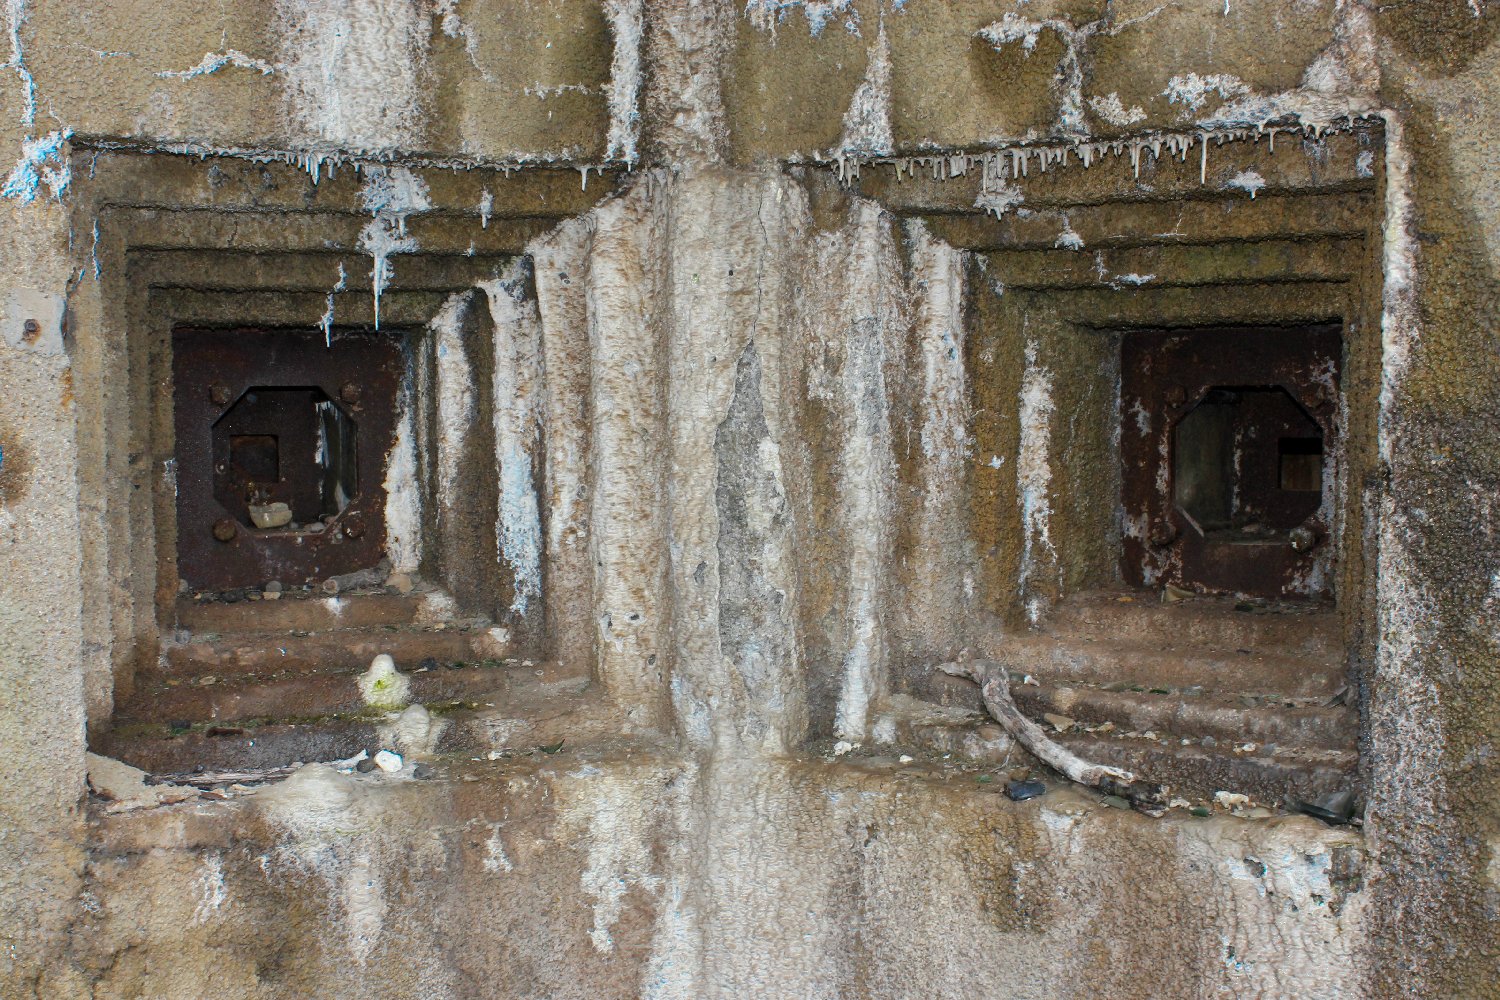
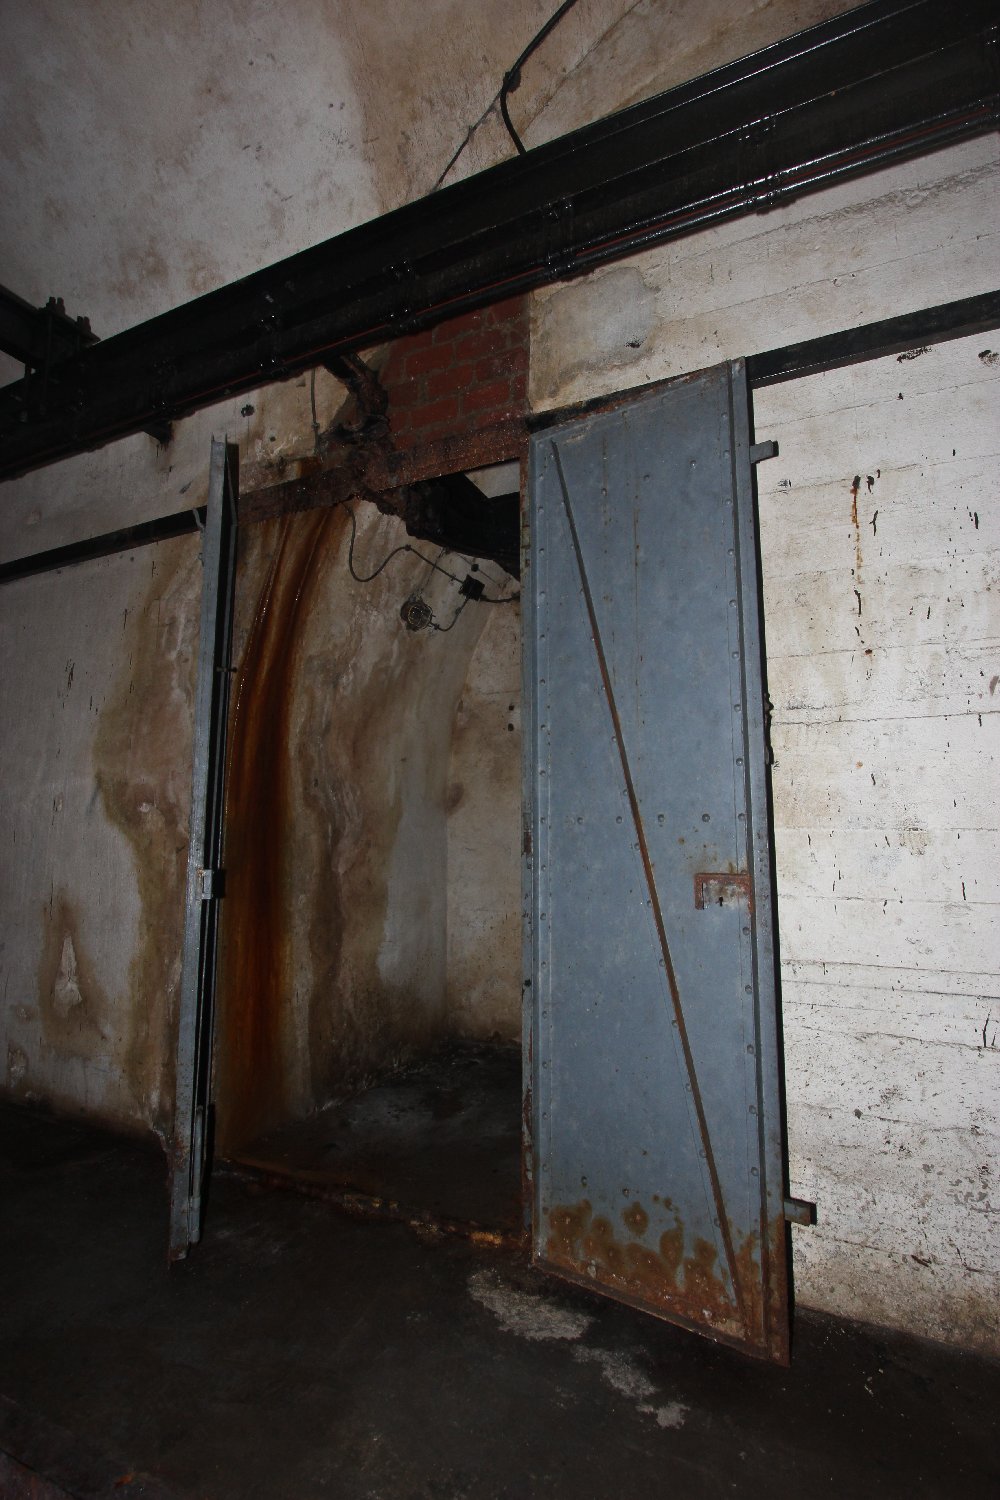
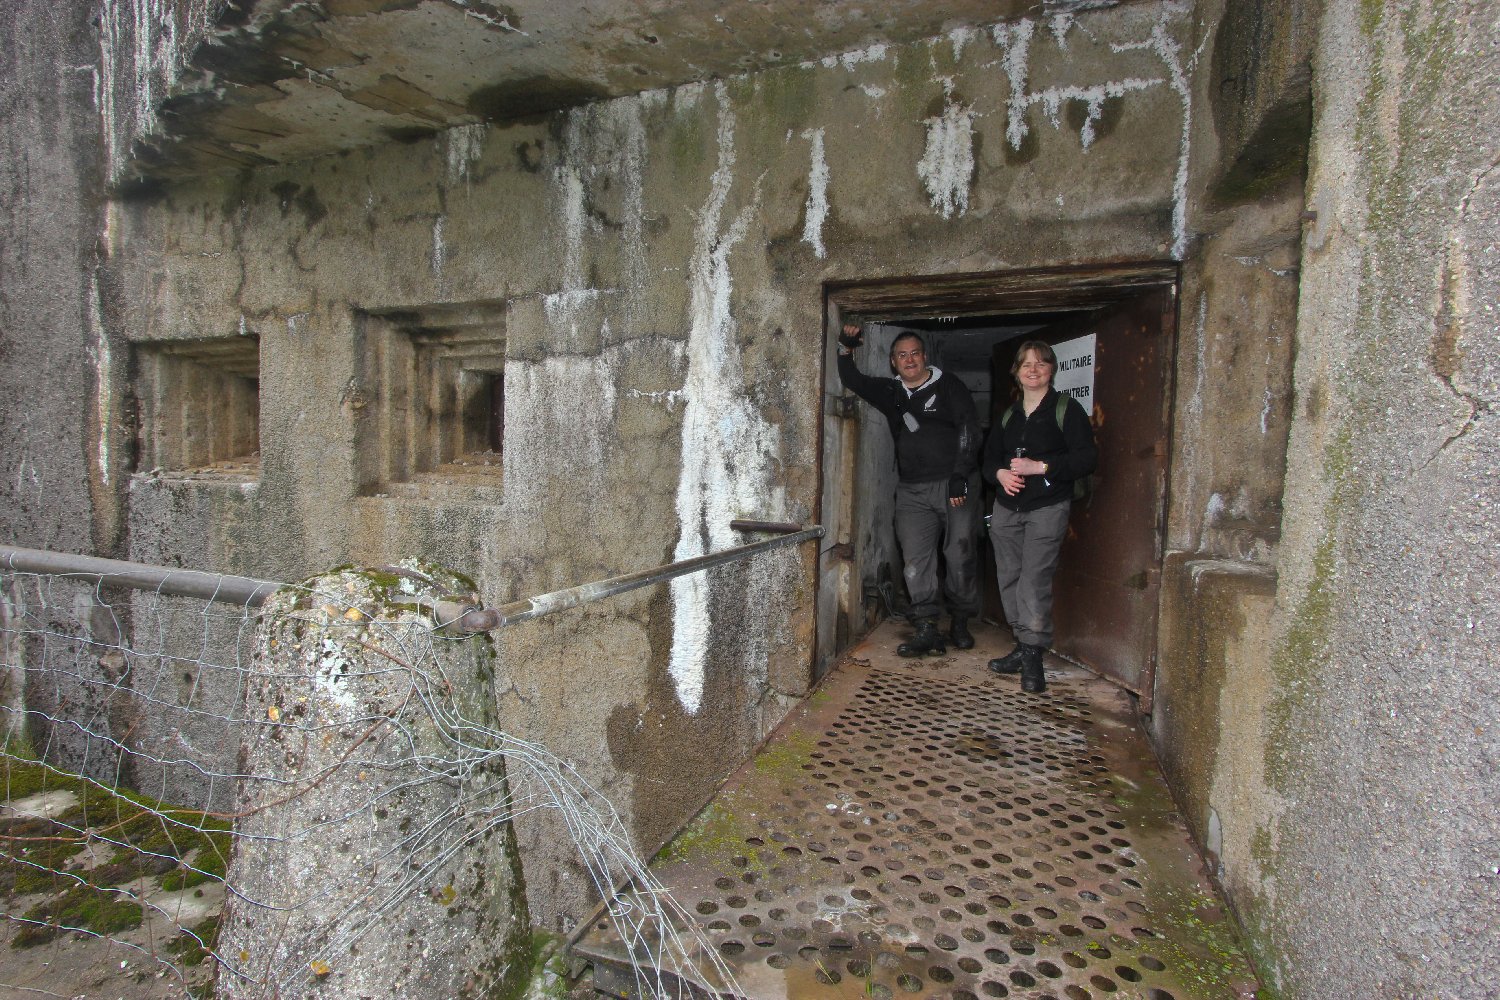
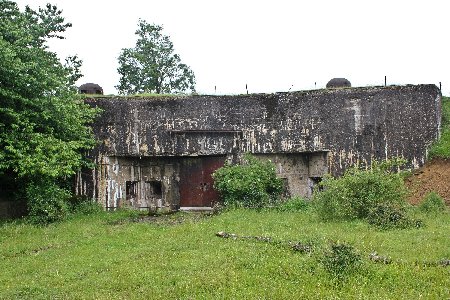
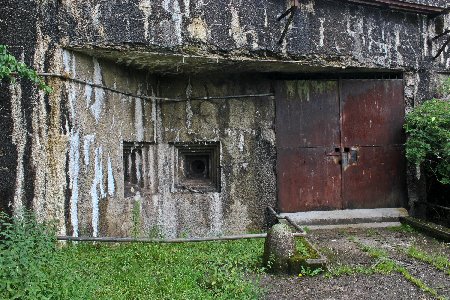
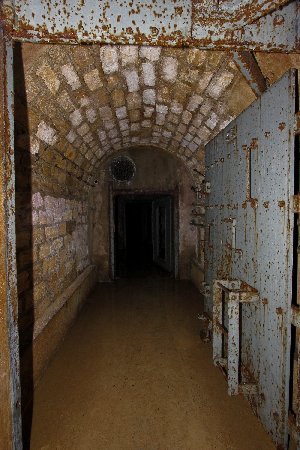
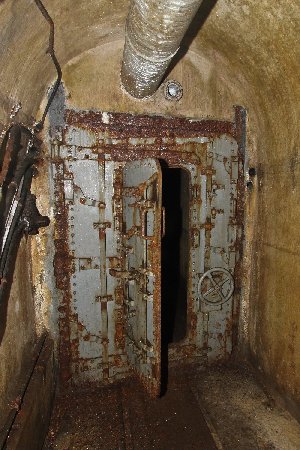
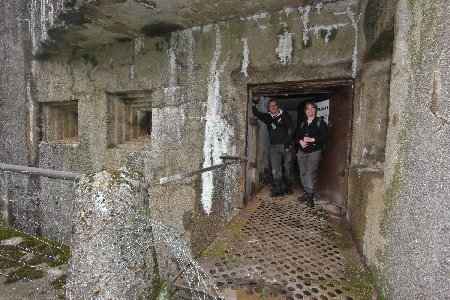
The ammunition entrance.
|
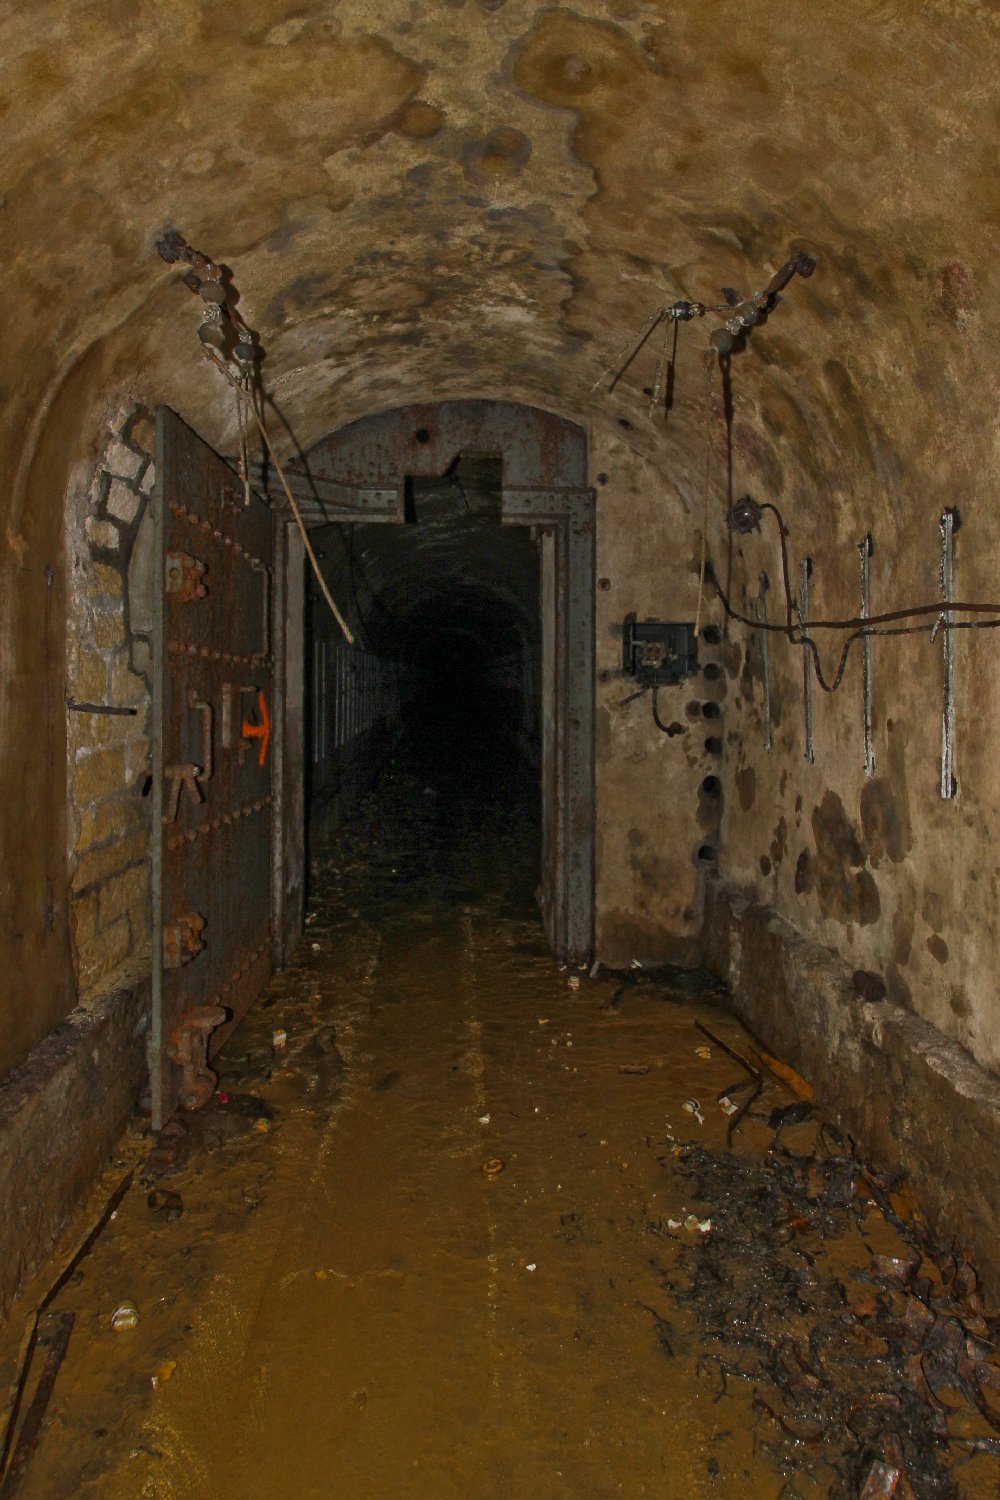
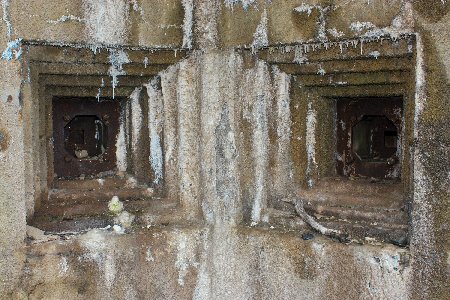
The huge armoured doors
are protected against enemy infantry attack by machine guns ported
through armoured crenels.
|
 |
 |
 |
|
In the distance is the
personnel entrance protected on top by two cloches carrying machine
guns and grenade launchers.
|
The entrance is further
protected by more machine gun crenels at the lower level.
|
Crossing fields of fire from the MG crenels.
|
 |
 |
 |
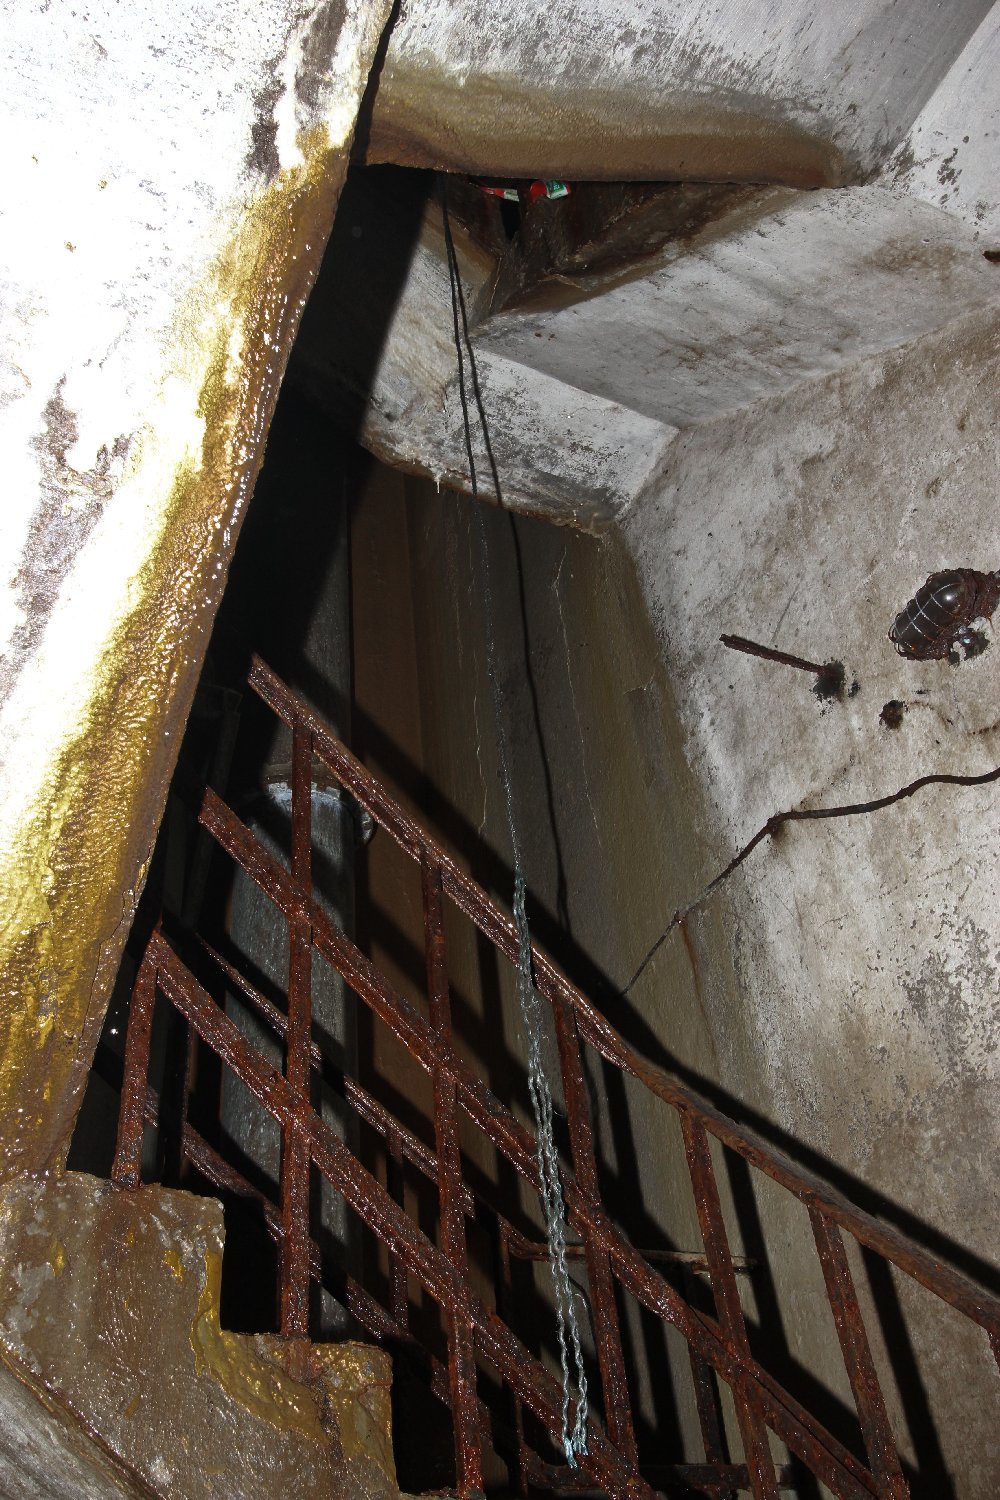
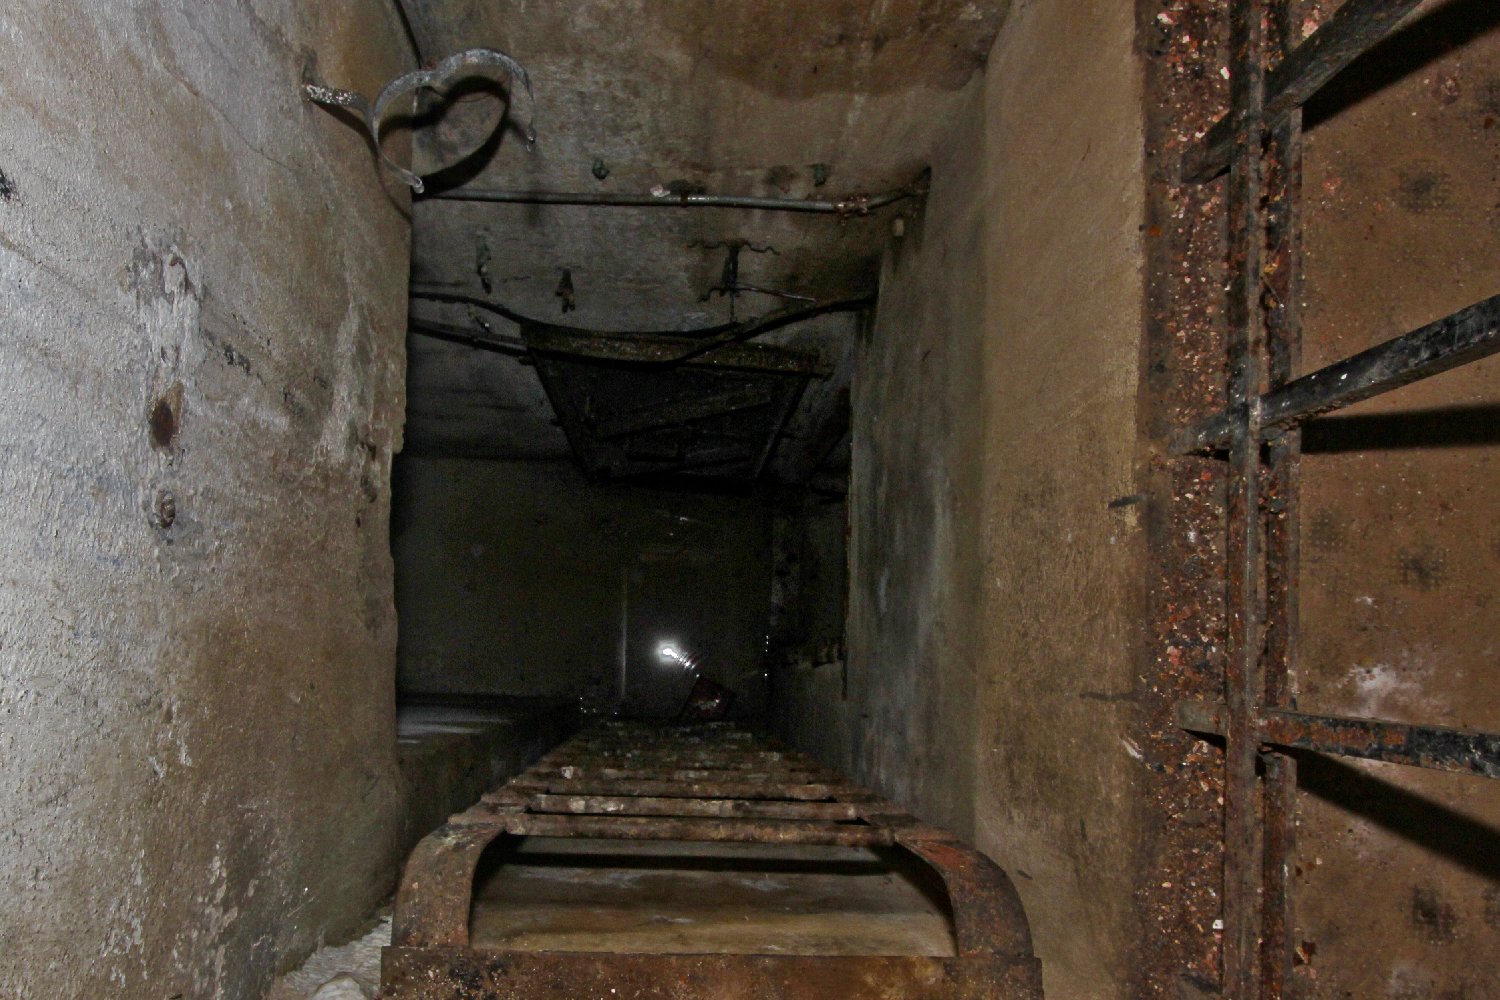
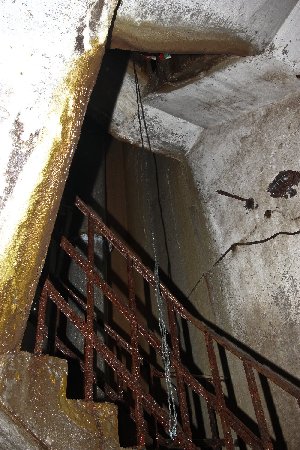
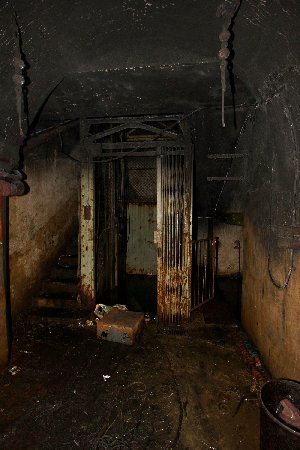
Inside the fort we descend 148 steps alongside
the lift.
|
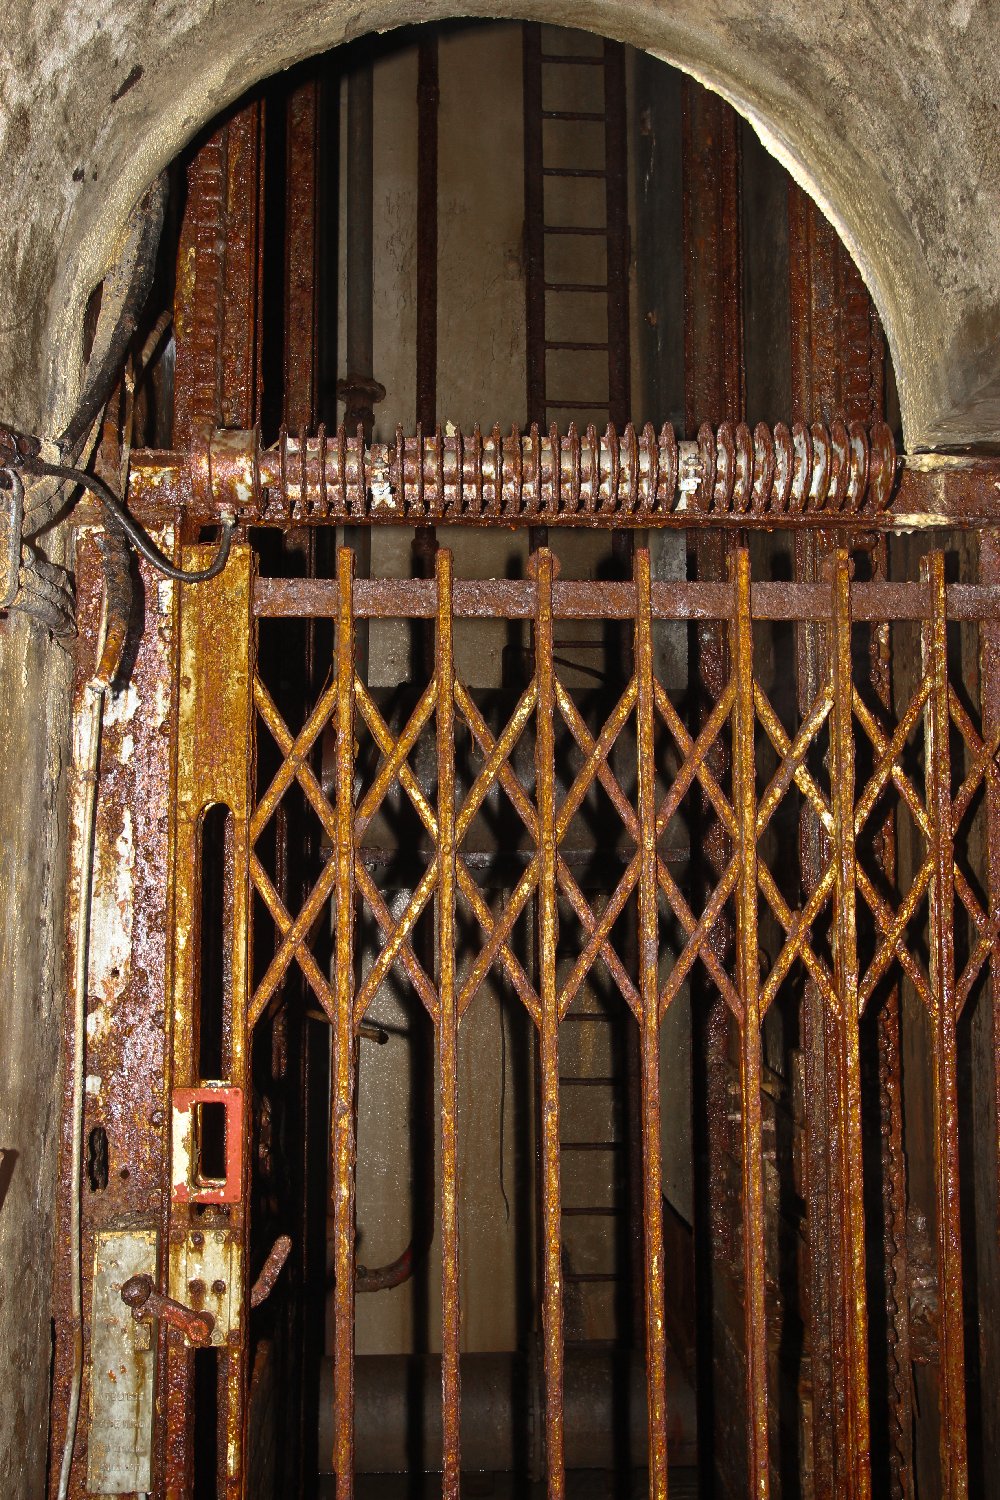
At the bottom can be
seen a heater and an escape ladder behind the lift doors.
|
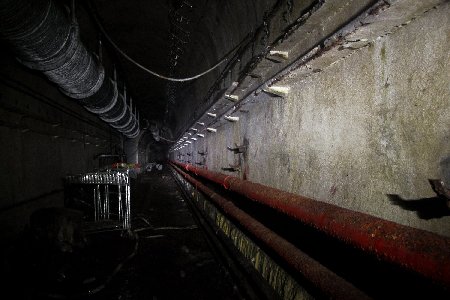
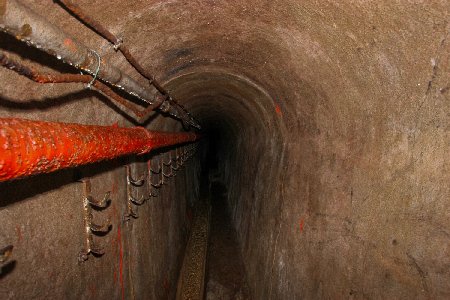
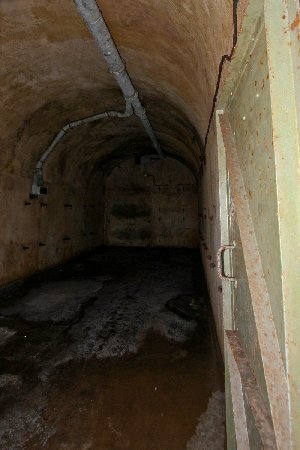
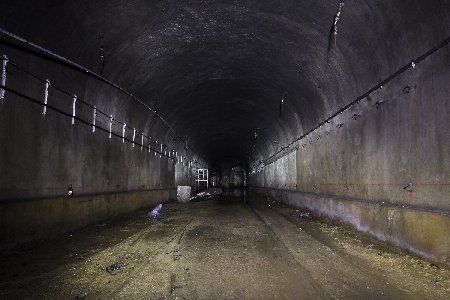
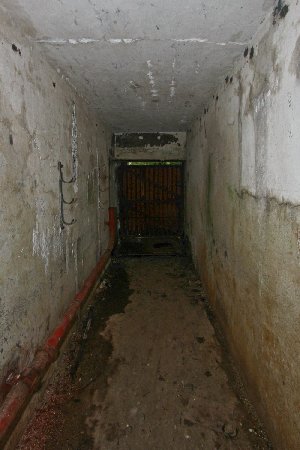
The sheer scale of the tunnels is very
intimidating at first sight!
|
 |
 |
 |
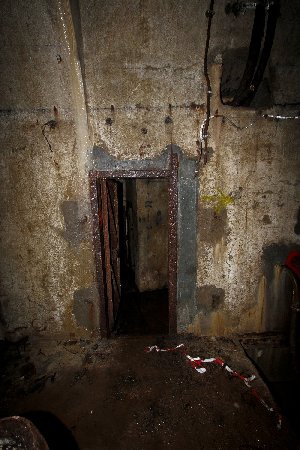
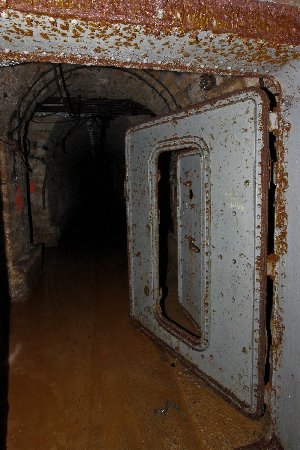
A service tunnel door.
|
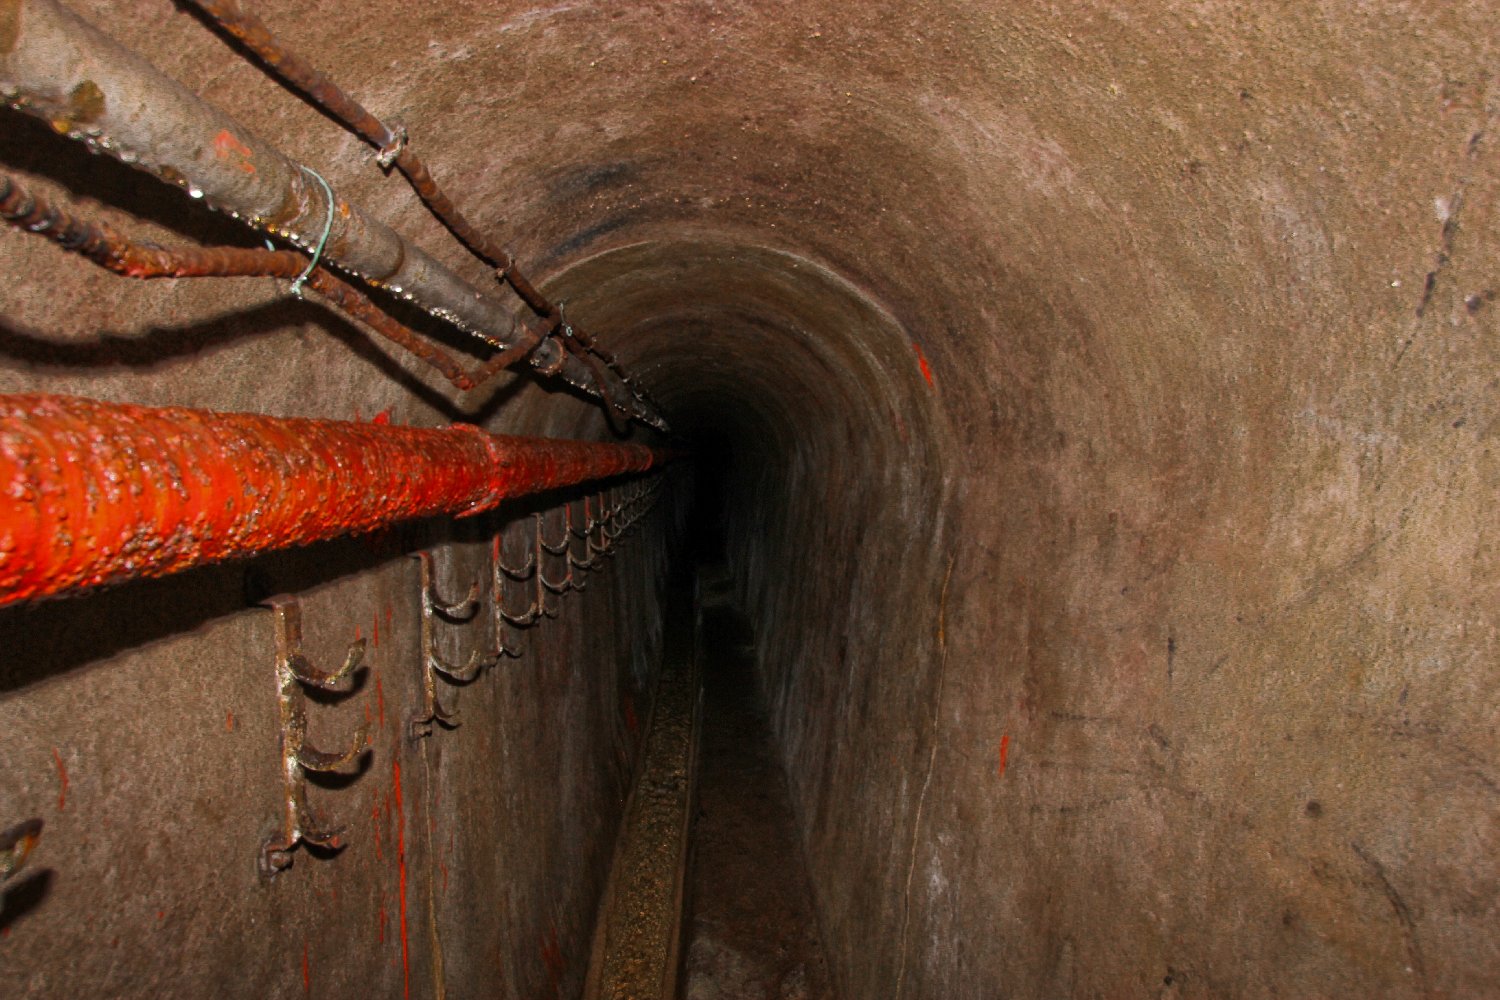
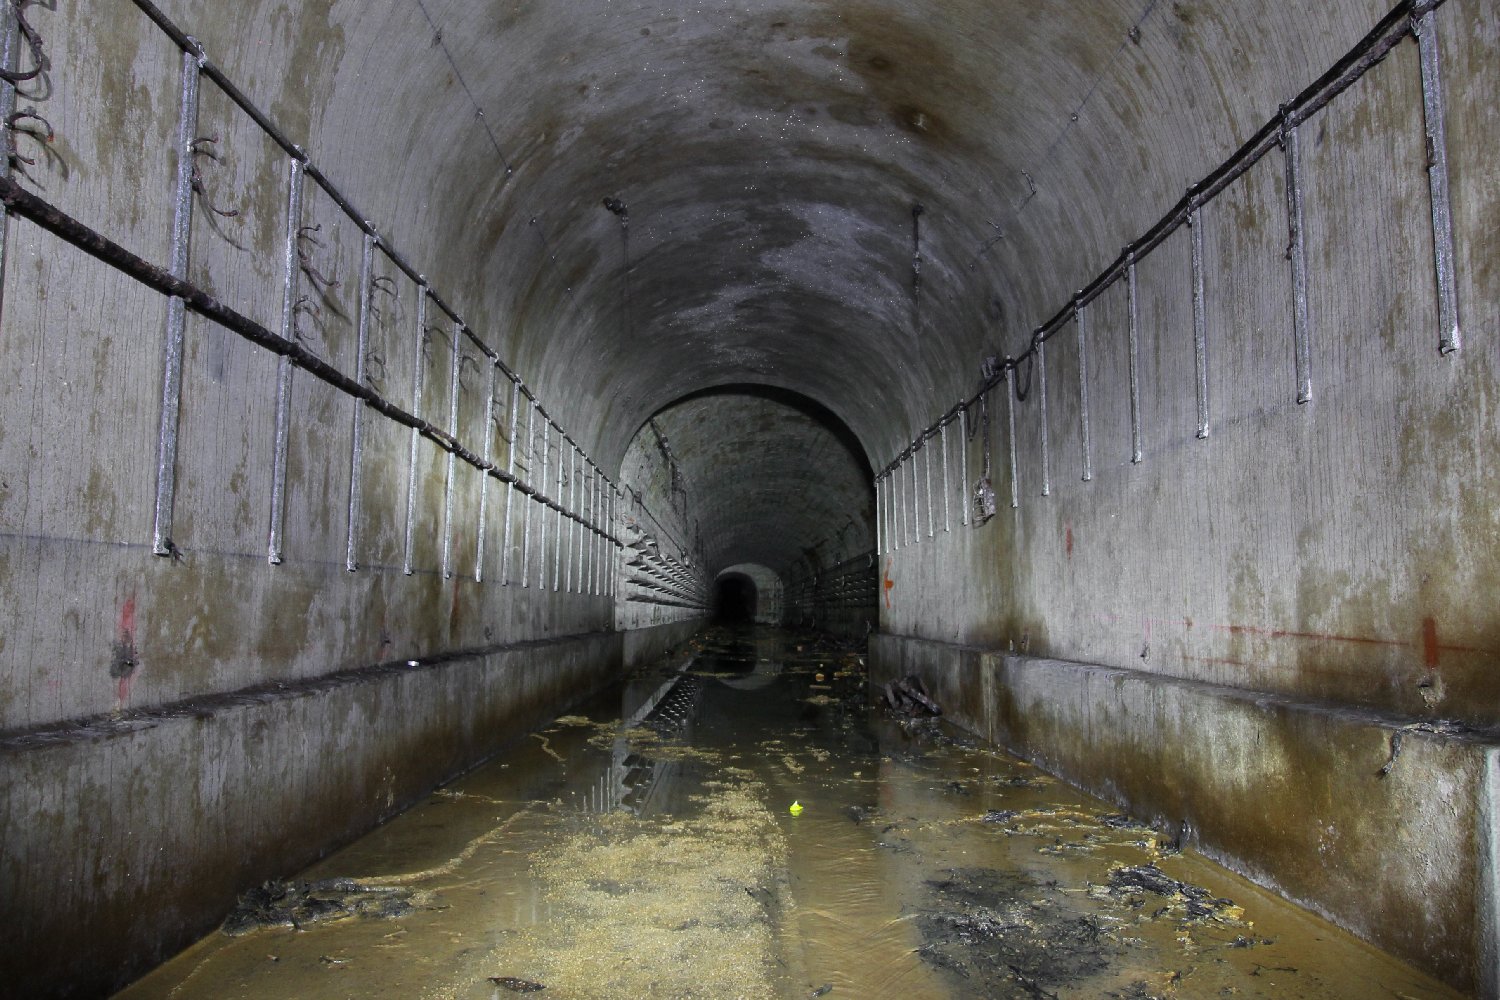
Inside the narrow
service tunnels the hangers on the wall to carry services are
exactly the same as we saw in the Verdun forts.
|
This chamber was probably a storage area.
|
 |
 |
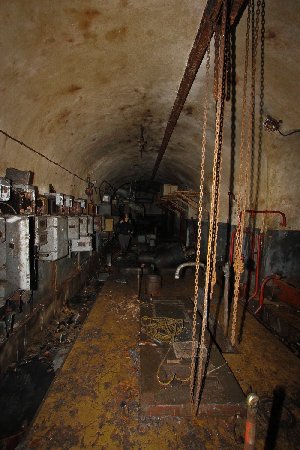 |
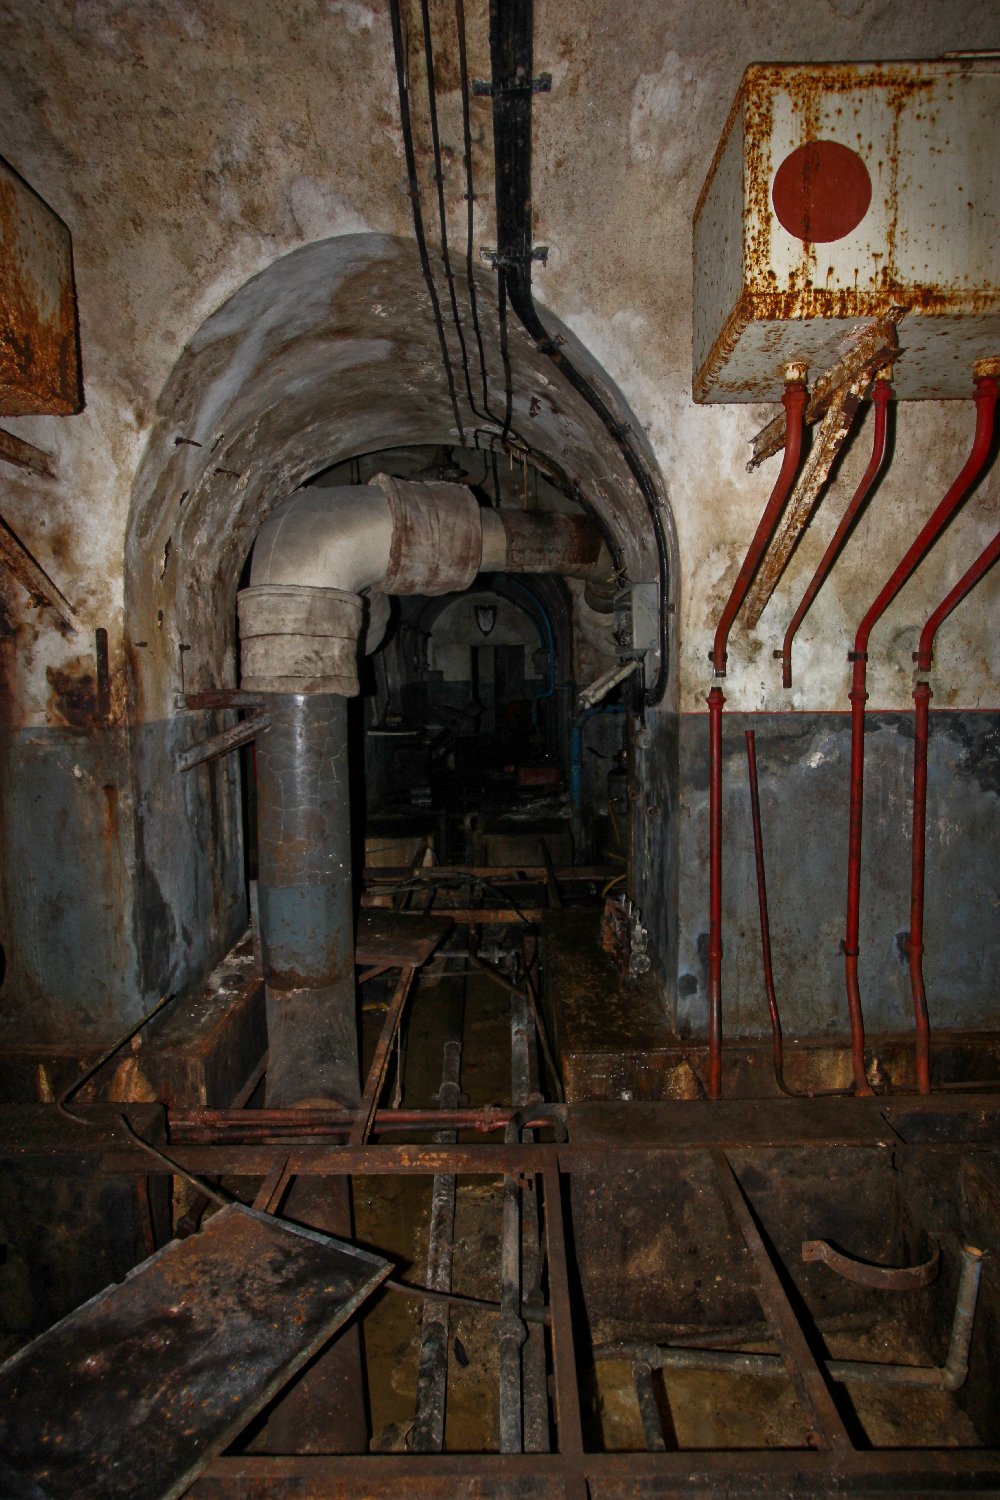
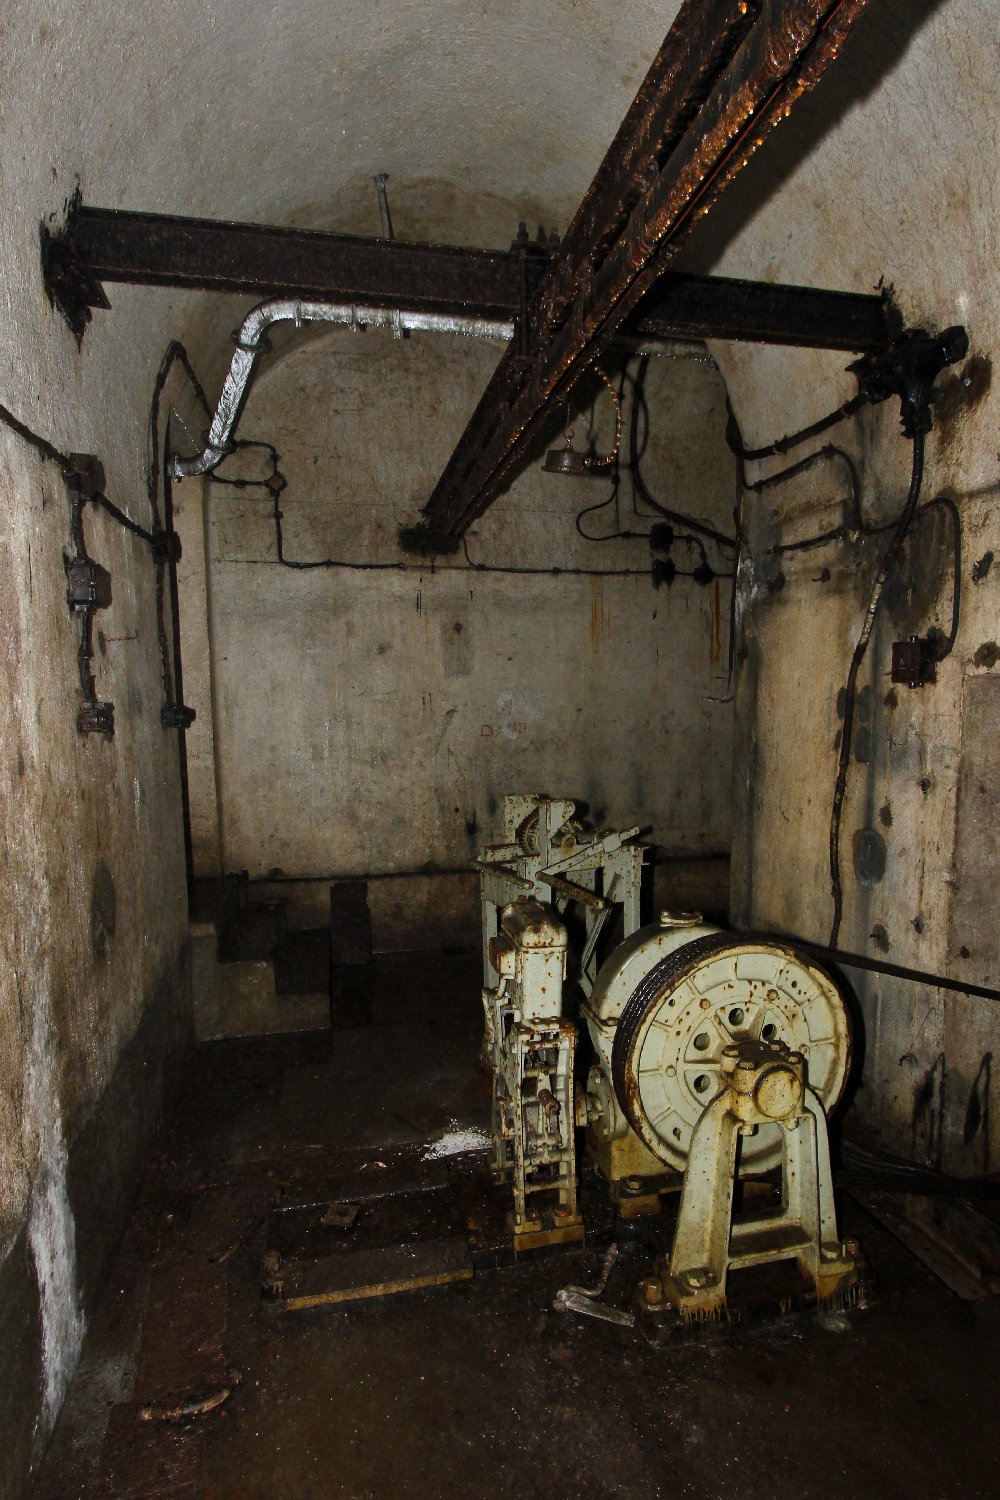
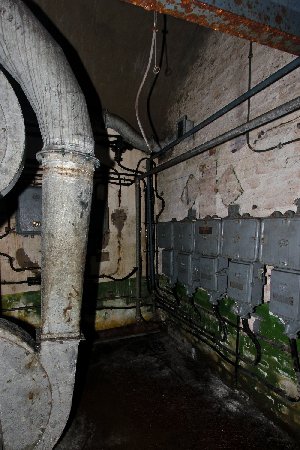
Entering the Usine (generator plant room).
|
Electrical distribution and ventilation
pipes.
|
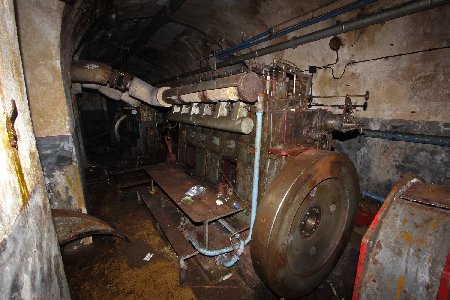
Within the Usine three of the four
generators are gone now.
|
 |
 |
 |
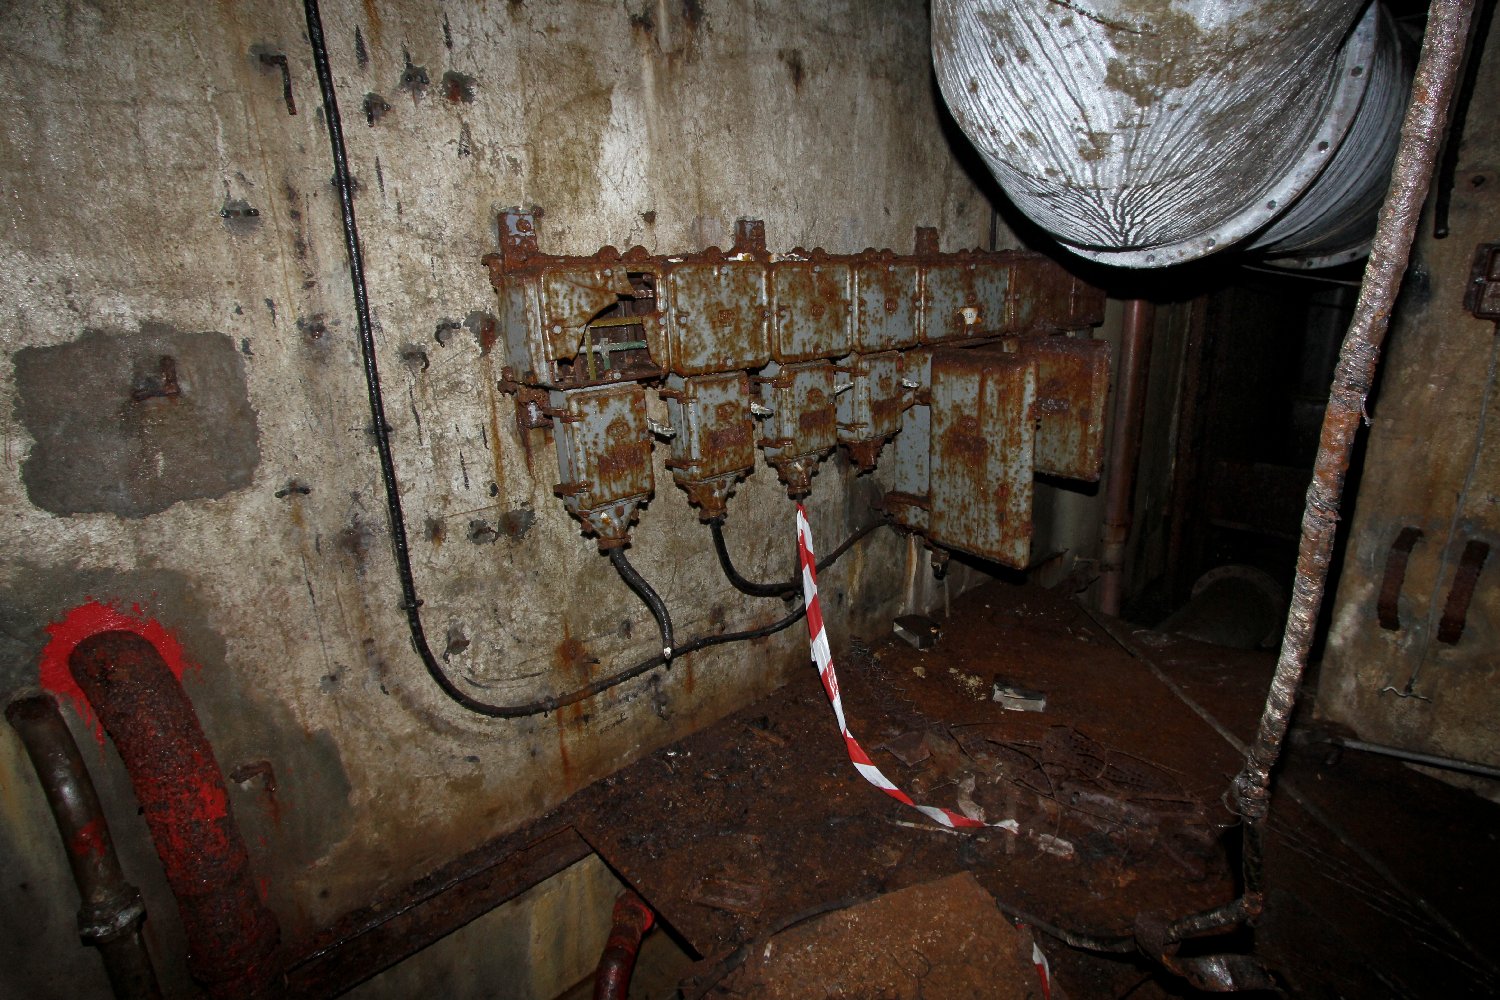
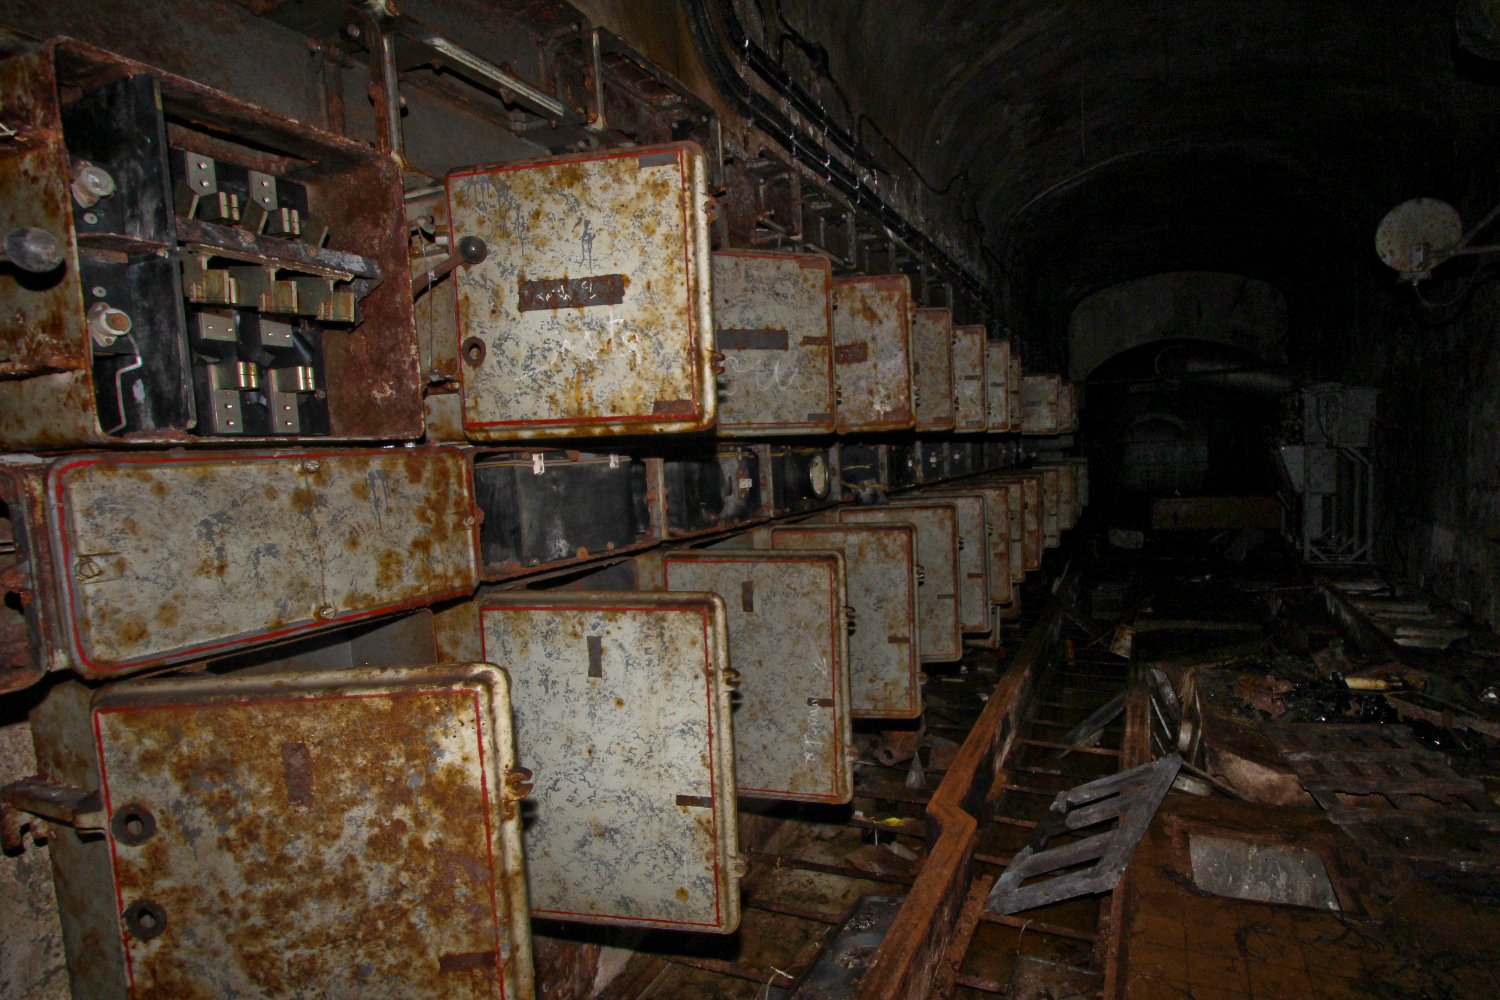
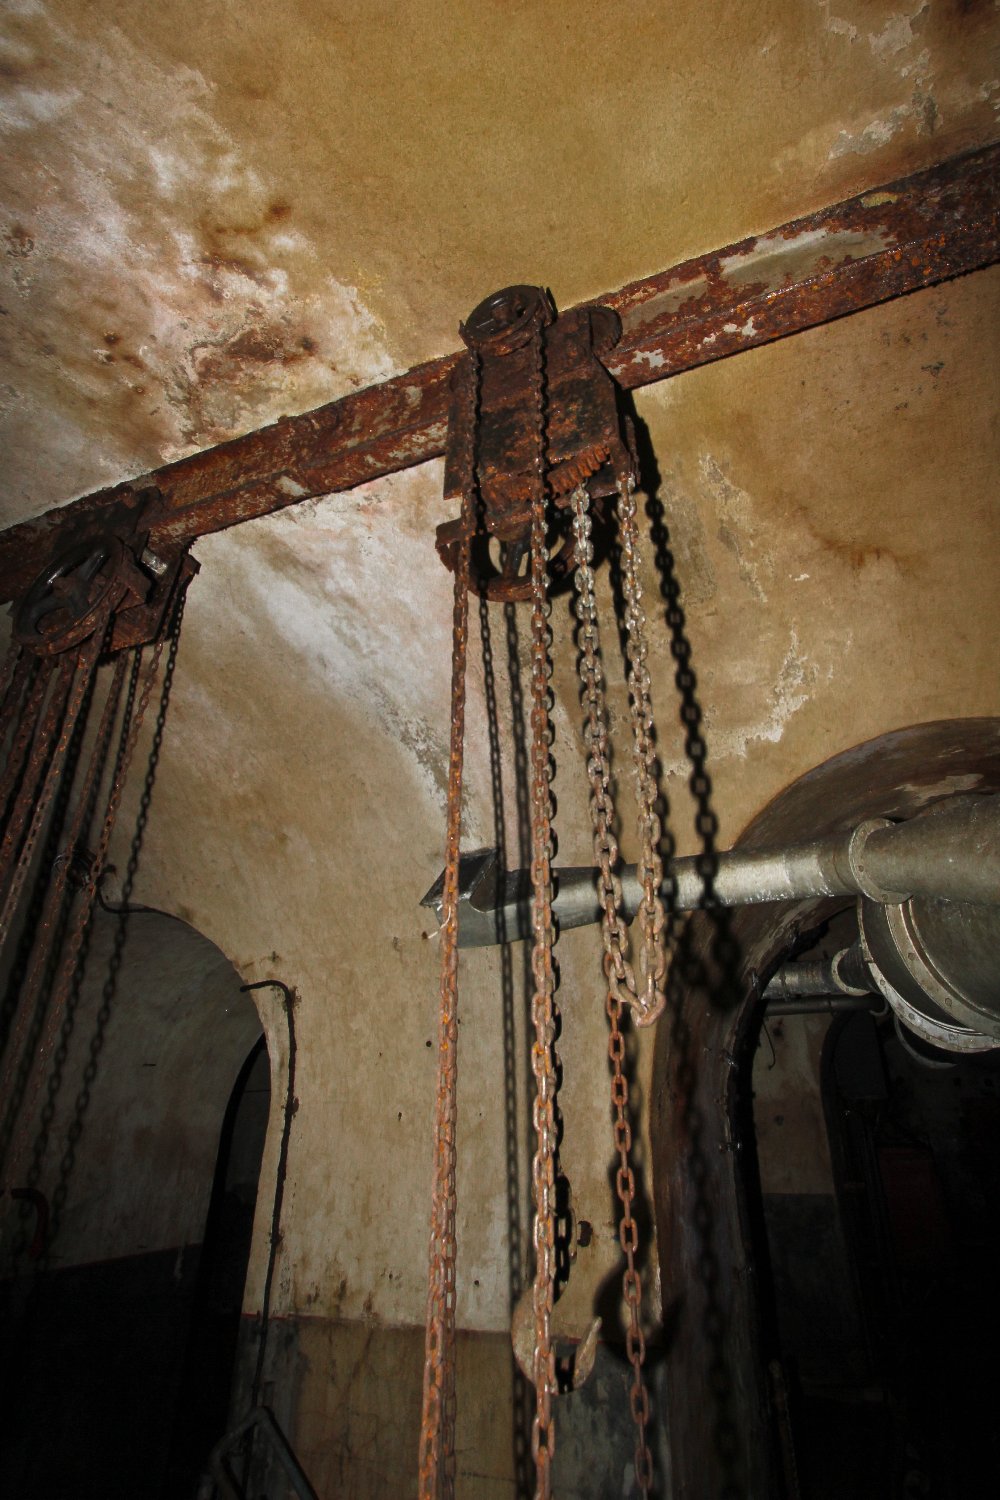
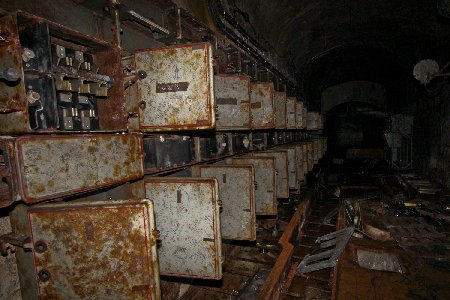
Switch gear for the generators.
|
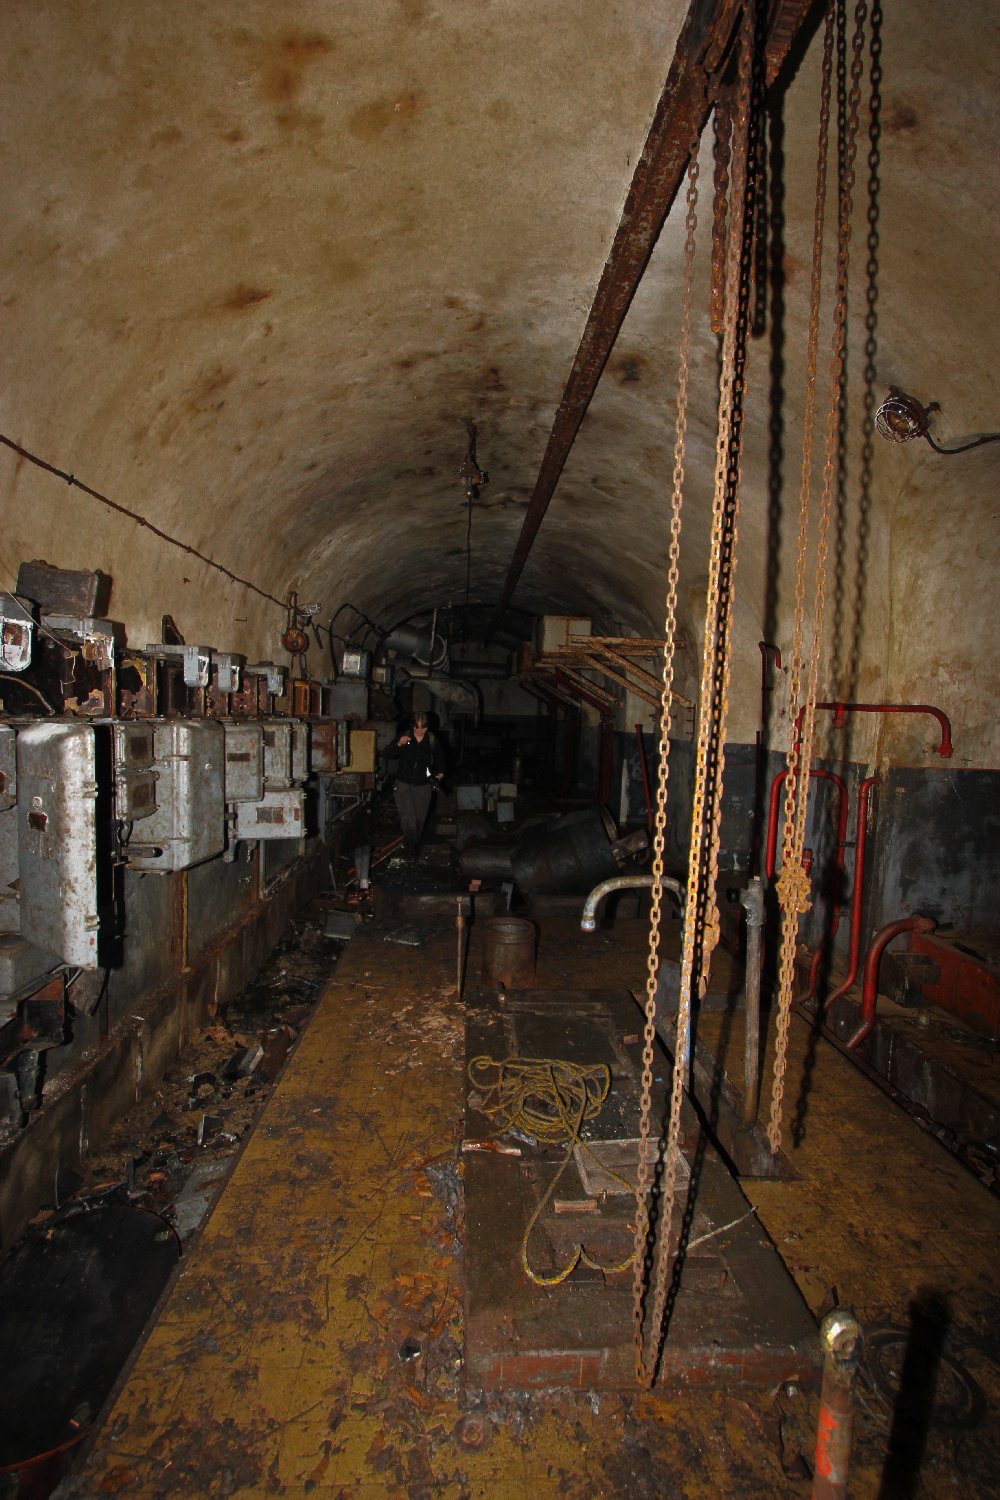
A chain hoist for maintenance work on the
generators.
|
The huge diesel engine which drives the
associated generator.
|
 |
 |
 |
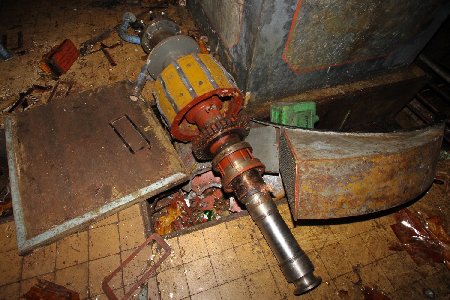
Part of a generator stator.
|
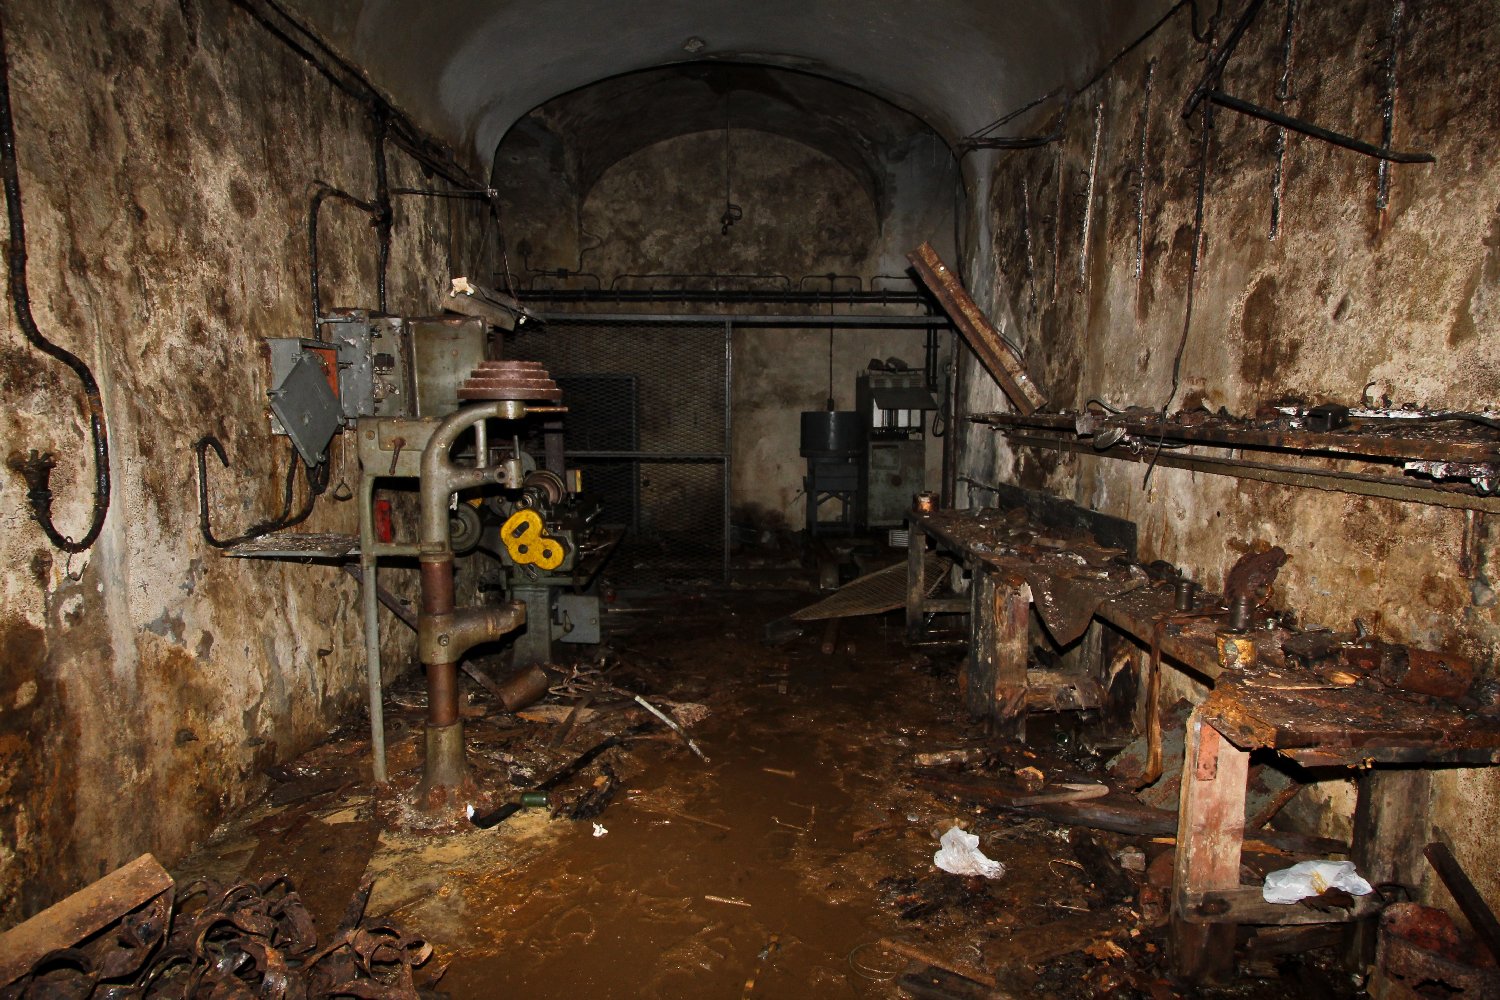
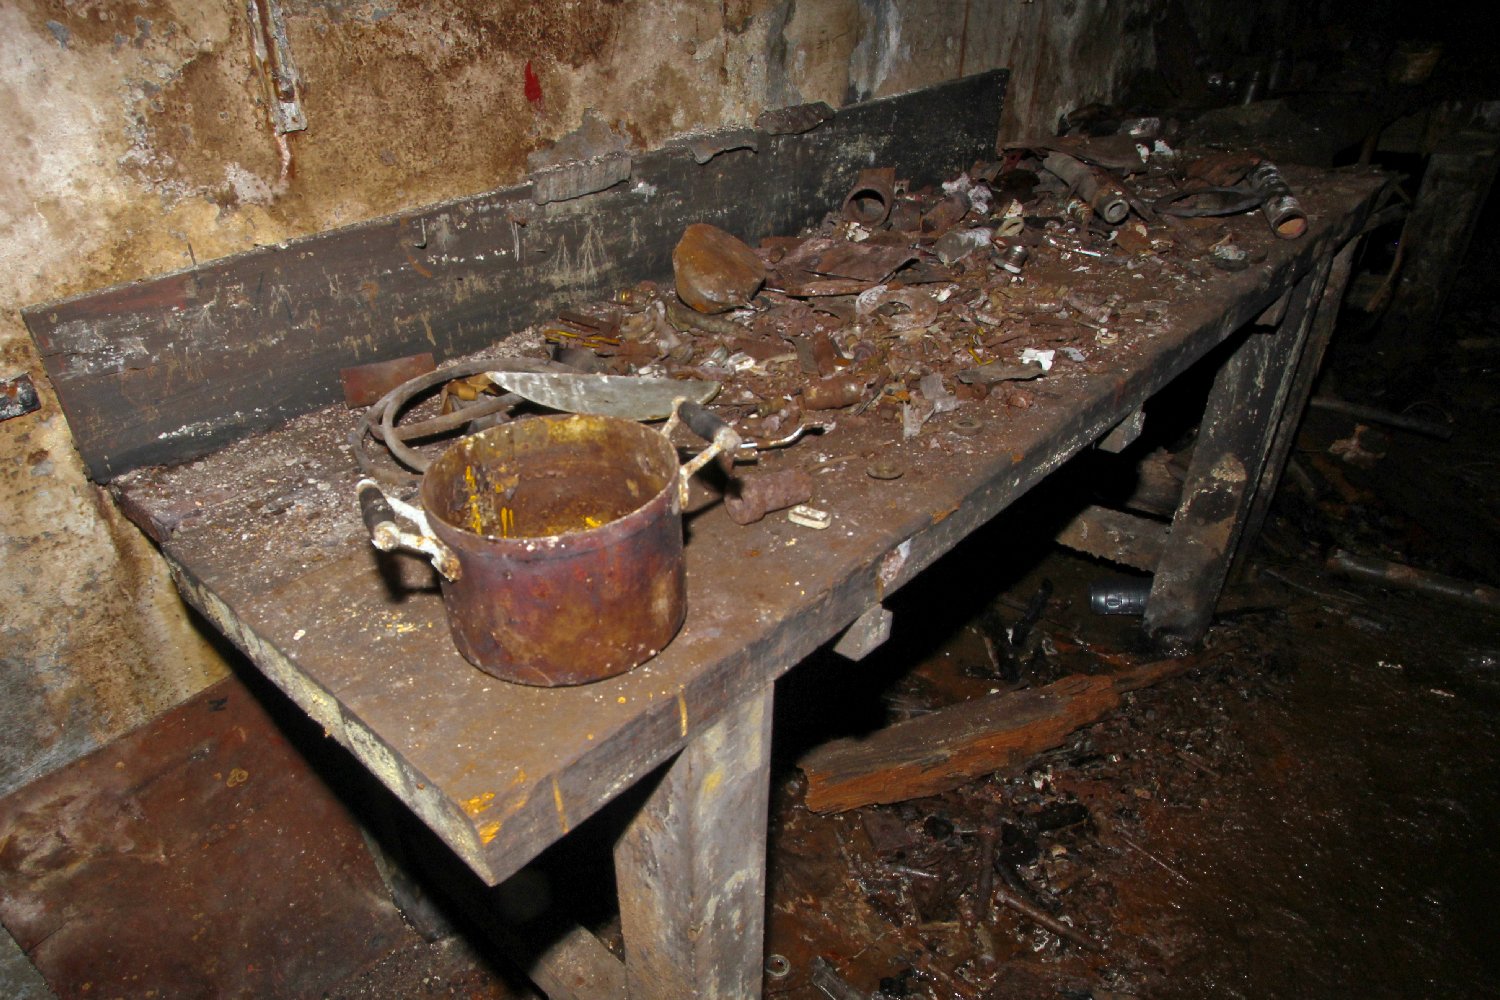
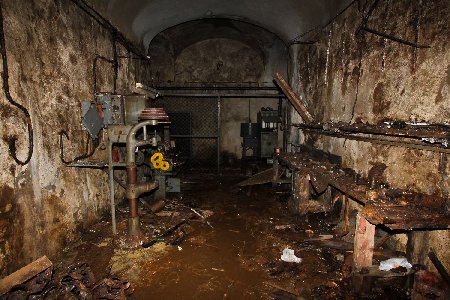
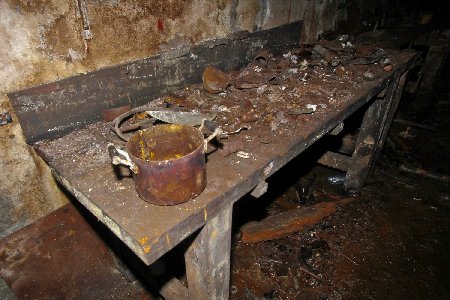
The Usine workshop, one of two in the ouvrage.
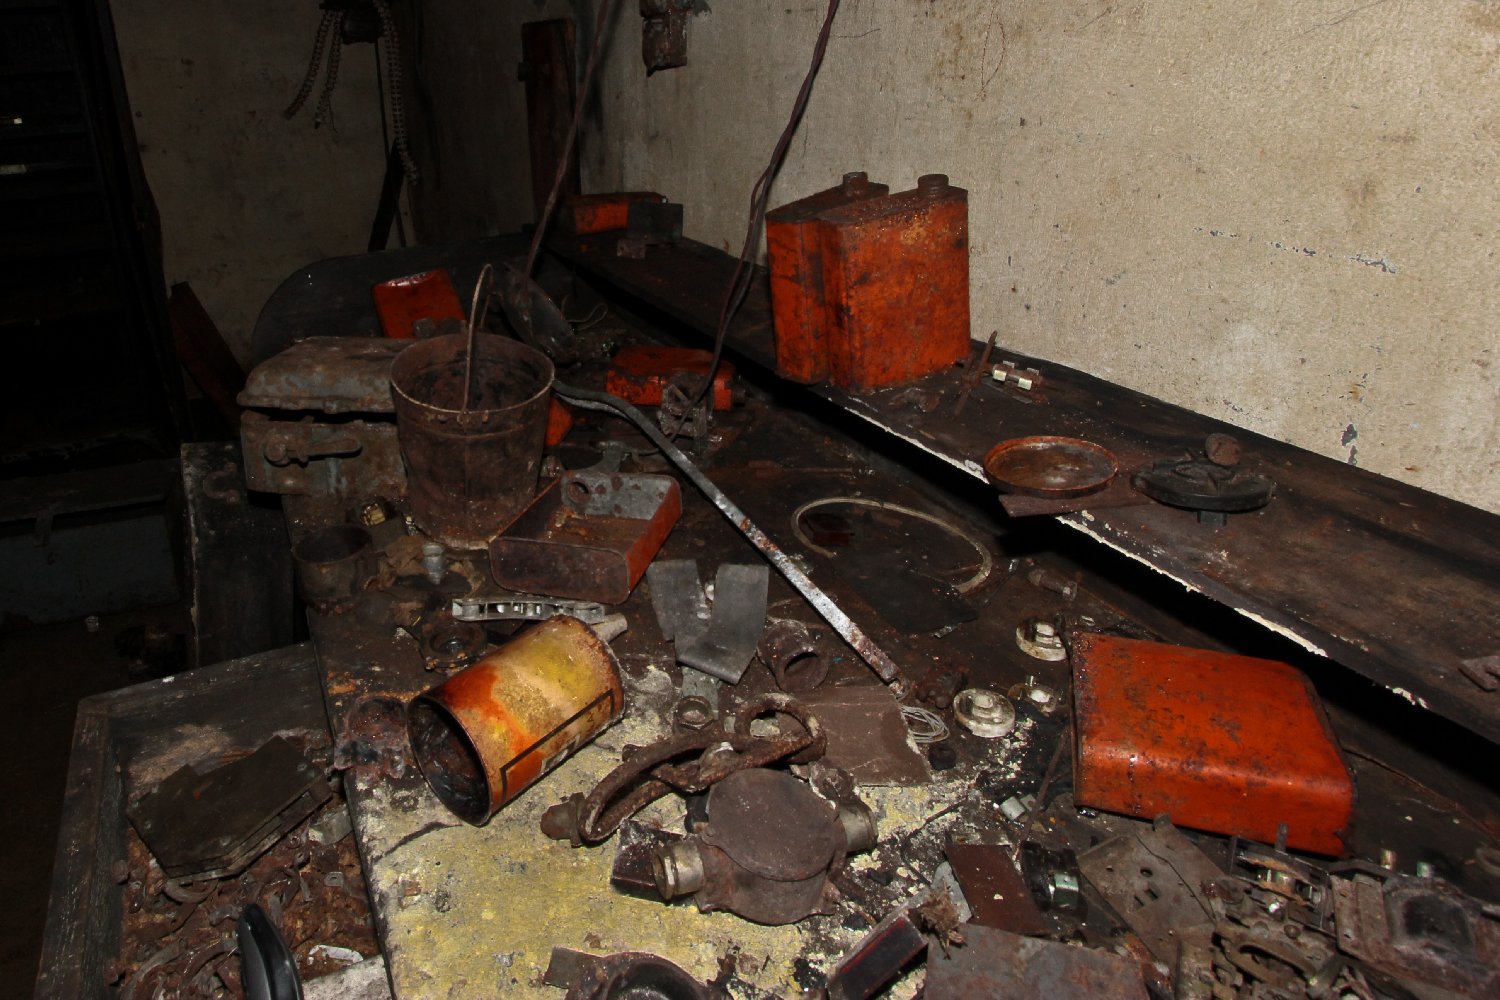
|
Rotting spare parts on the workshop bench.
|
 |
 |
 |
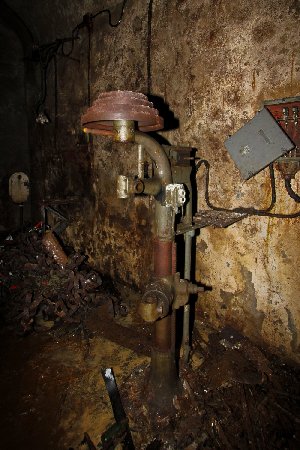
A large pillar drill.
|
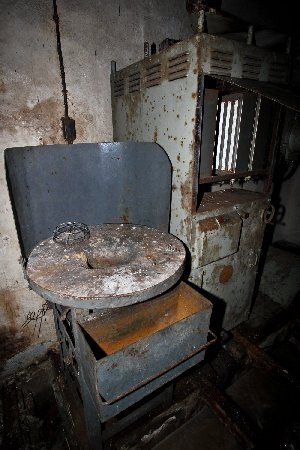
We couldn't work out what this is.
|
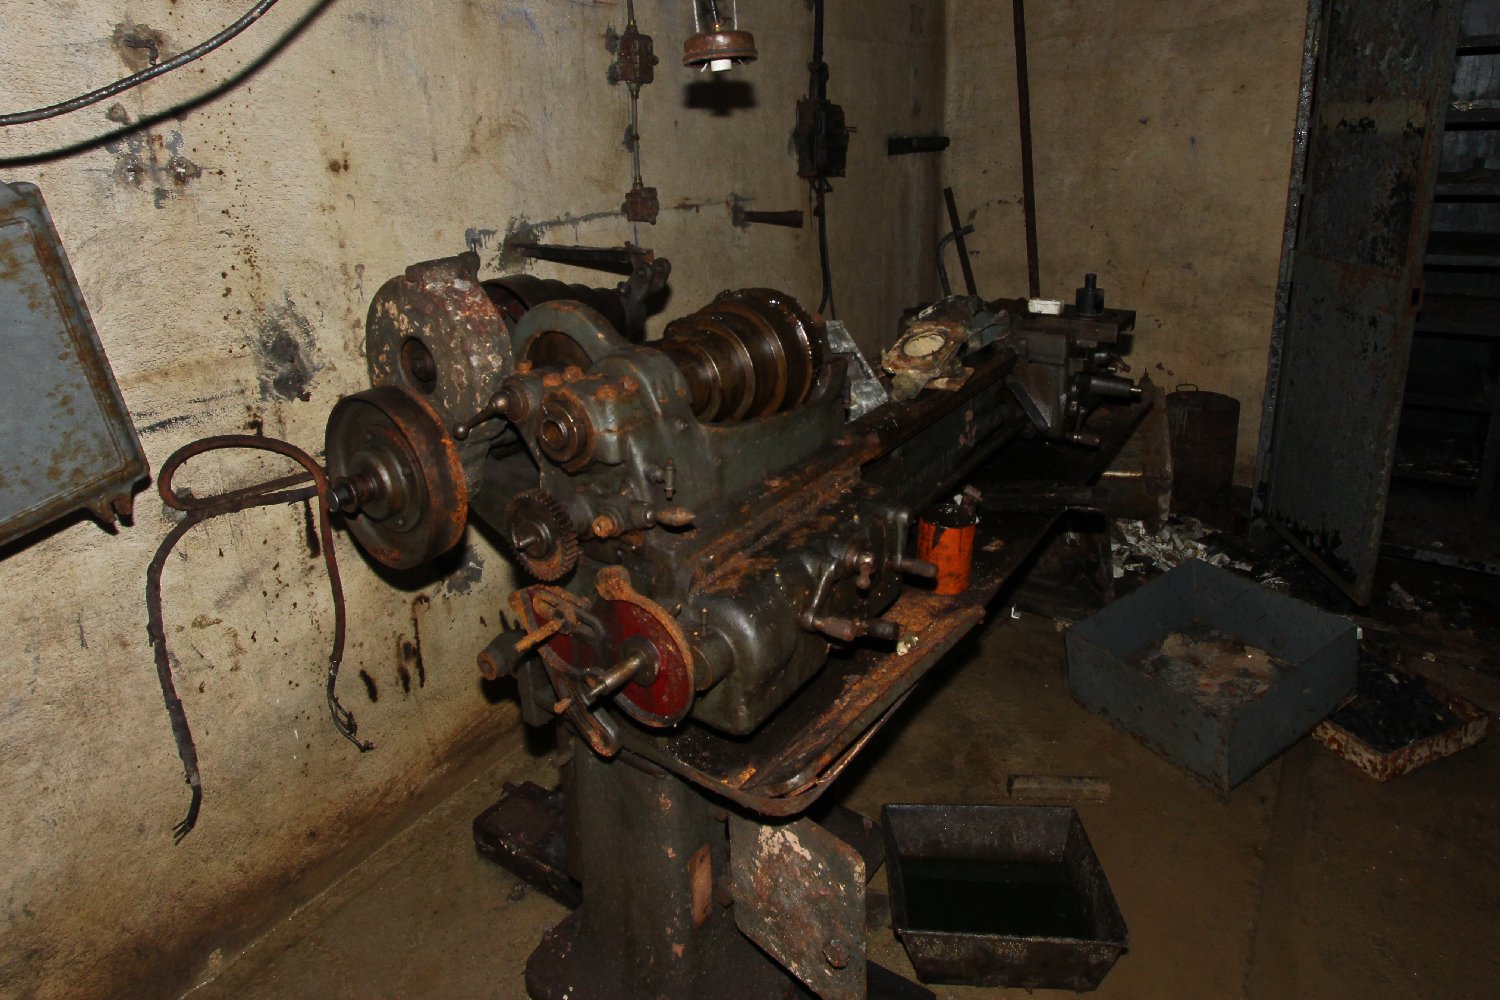
The lathe and pillar drill.
|
 |
 |
 |
Entering the barrack block accommodation.
|
Large gauges on the tunnel roof.
|
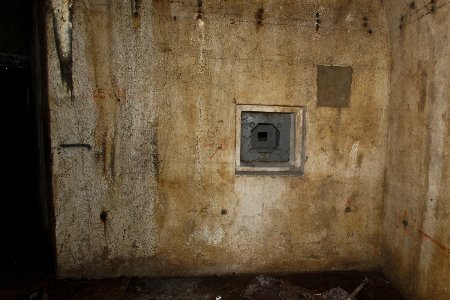
A machine gun crenel
defends the passageway in the event of enemy penetration of the
fort.
|
 |
 |
 |
|
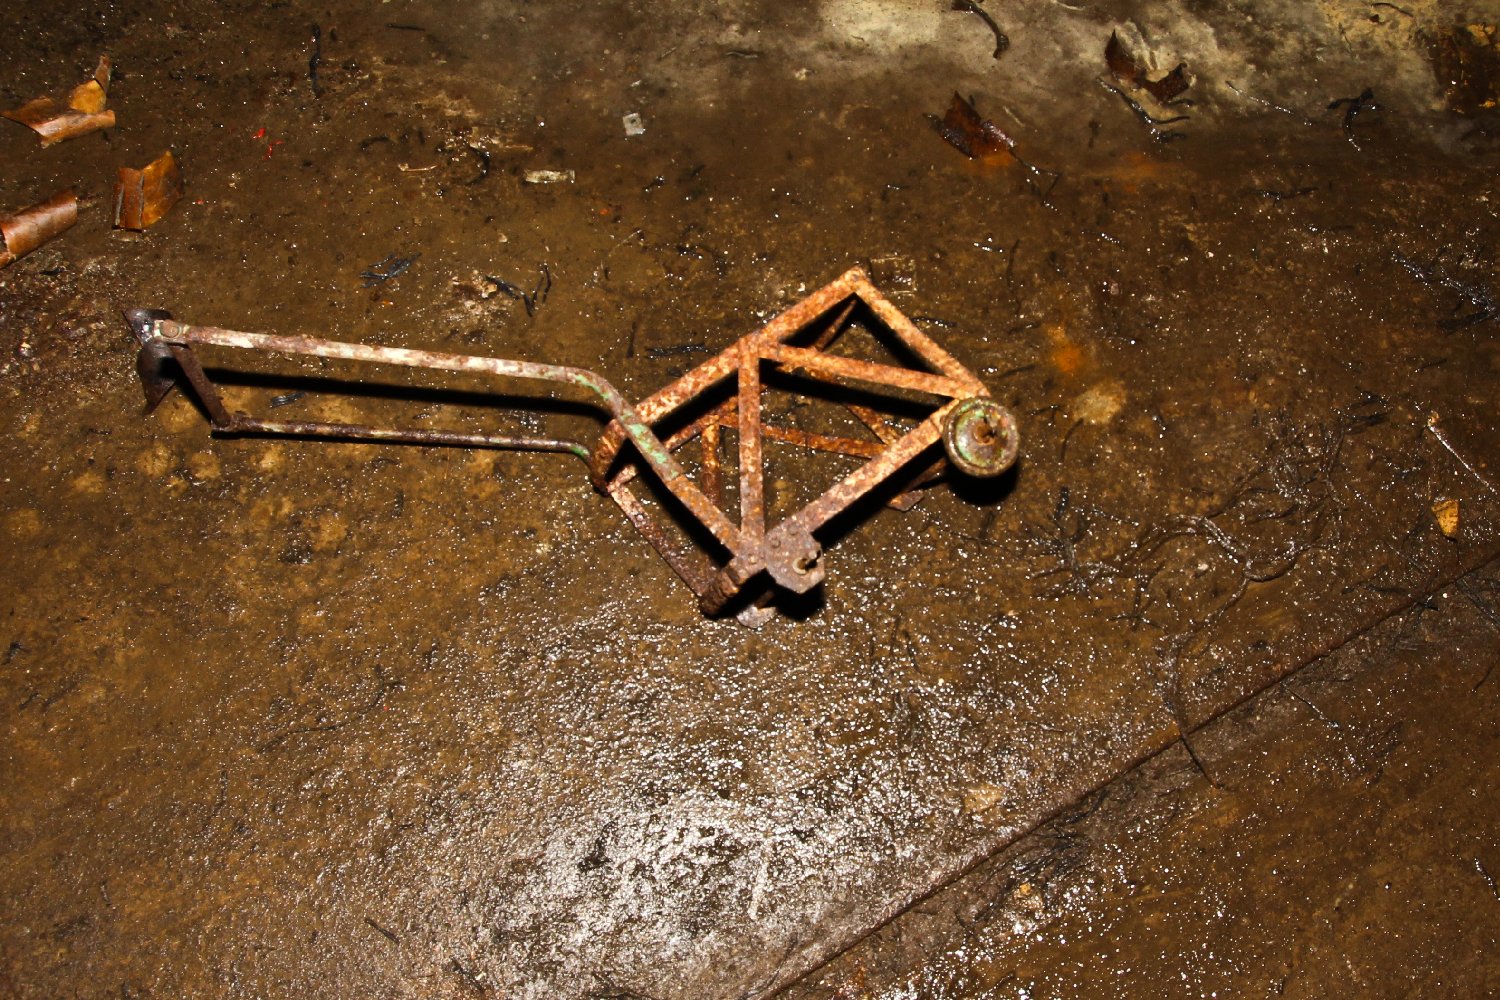
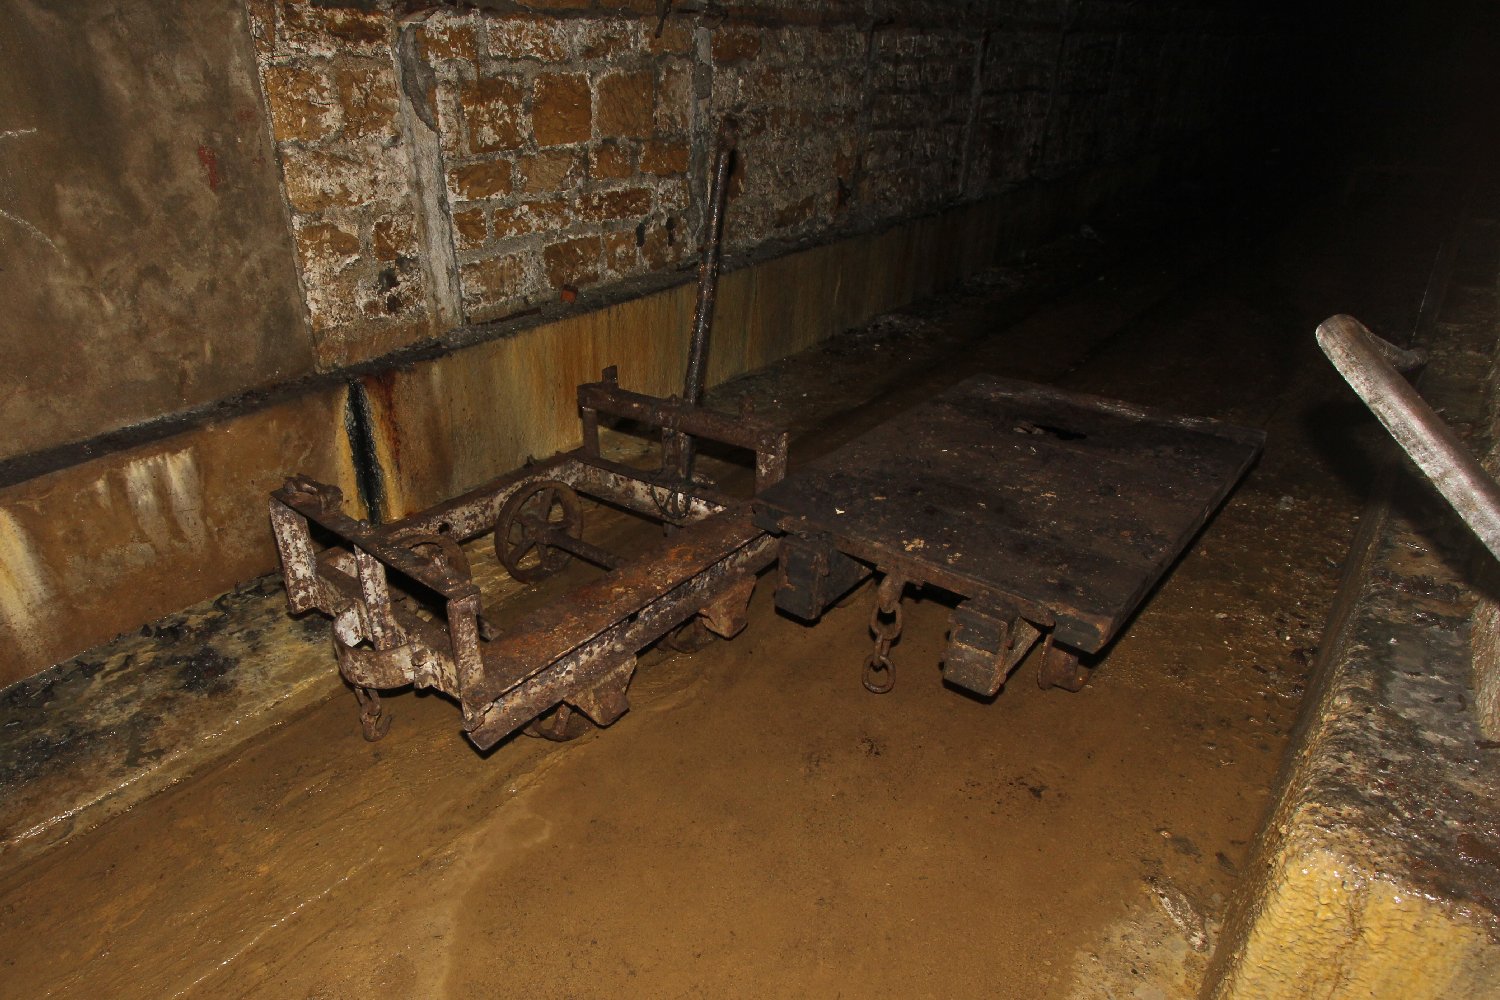
I can't see this being
military somehow because it's the size of a child's toy pram!
|
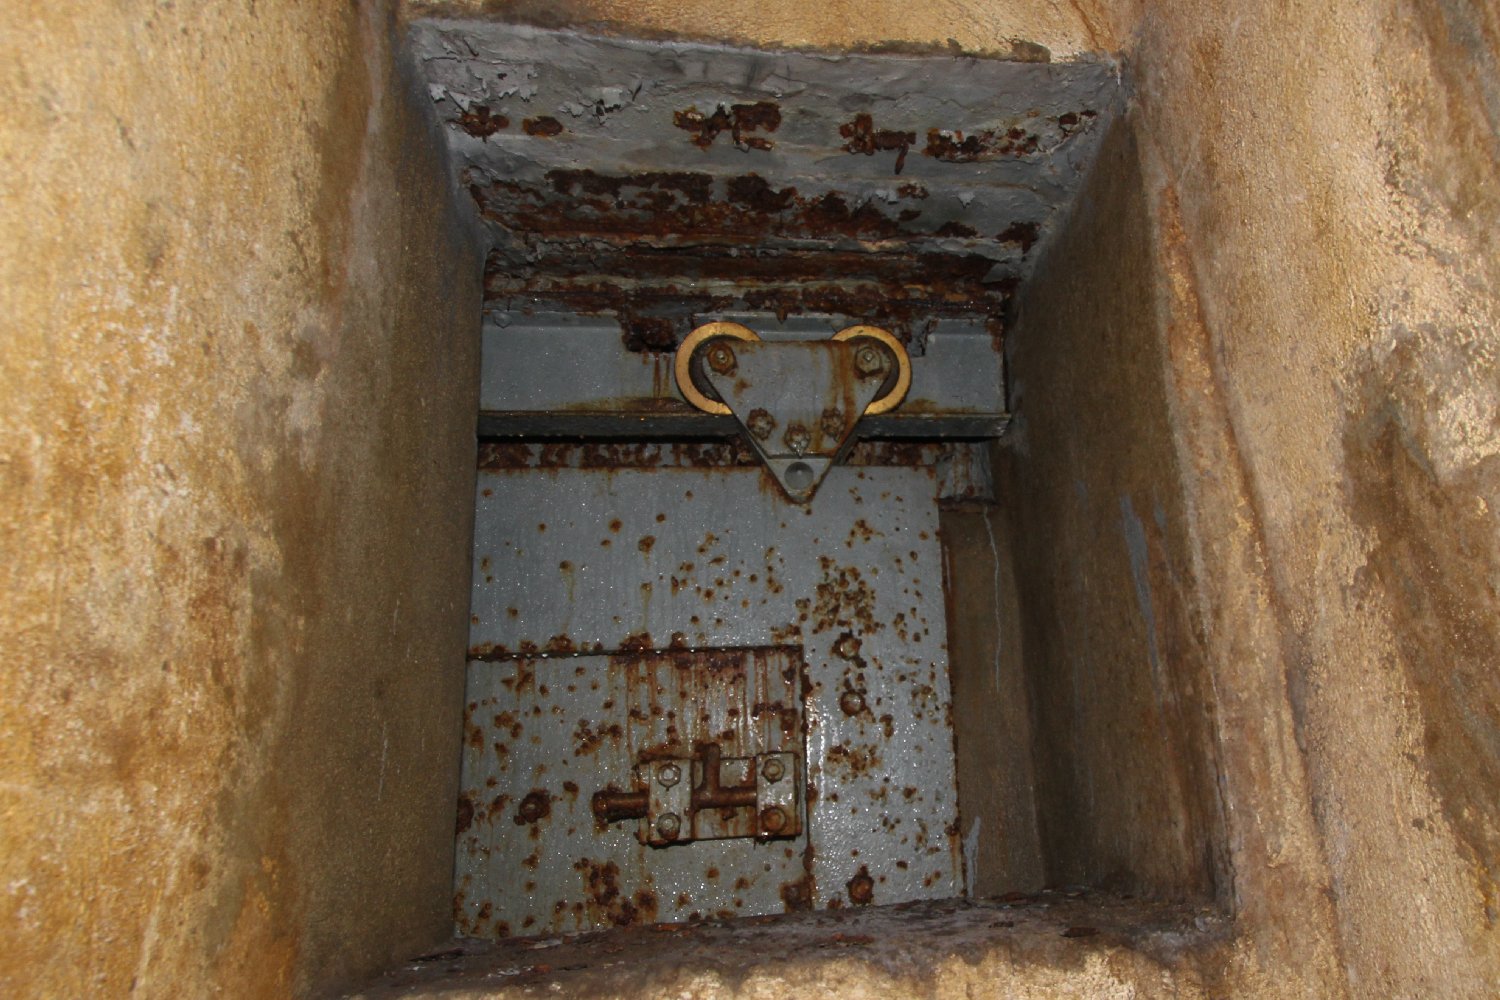
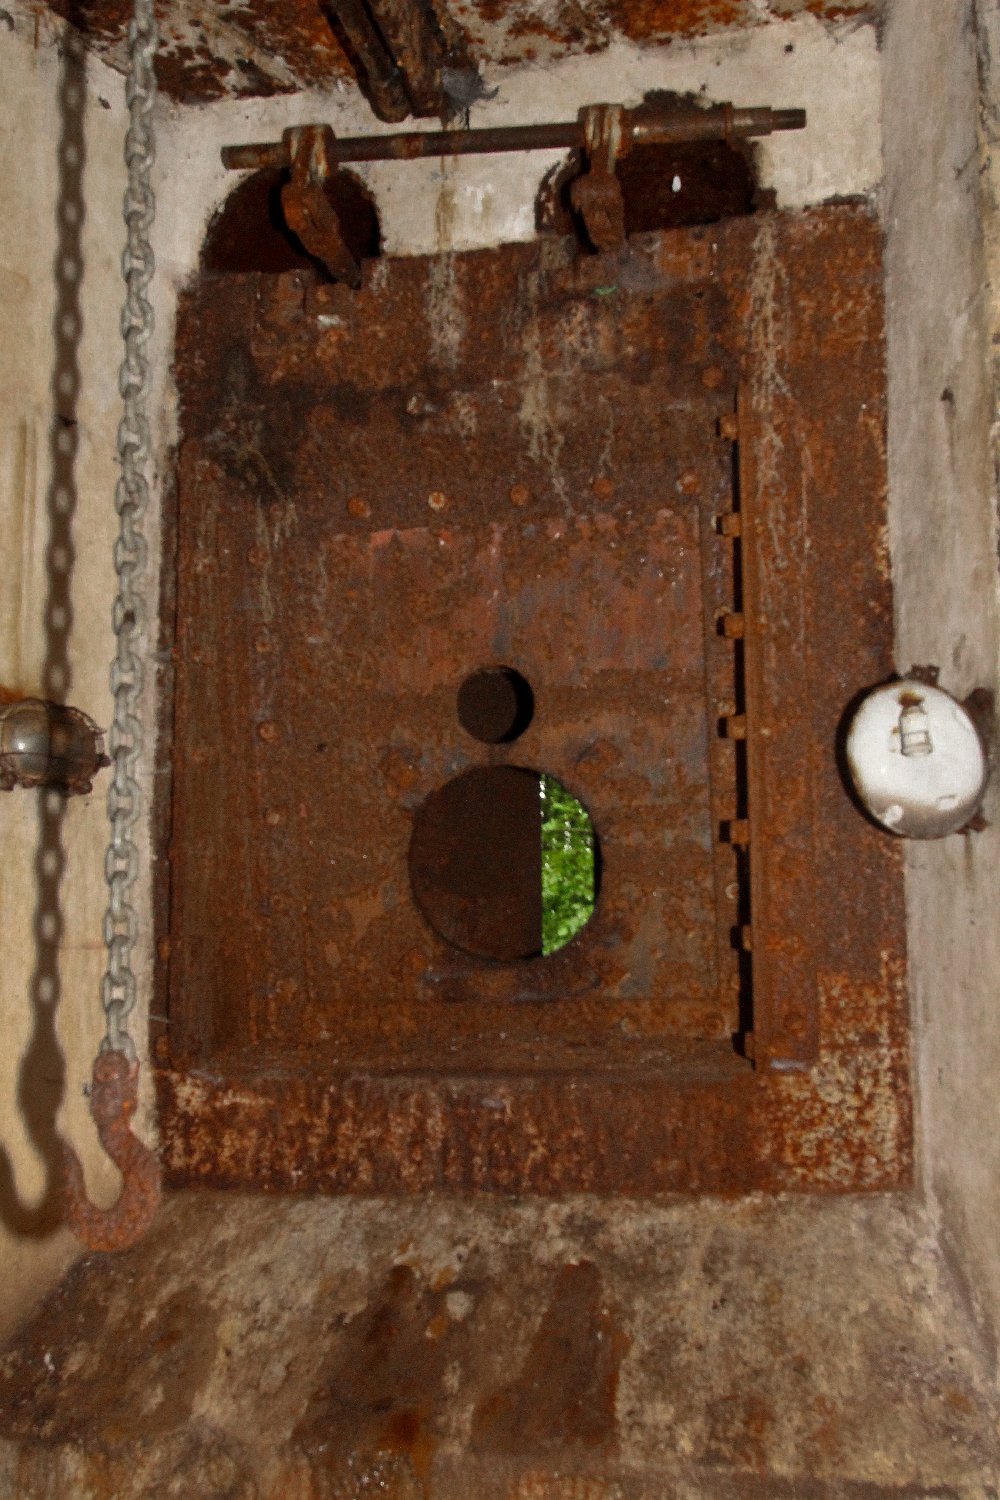
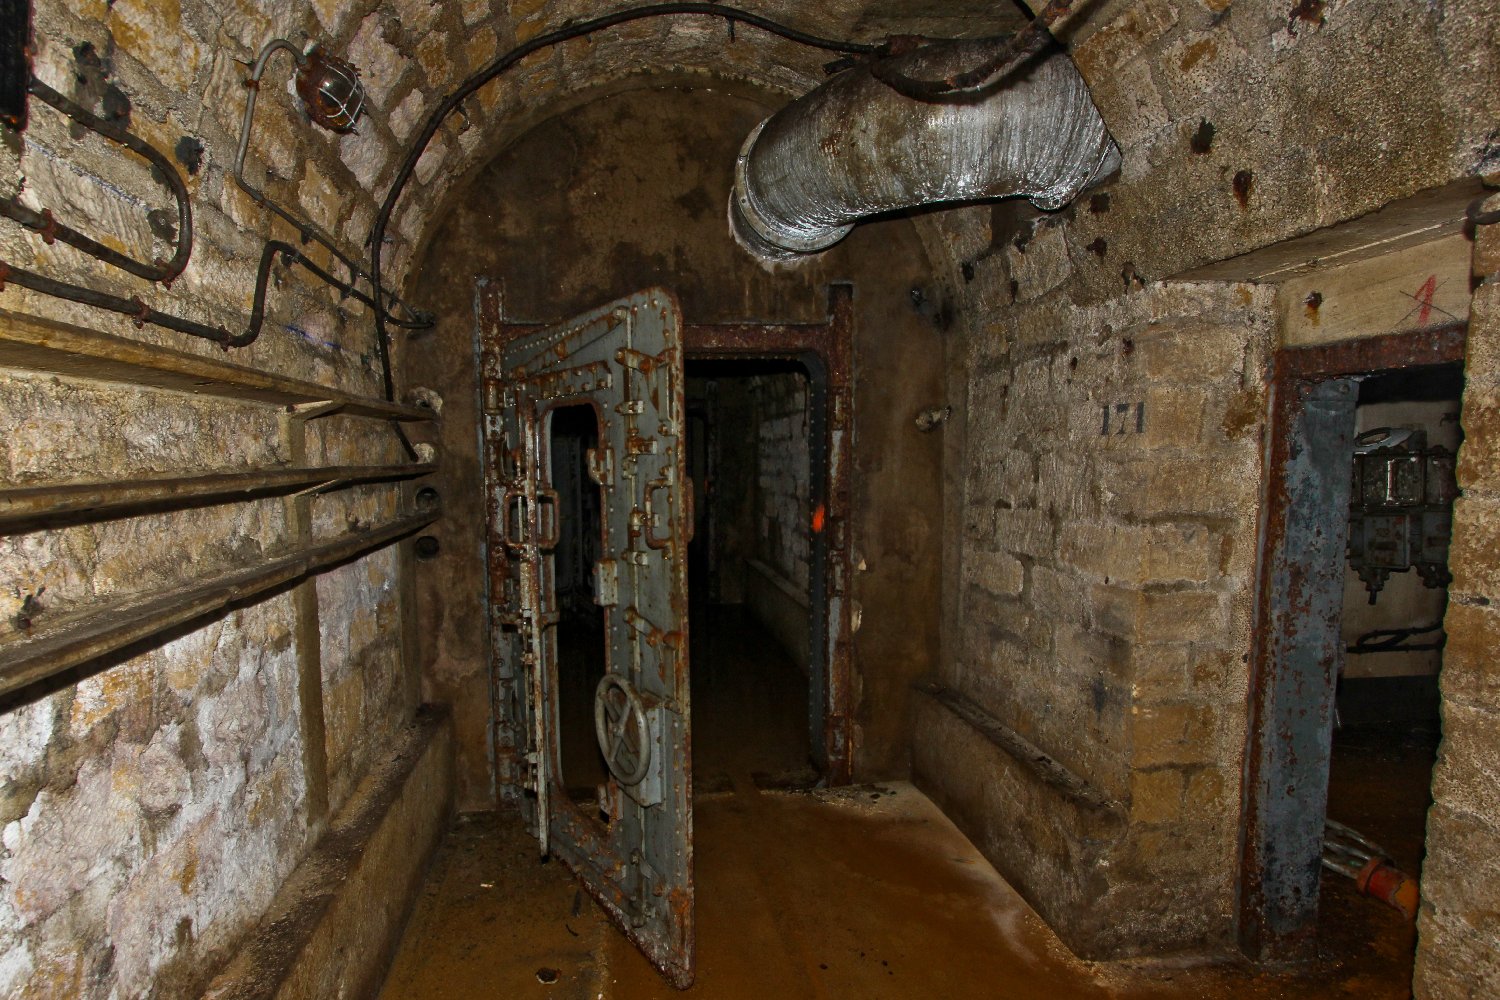
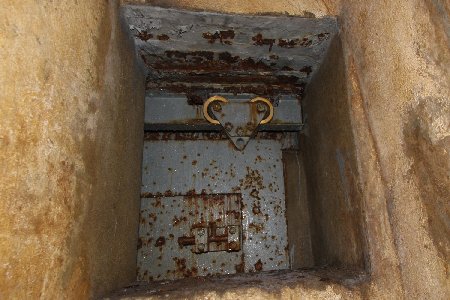
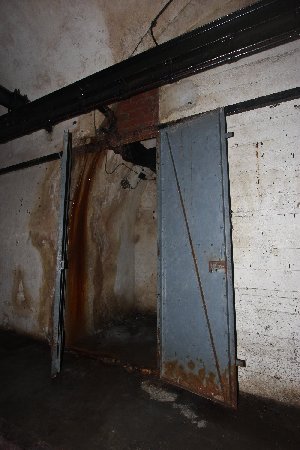
Part of the interior
blast door mechanism presumably fitted after WW2 to harden the
tunnels against nuclear attack. The steel door is about 10" thick.
|
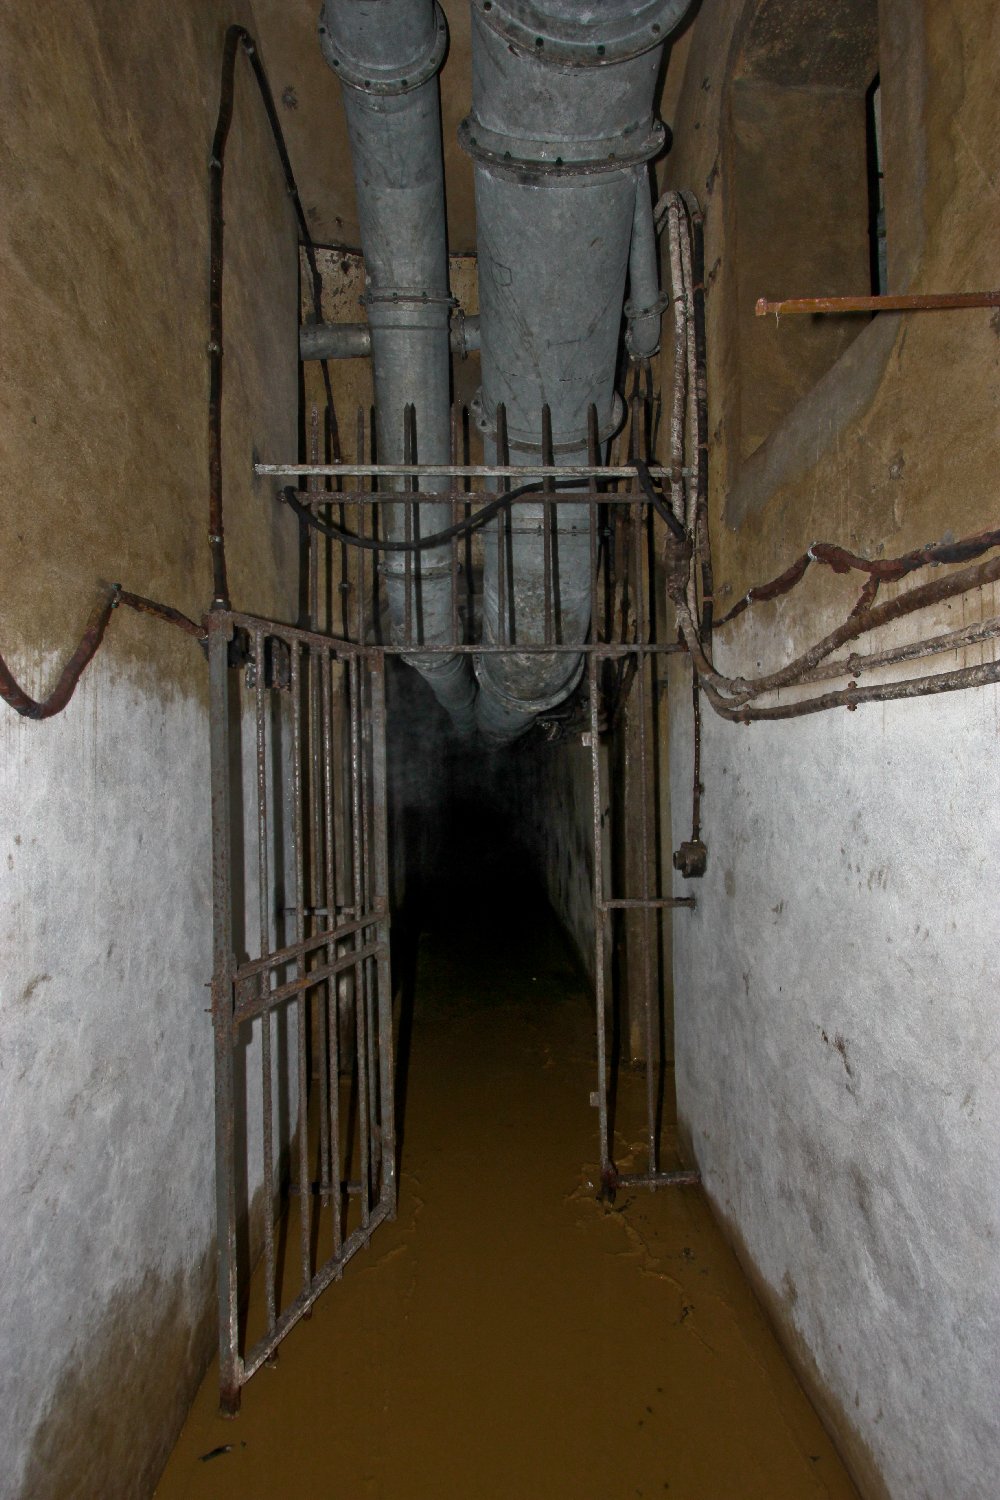
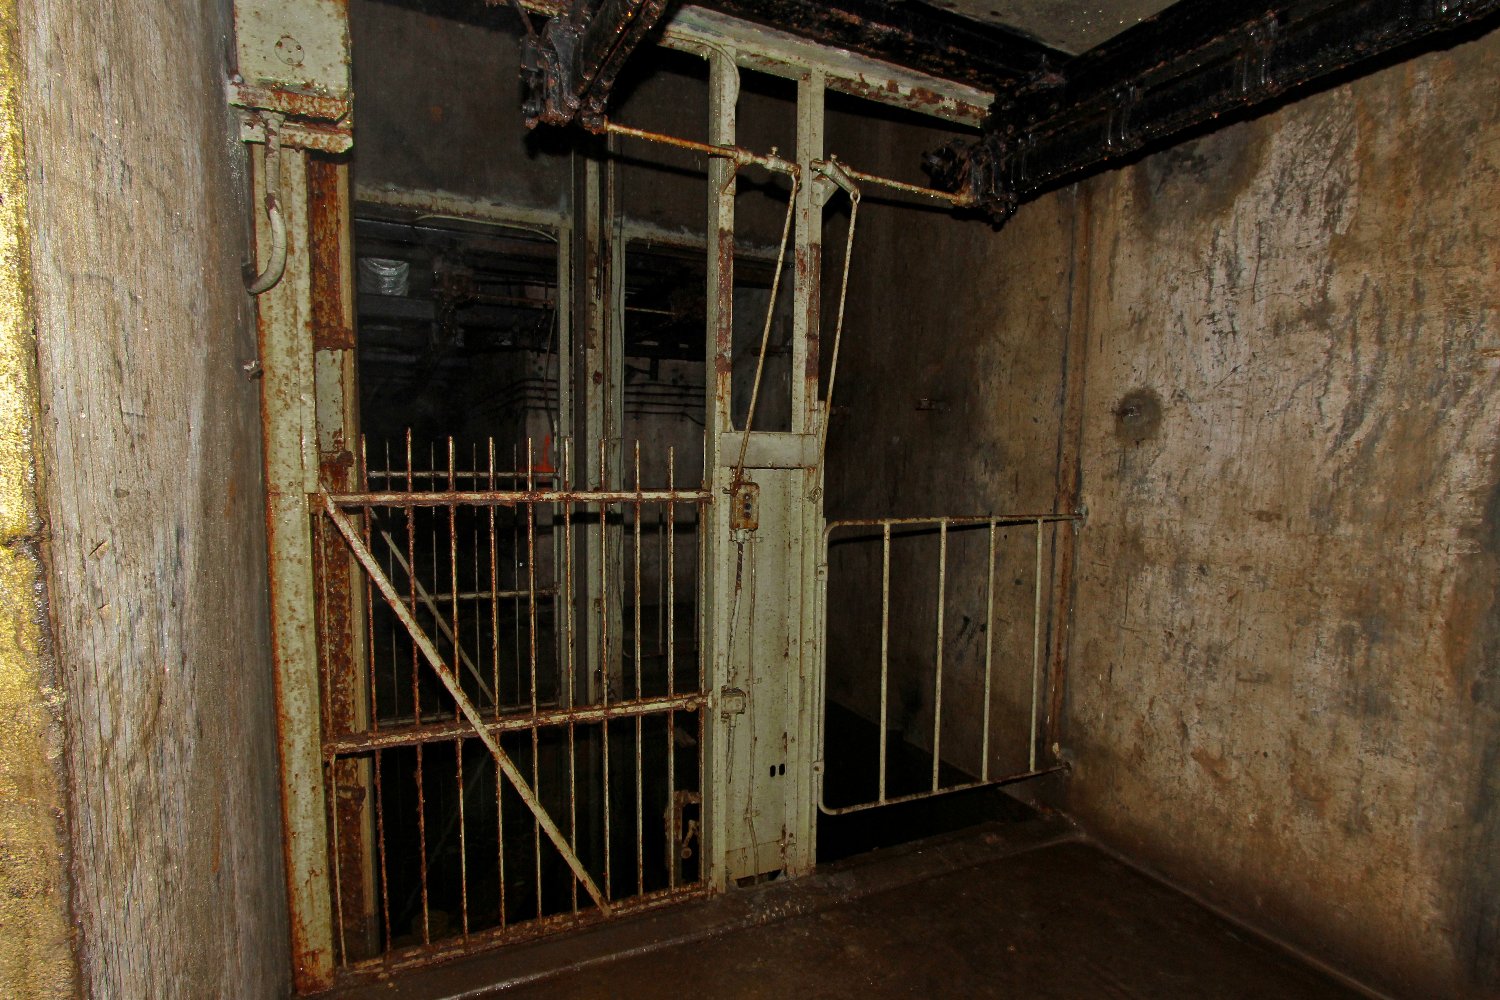
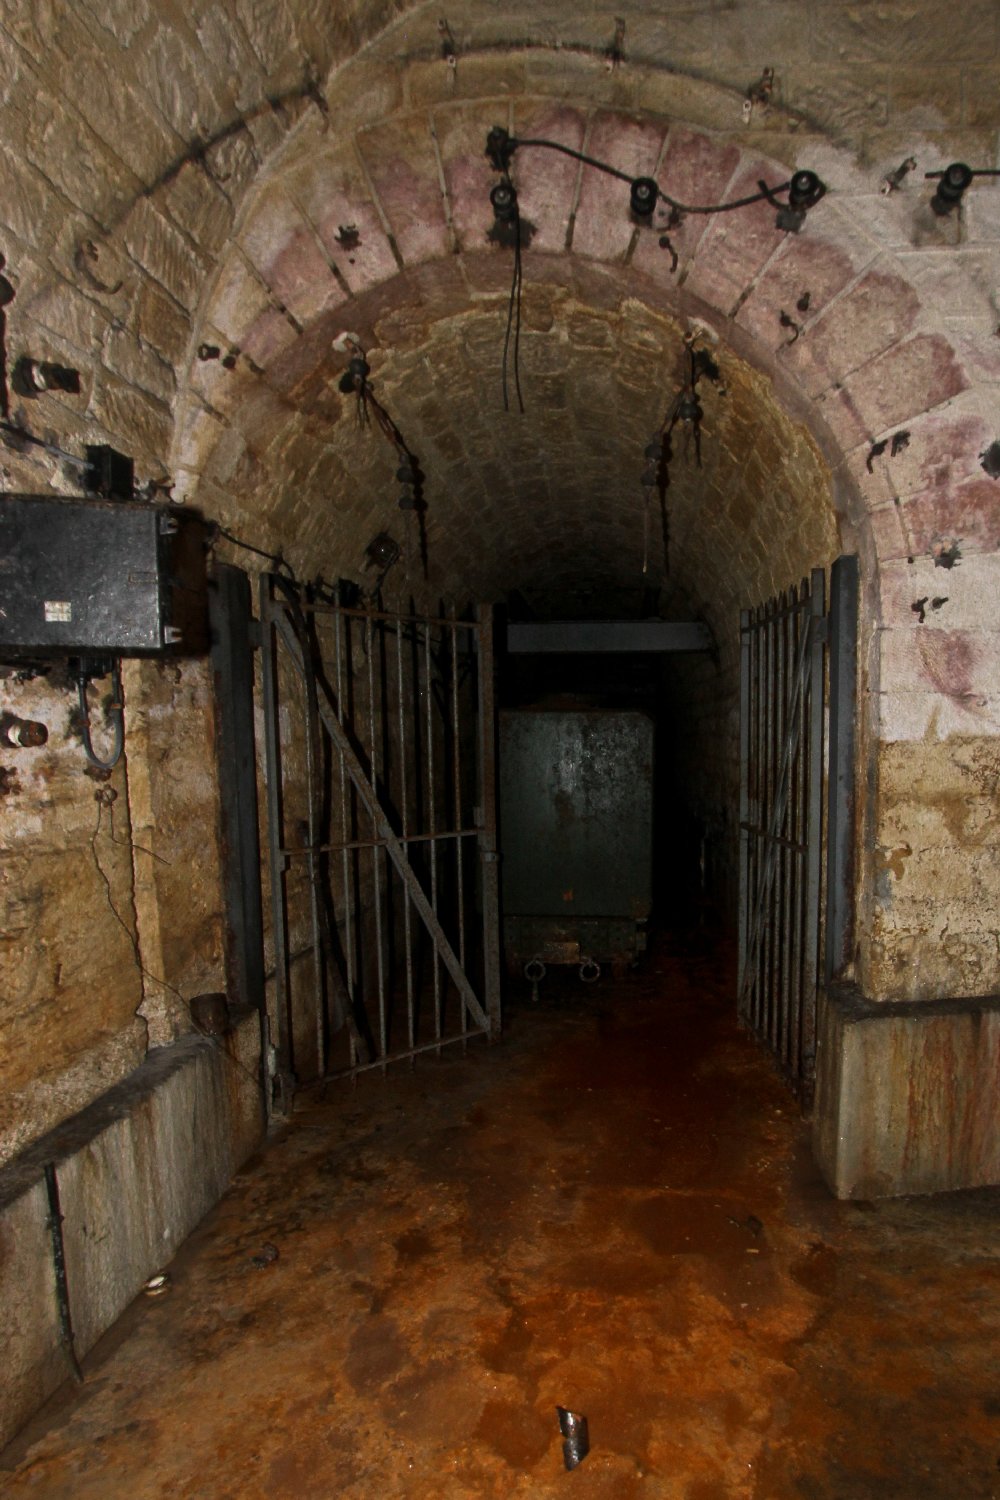
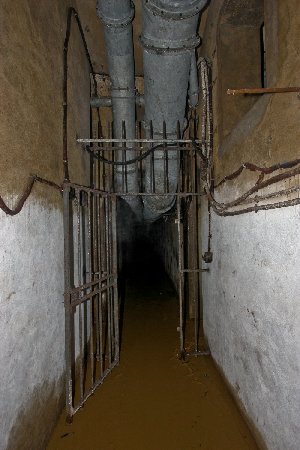
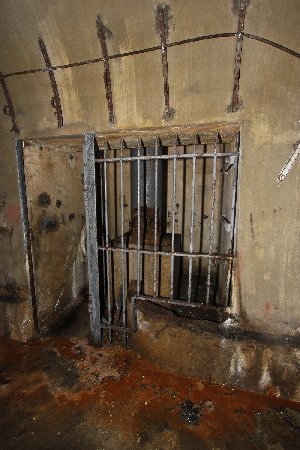
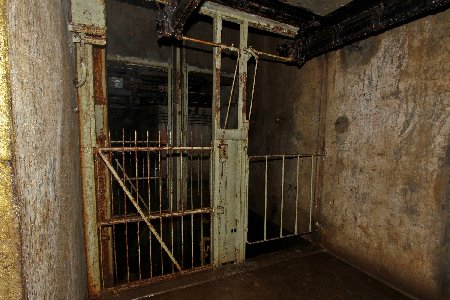
More interior gates to
slow down enemy progress along the tunnels behind the barracks.
|
 |
 |
 |
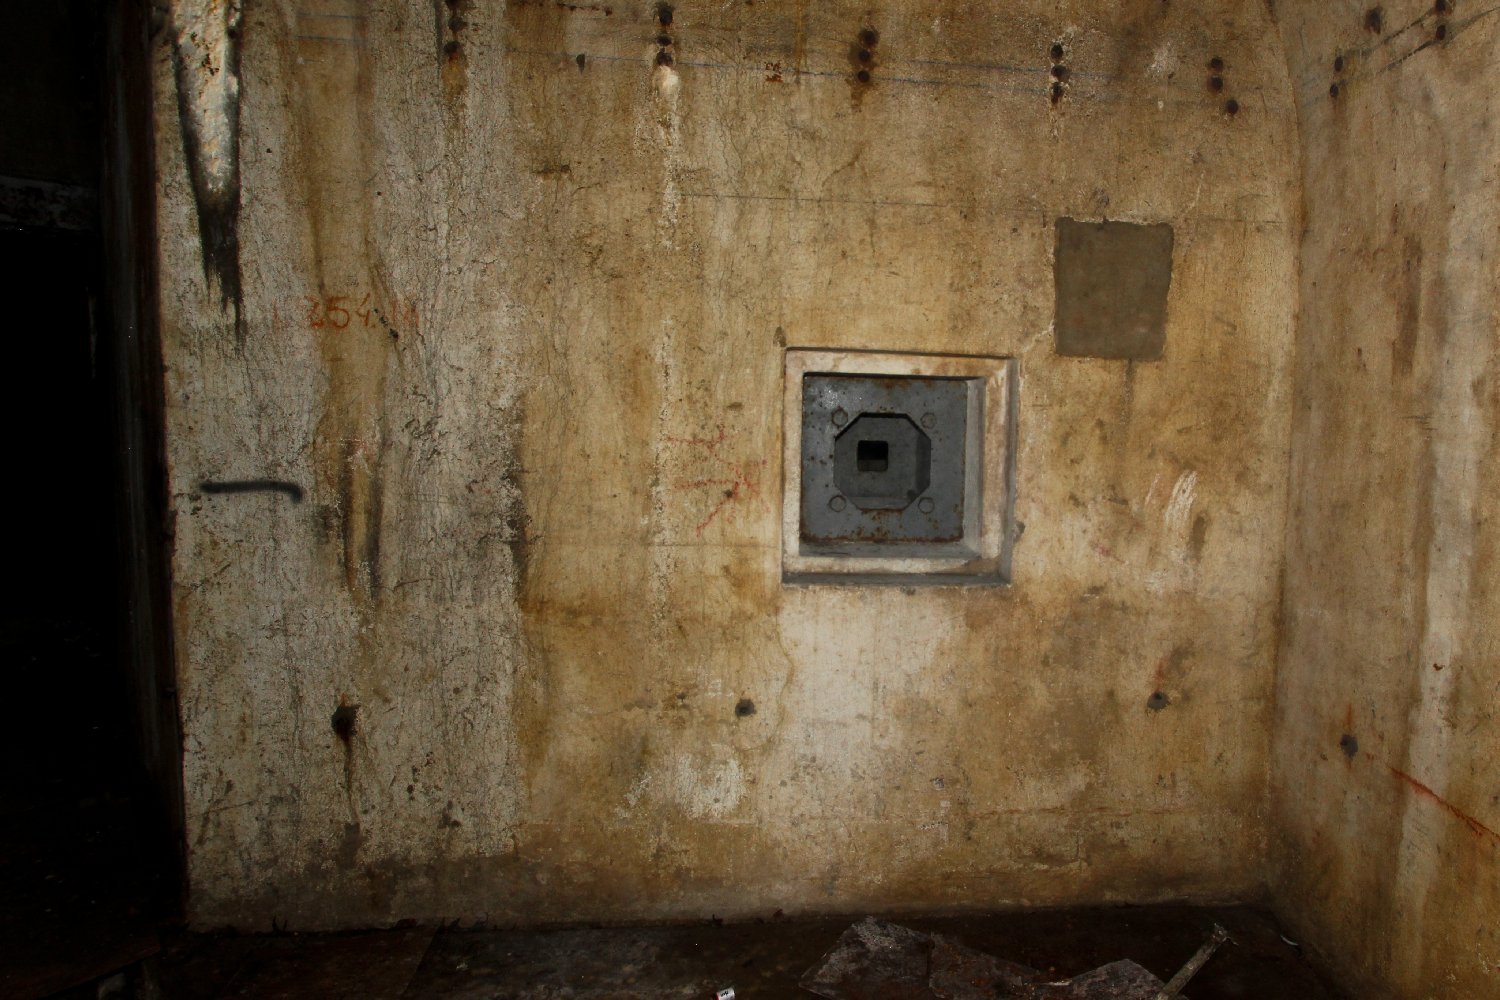
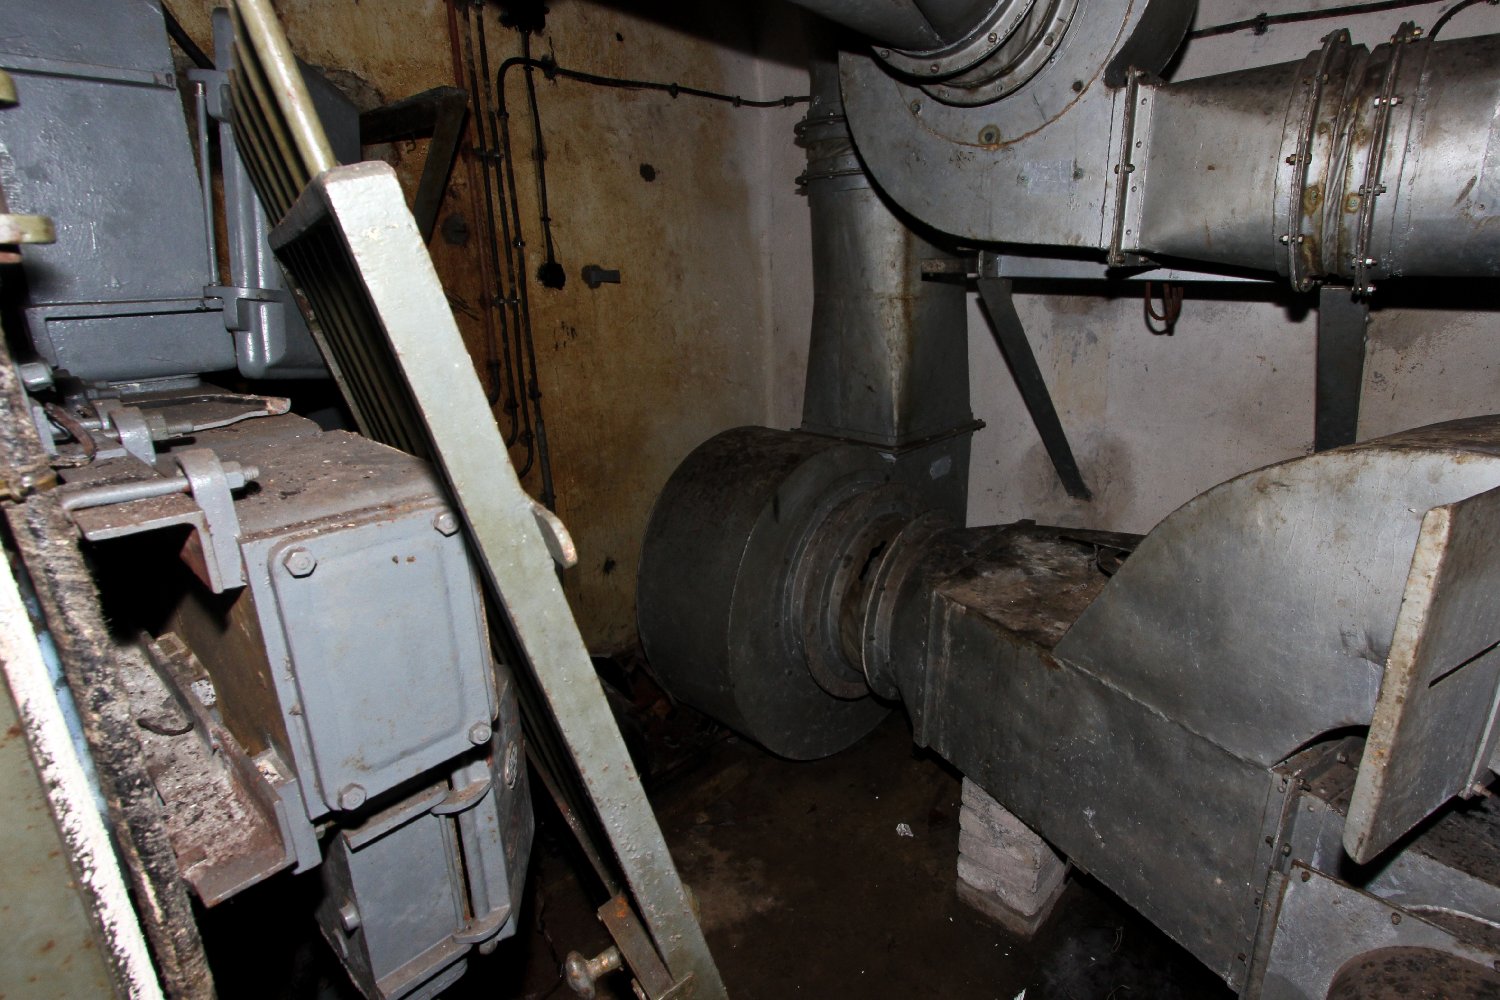
|
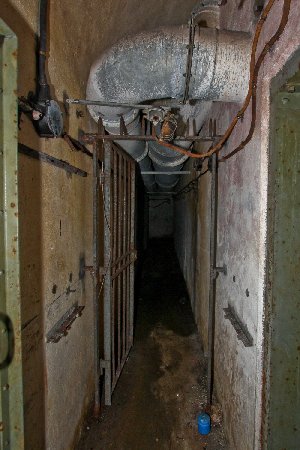
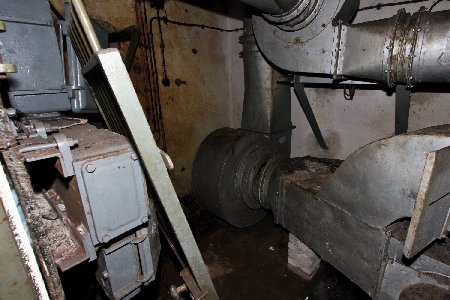
Part of the massive
ventilation system, originally designed to over pressurise the fort
interior to proof against poison gas.
|
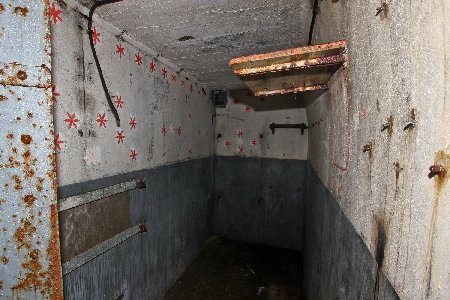
One of the barrack rooms
which originally contained several three high bunk beds for the
soldiers. Cosiness of this nature would have been all too familiar
to a Verdun fort veteran!
|
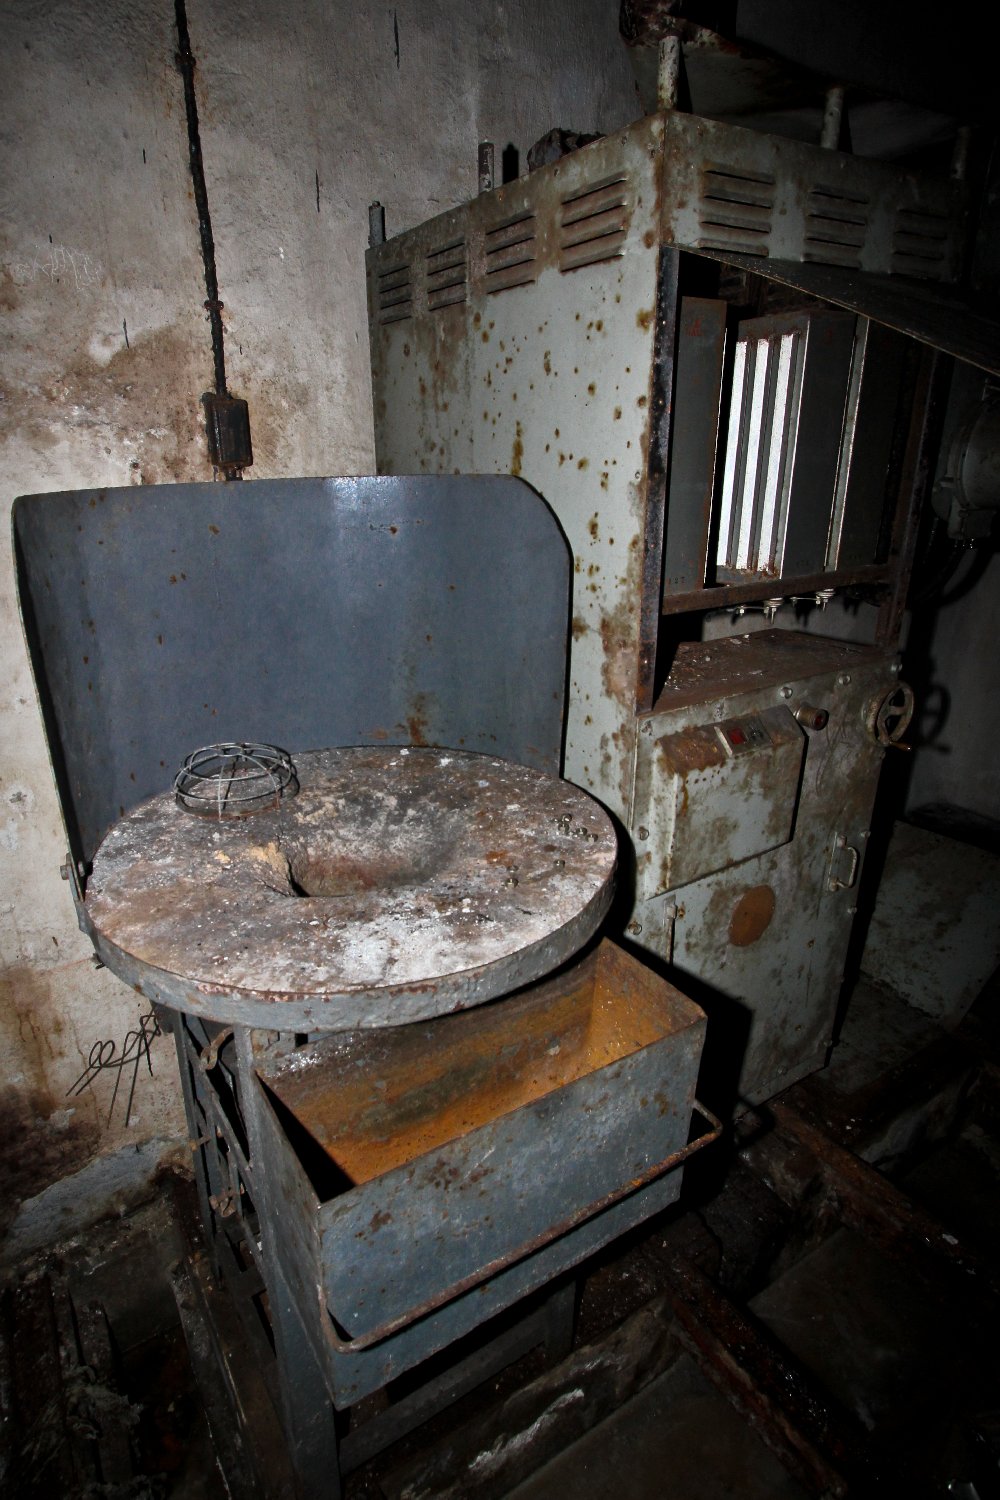
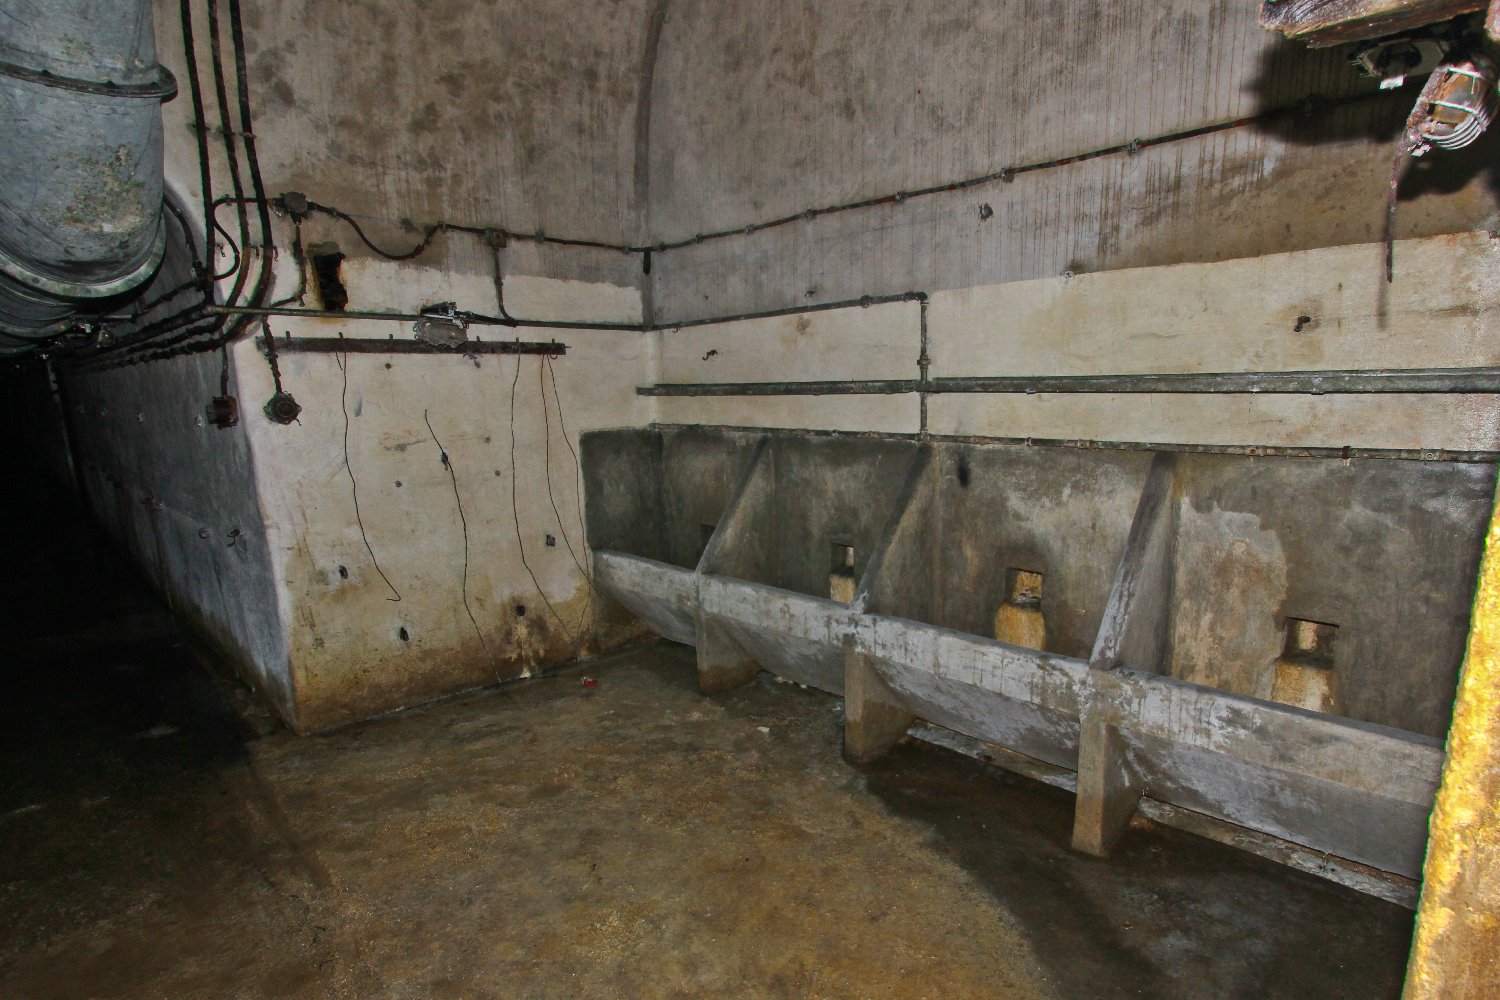
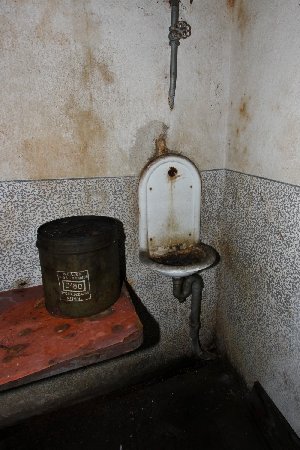
Zinc plated latrines - rather superior
sanitation when compared to the buckets used in the Verdun forts.
|
 |
 |
 |
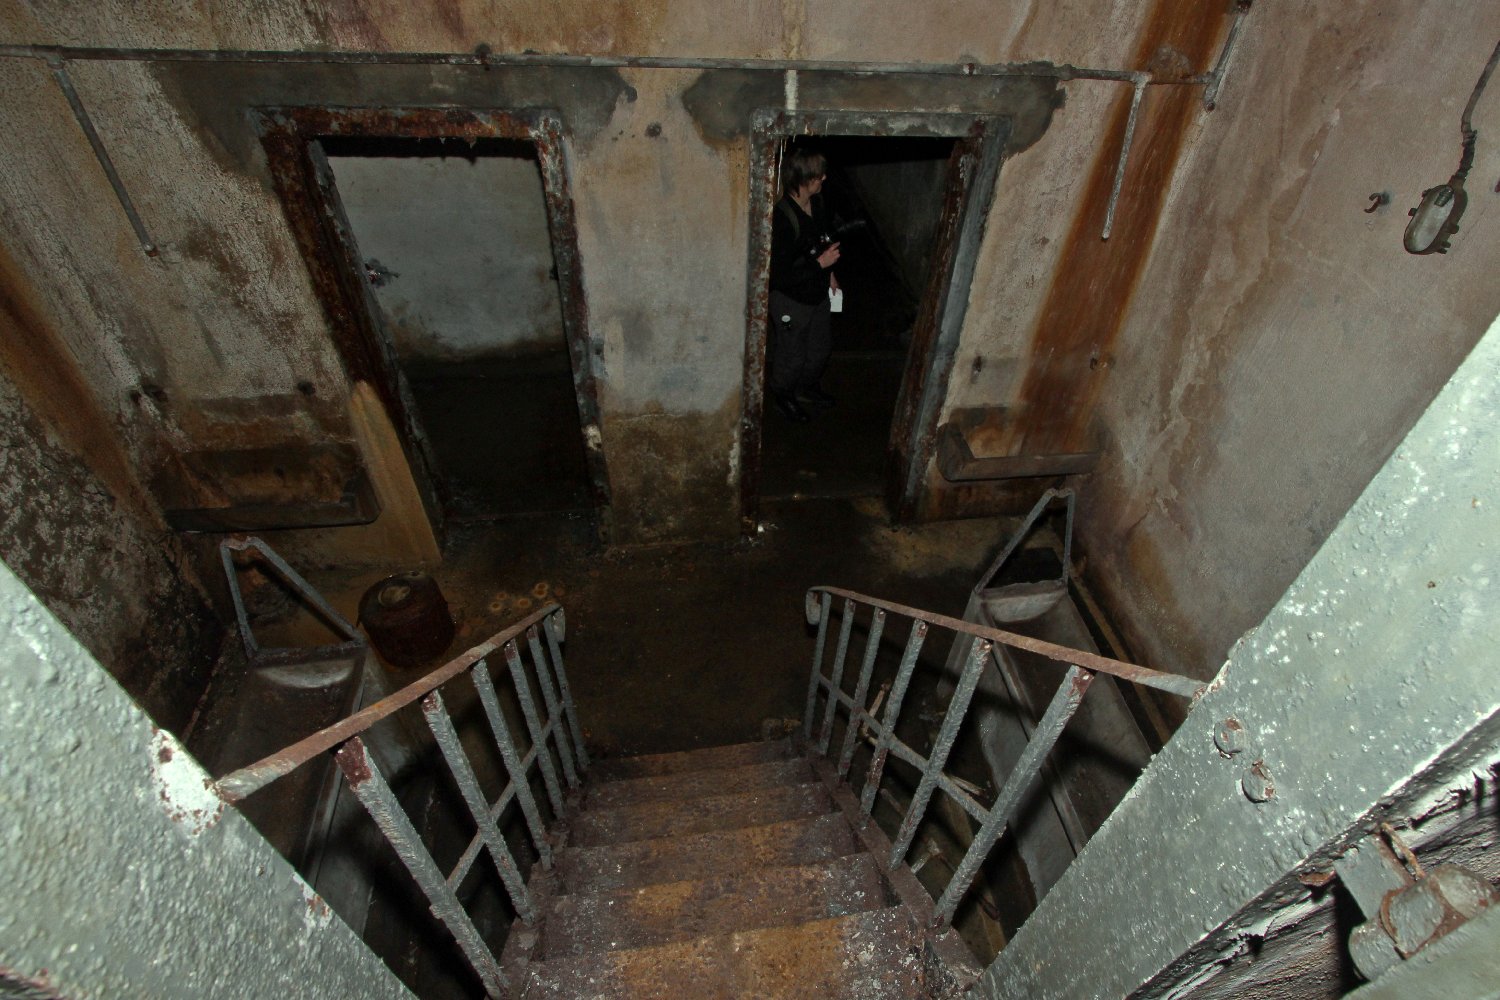
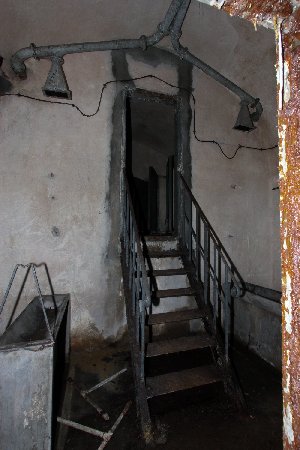
These stairs lead up to the ubiquitous
squatting plate toilets, again so familiar to a Verdun vet!
|
The extra height to the toilet cubicles is
a bit of a mystery frankly though we know that the toilets were
flushed into septic tanks which drained off into the fort's main
drain. Perhaps the tanks are directly beneath the squatting plates.
|
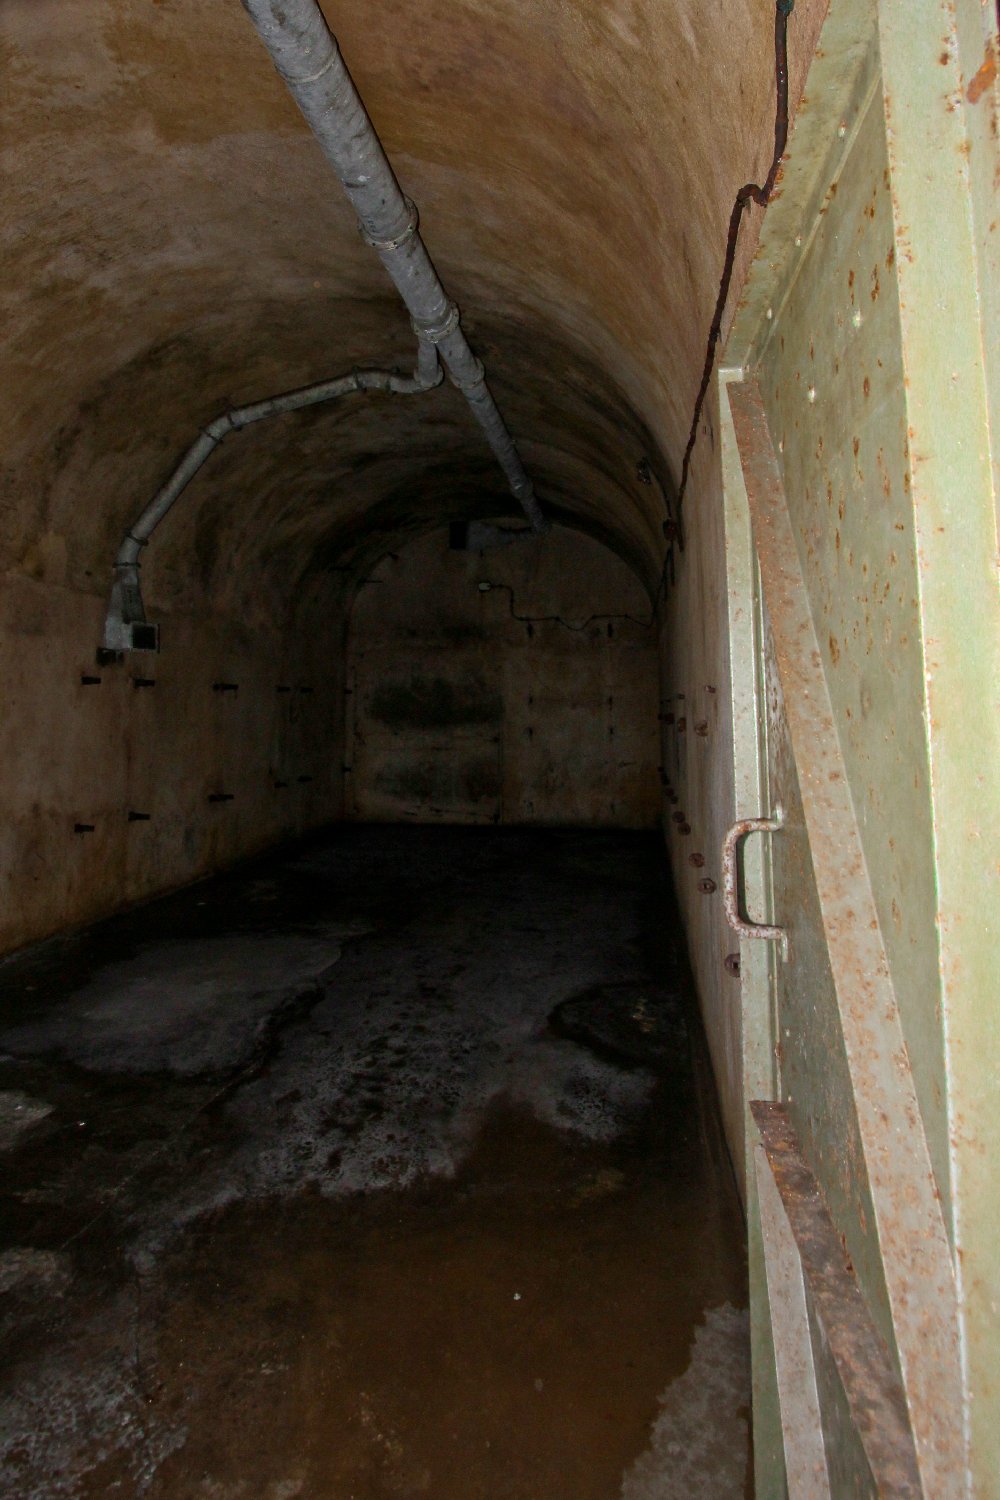
A side tunnel connects the main
thoroughfare of the fort to the barrack block tunnels.
|
 |
 |
 |
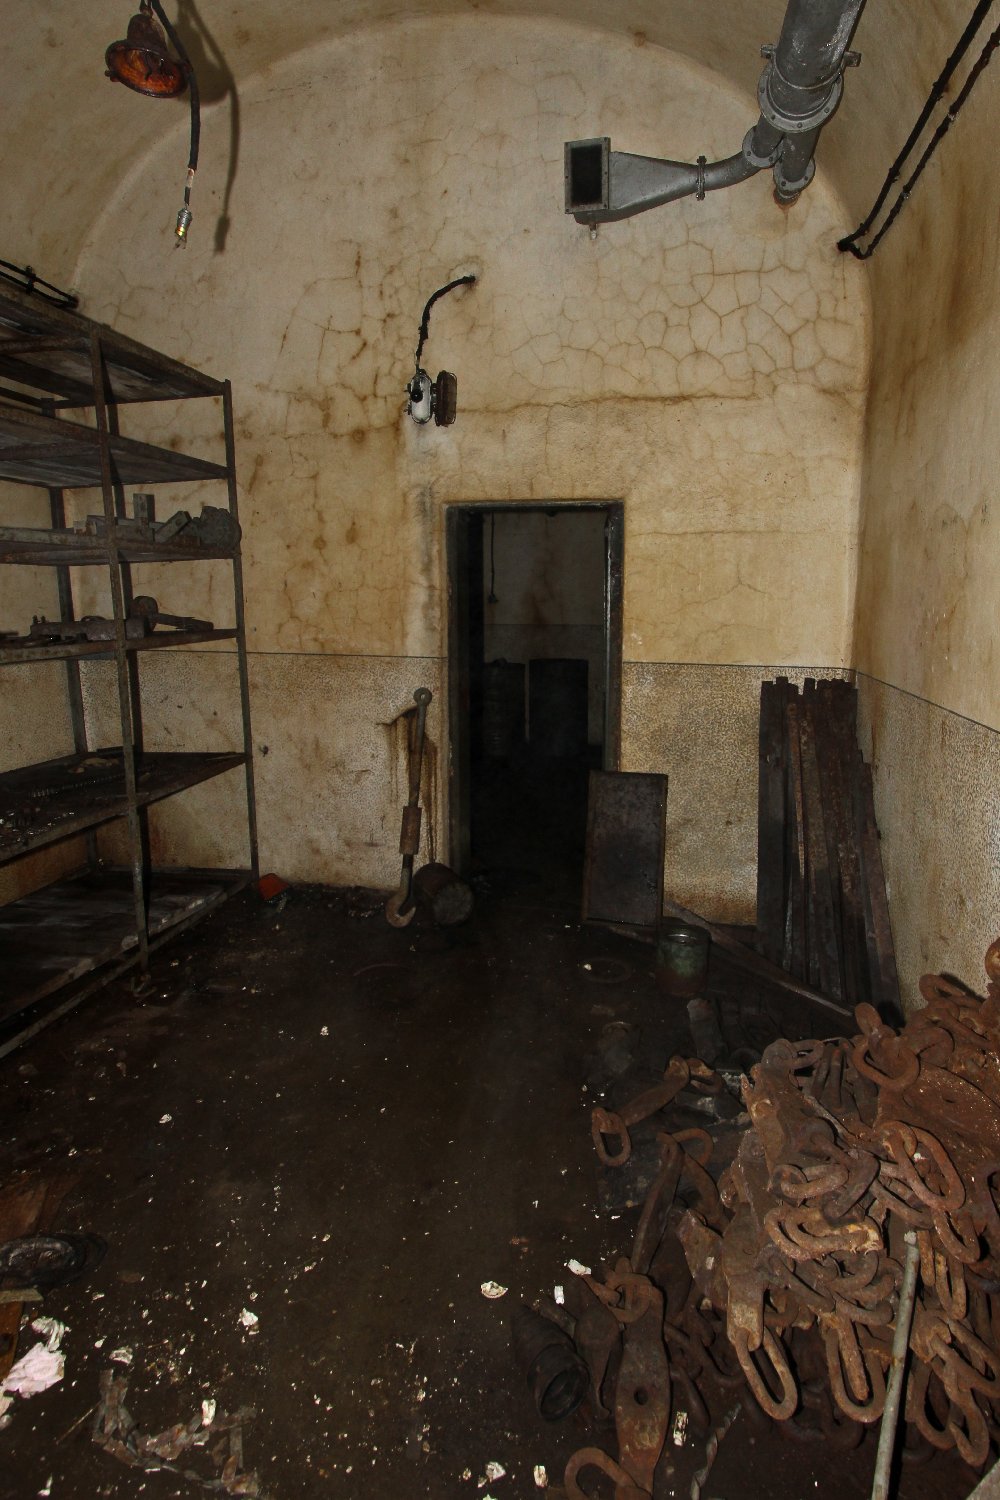
An engineering store room.
|
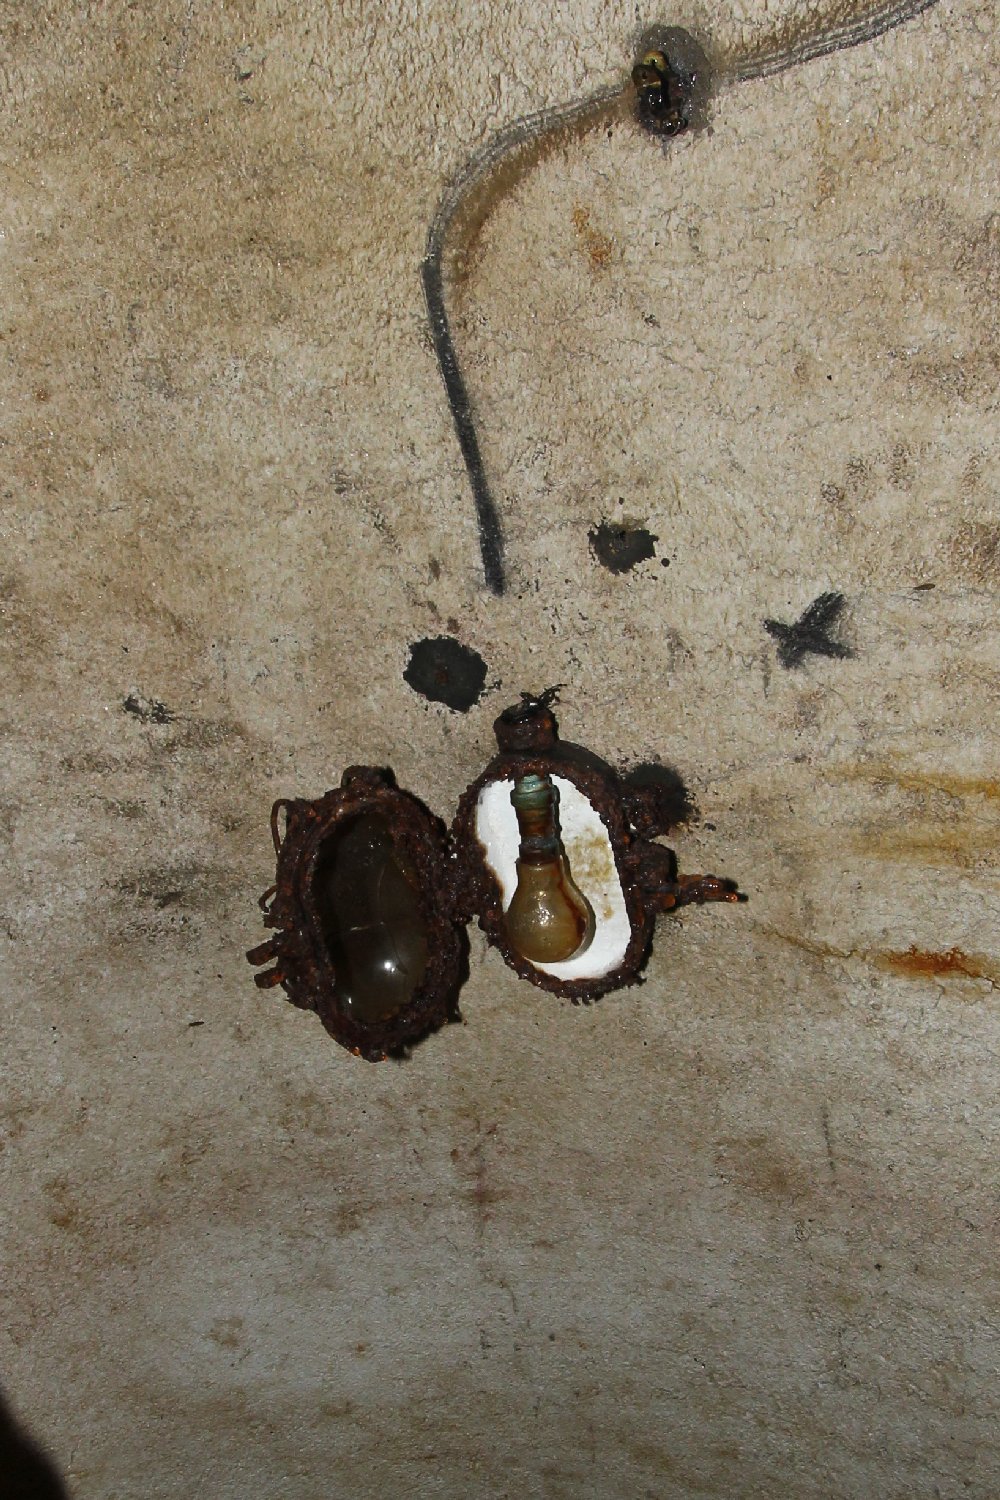
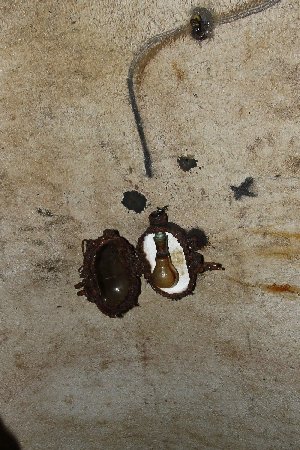
Many of the original light fittings still hold
incandescent bulbs.
|
This is possibly
a drinking fountain.
|
 |
 |
 |
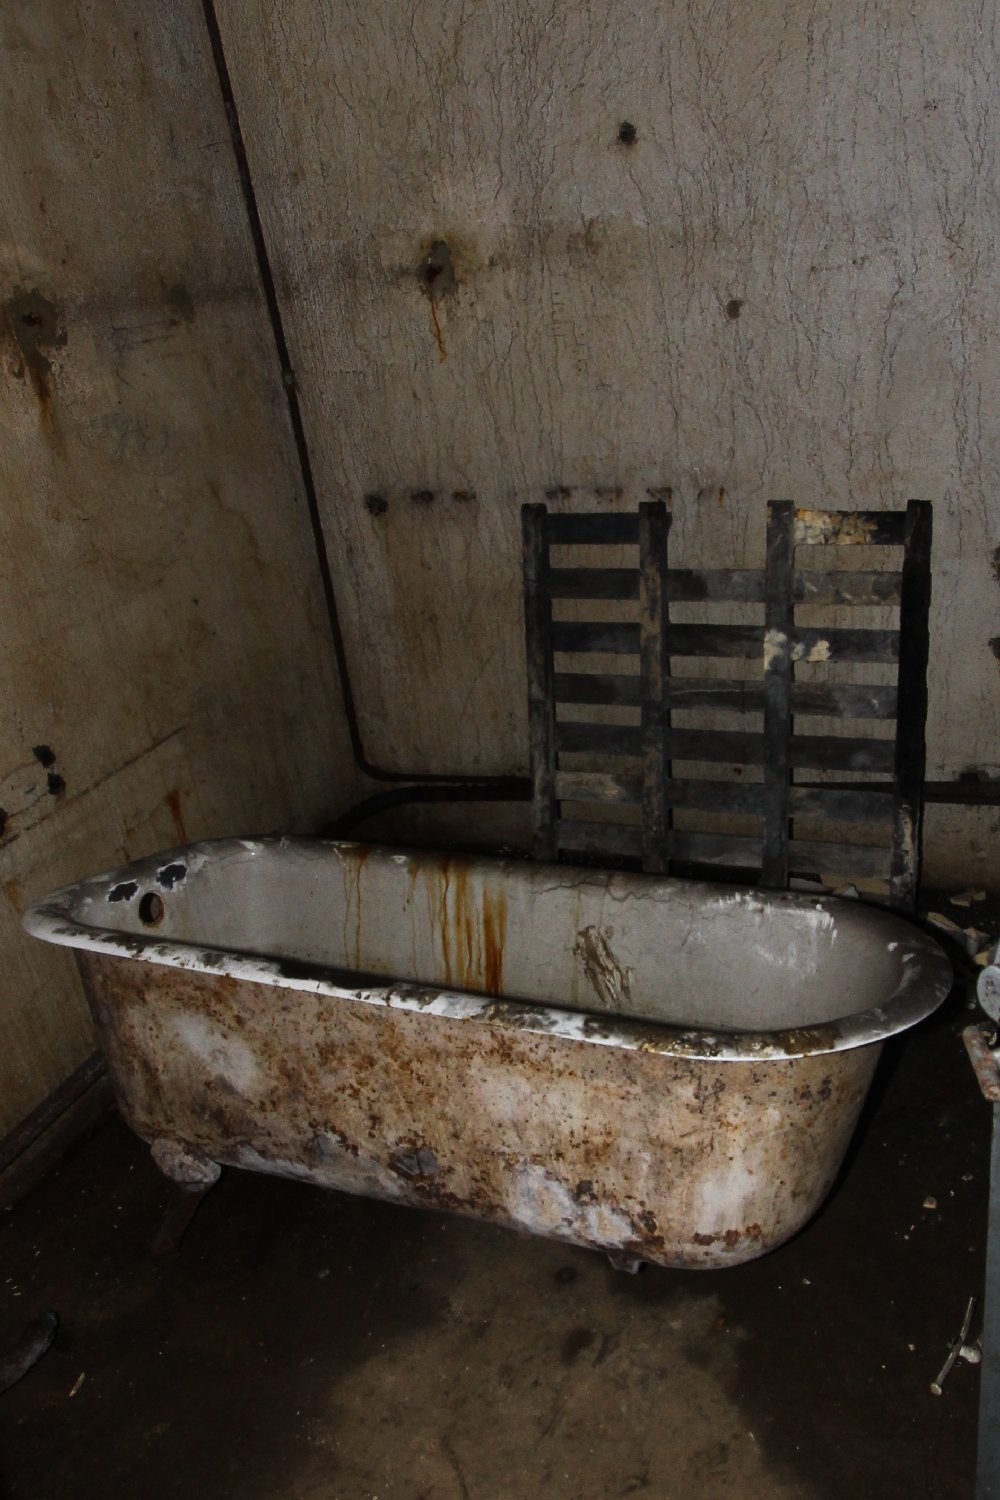
This bath has been removed and stored in
this room. Many of the privately owned forts are restored with
fittings and fixtures acquired from the abandoned and un-adopted
forts.
|
A much lighter blast door separates the
main barrack block corridor from the principle 'gare' (railway)
thoroughfare of the fort.
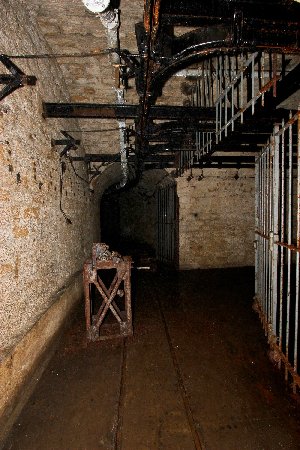
|
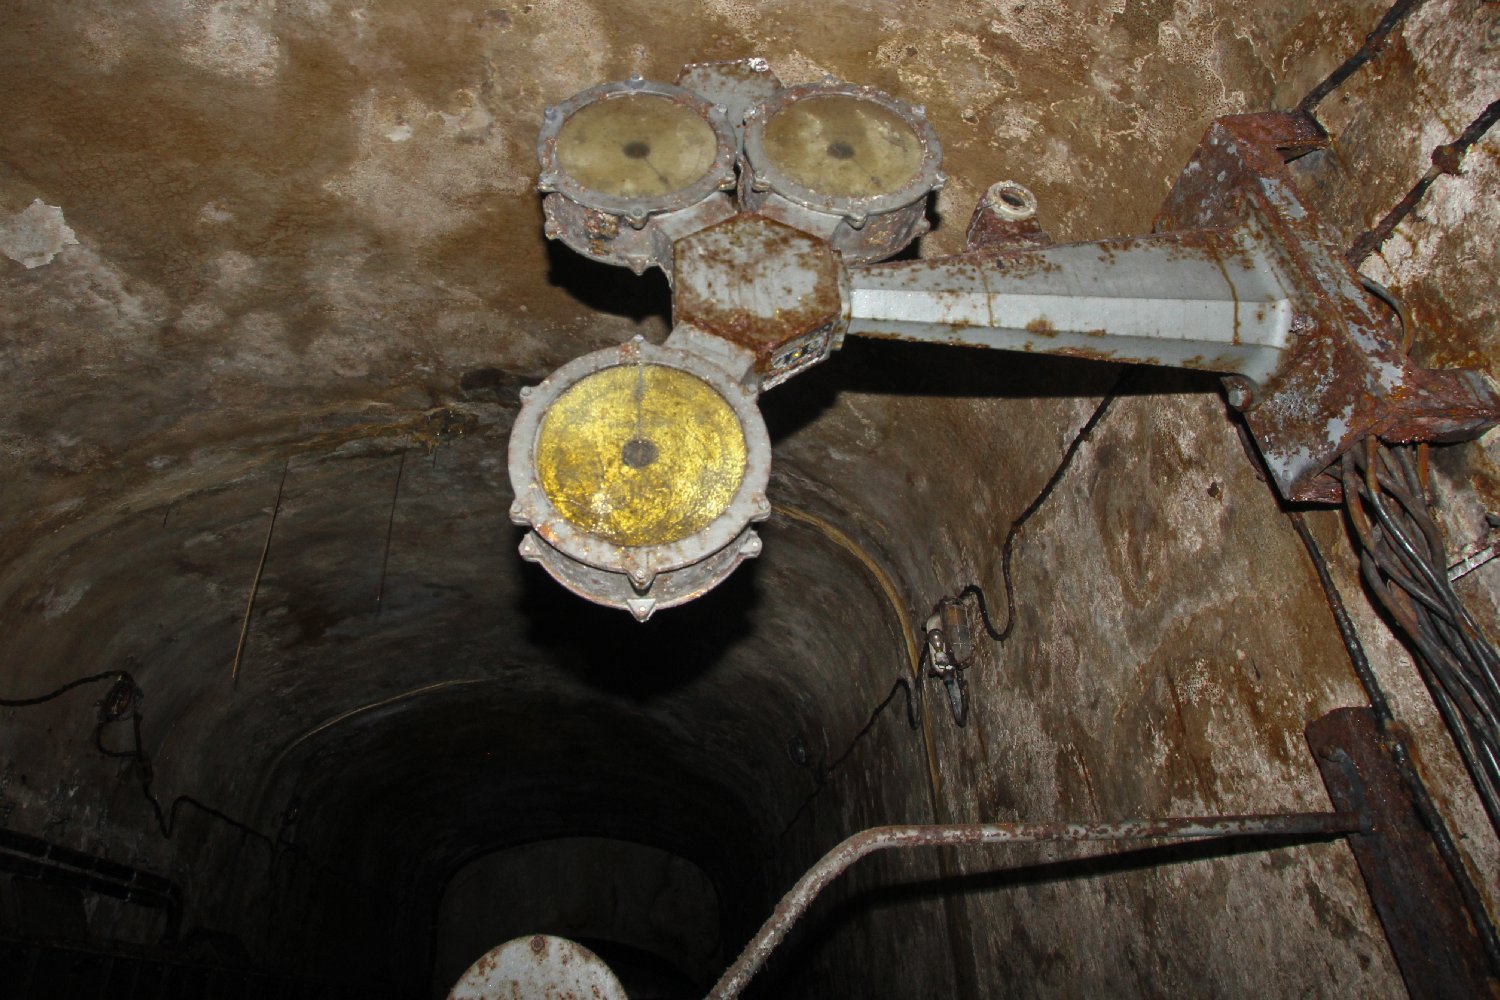
At intervals along the 'gare' tunnel are
what we took to be either heaters or vent plants ported out to the
surface. Some had been sealed with gravel from above.
|
 |
 |
 |
|
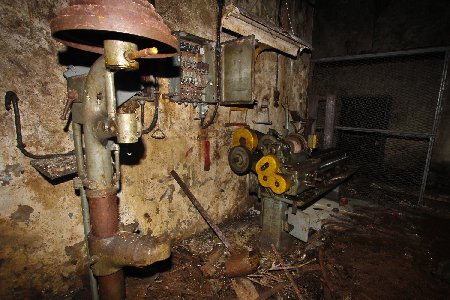
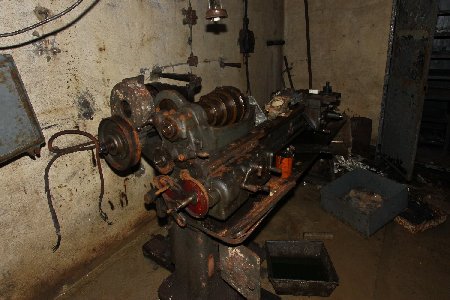
A second workshop with an
identical lathe to the first.
|
Odds and sods abandoned by the engineers
and thrown about by salvagers.
|
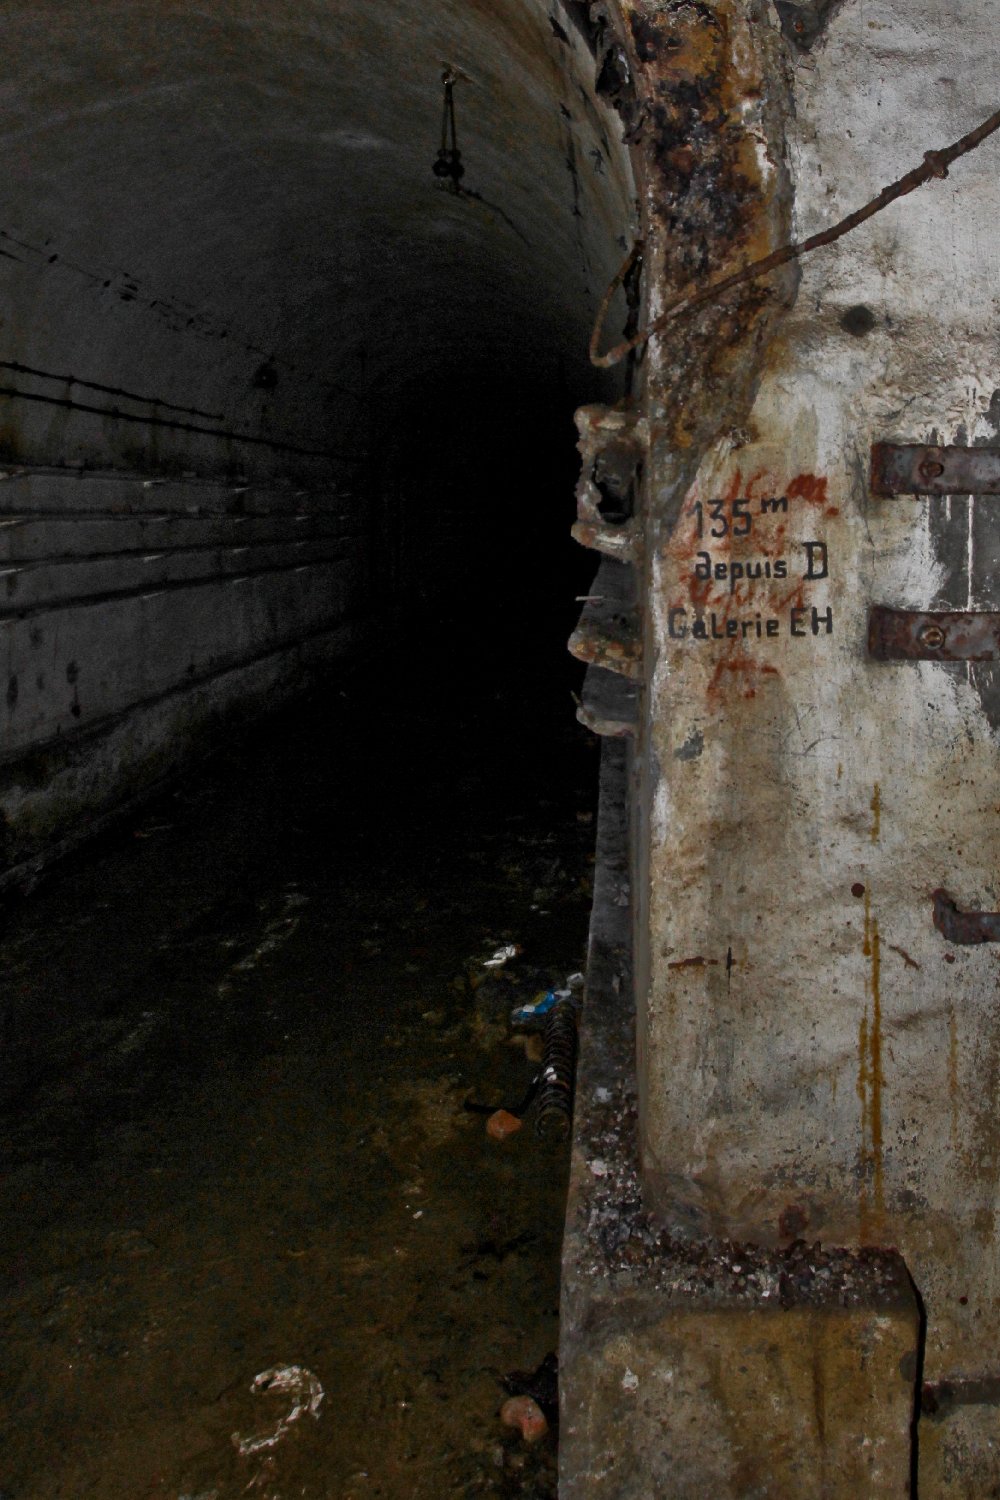
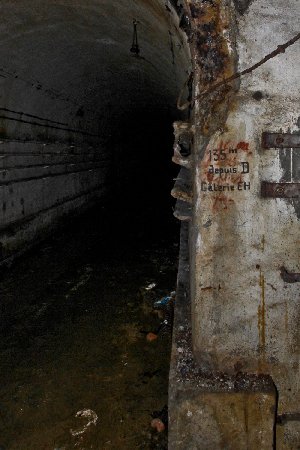
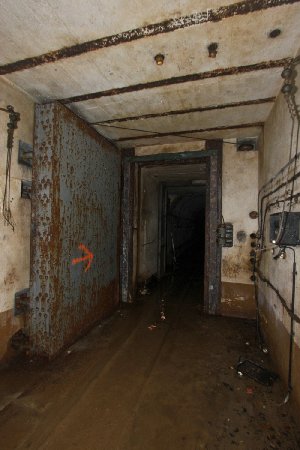
We think this signage on the wall is a
location marker saying basically that here at point D you are 135
meters from the personnel entrance.
|
 |
 |
 |
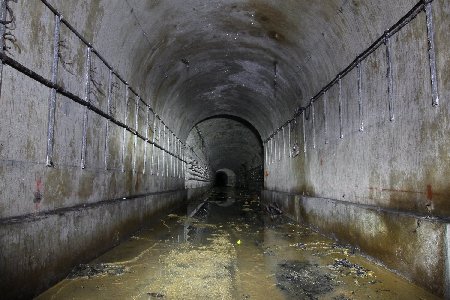
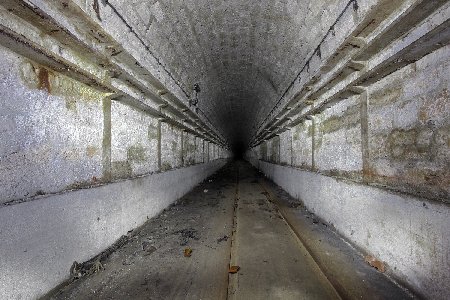
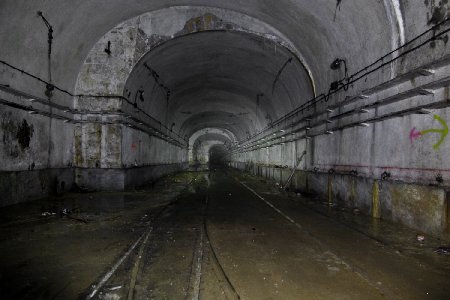
I had the utmost difficulty light-painting
tunnels which run for in excess of 3/4 mile!
|
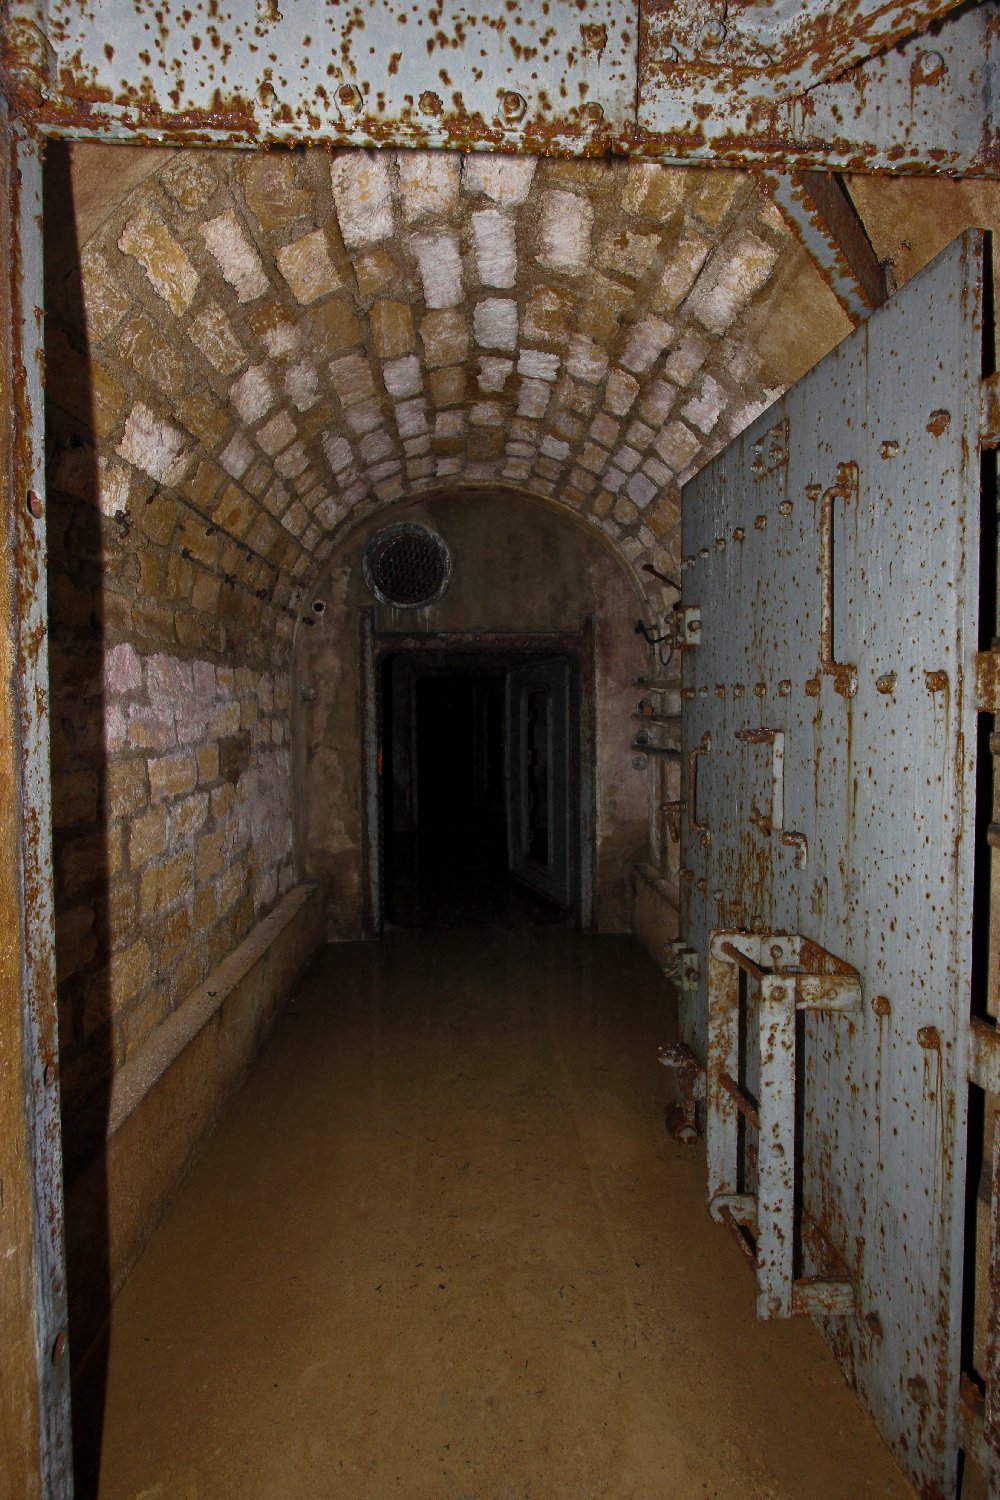
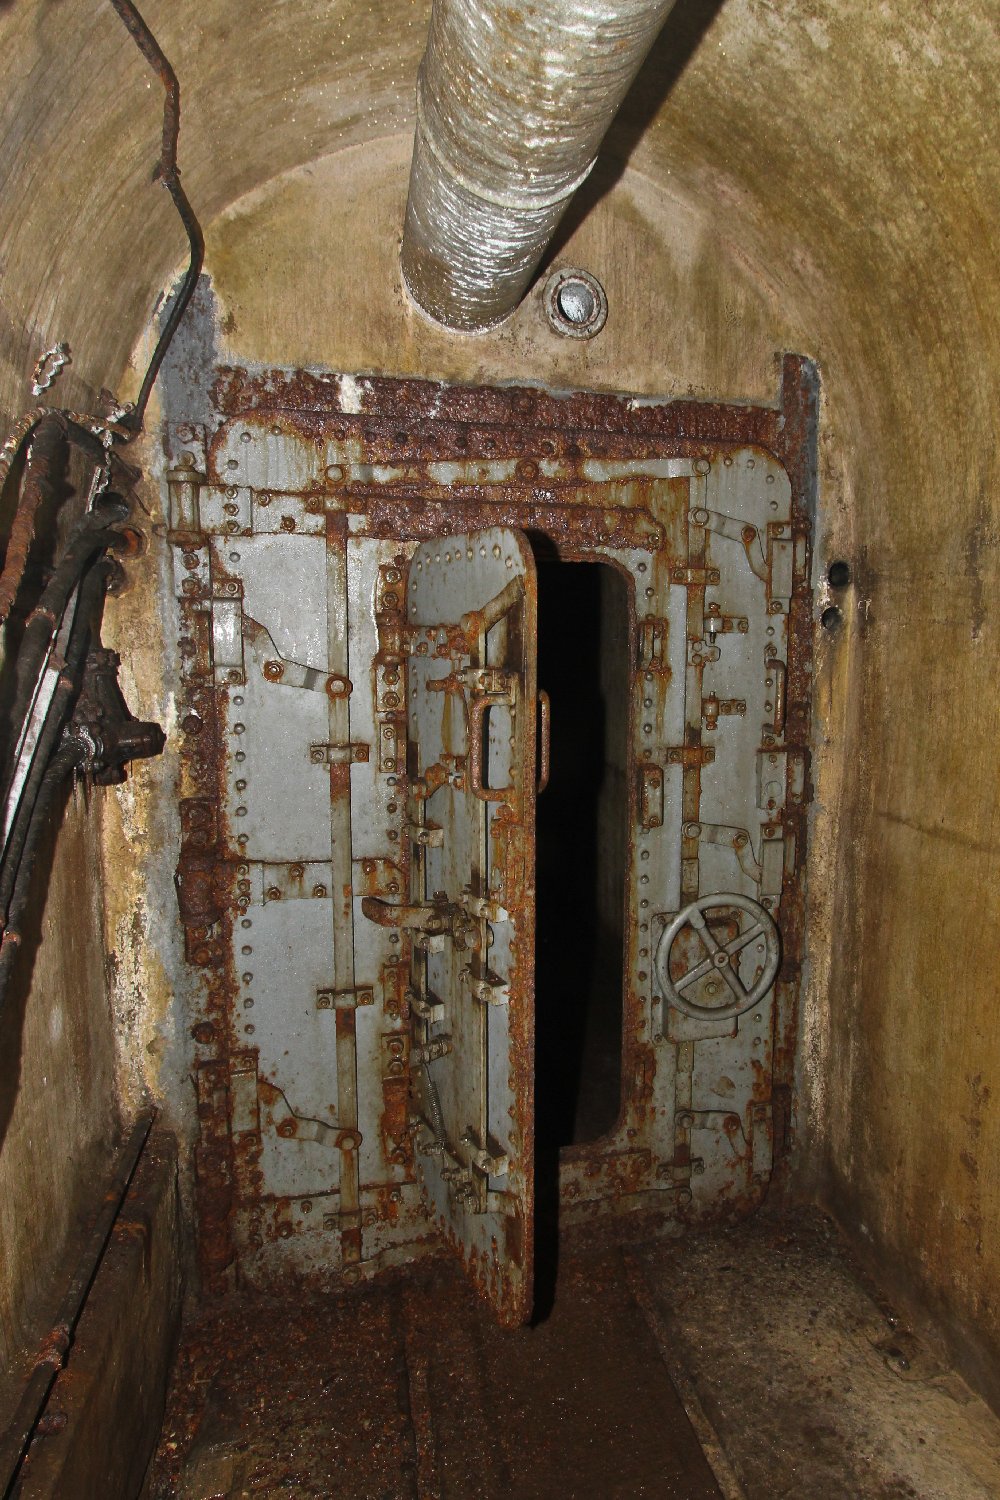
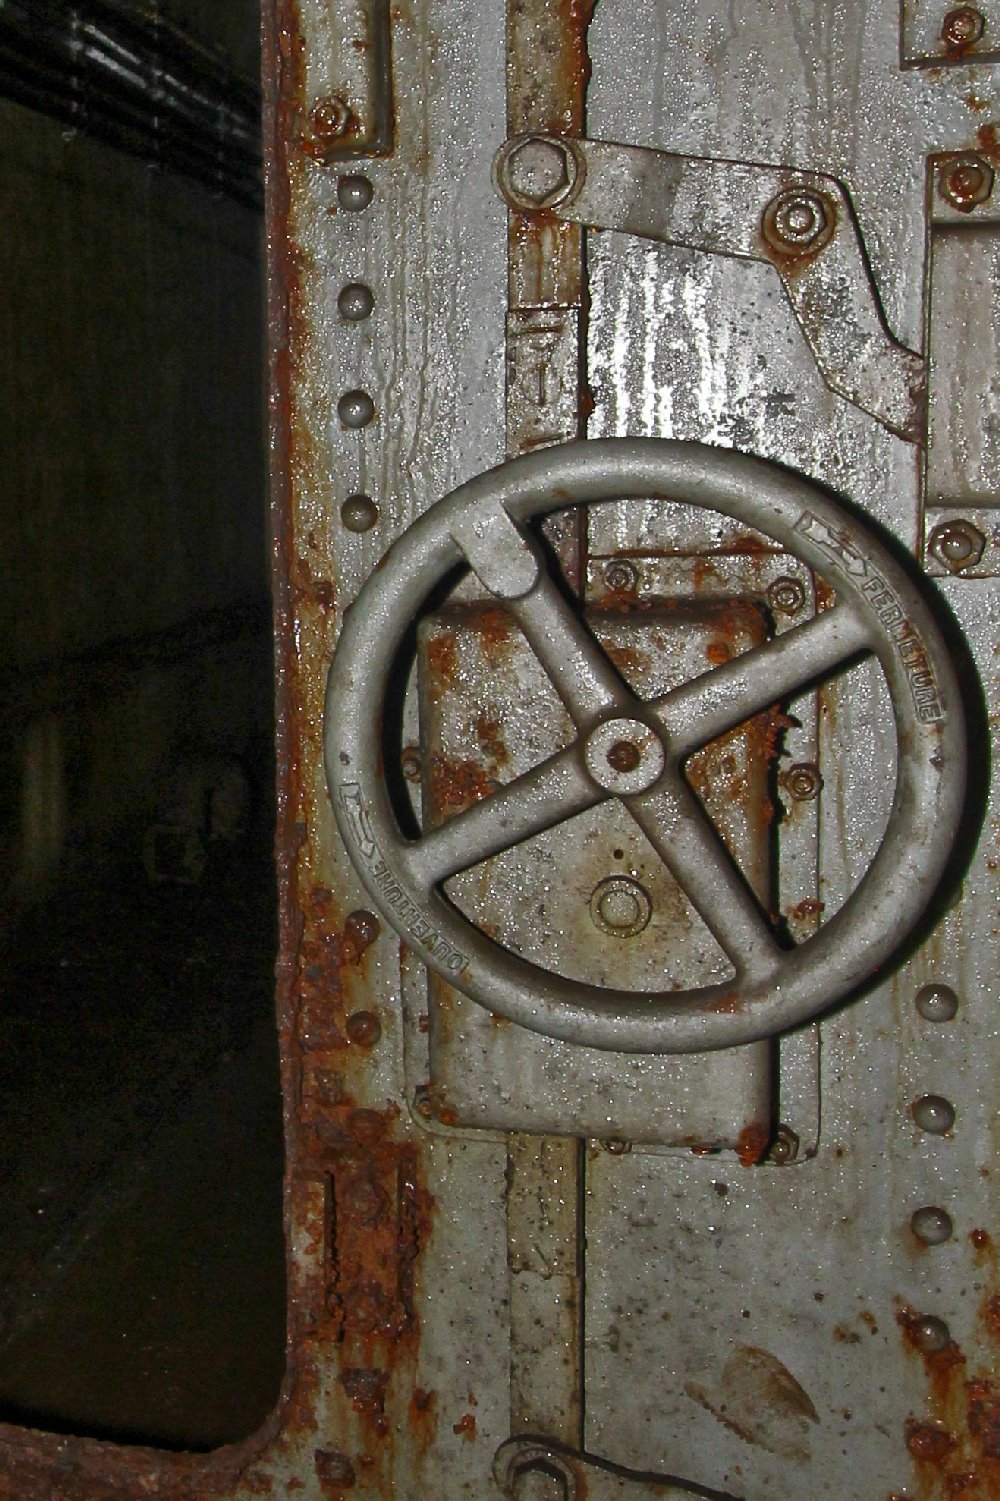
Entering through the first of two blast
doors which seal off a fighting compartment.
|
The second door has a smaller personnel
door in the middle to allow passage of troops whilst closed down for
battle.
|
 |
 |
 |
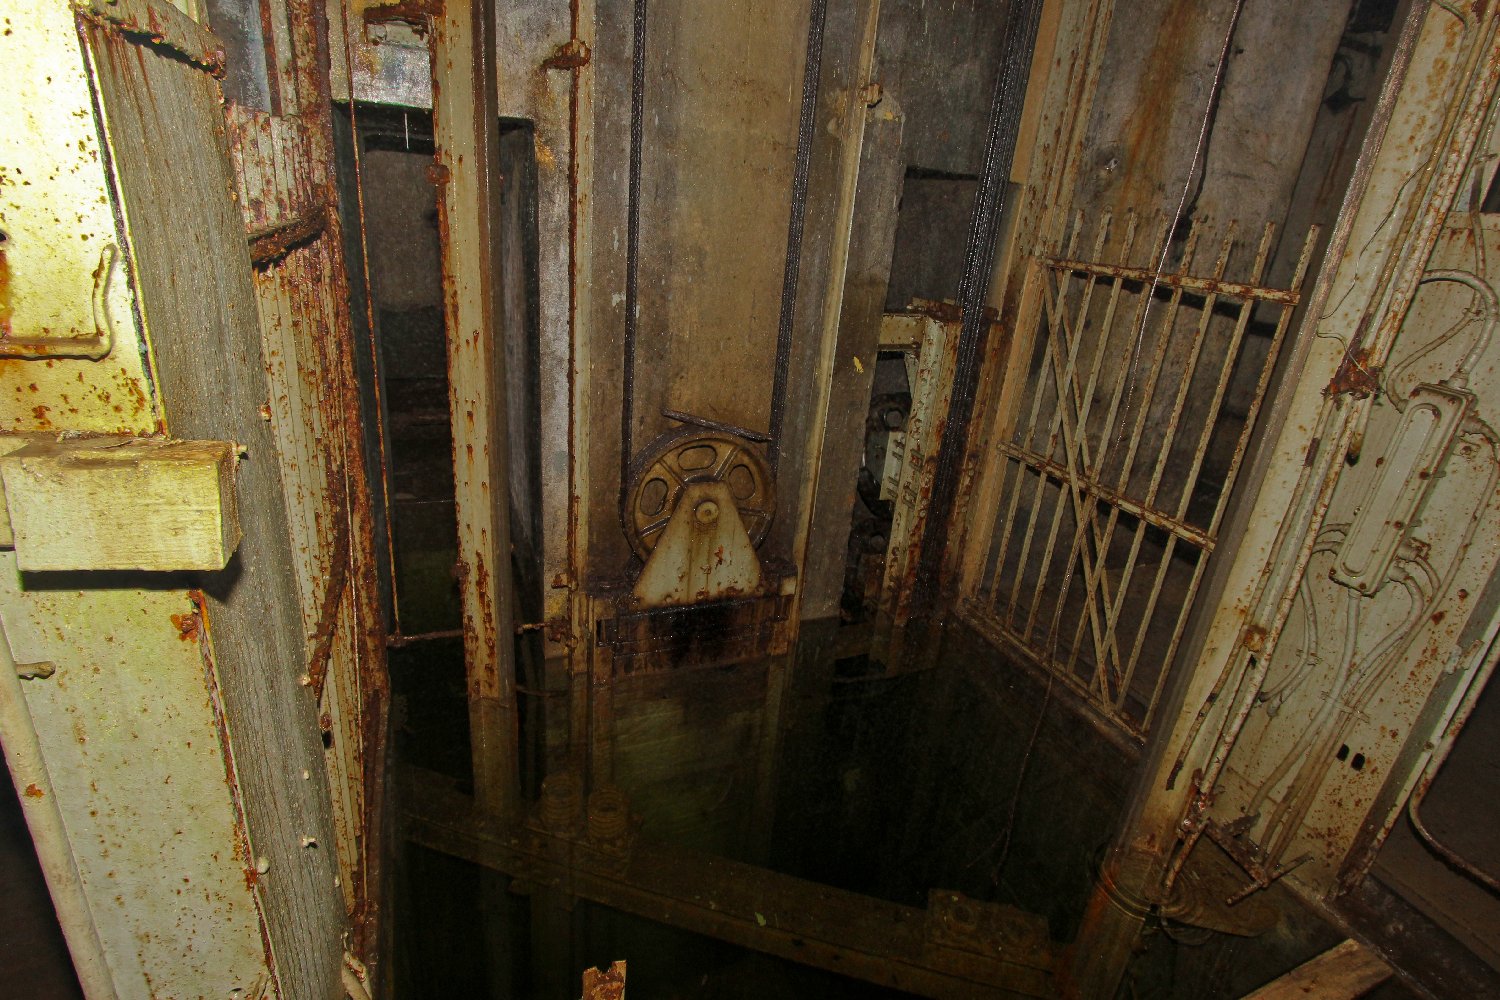
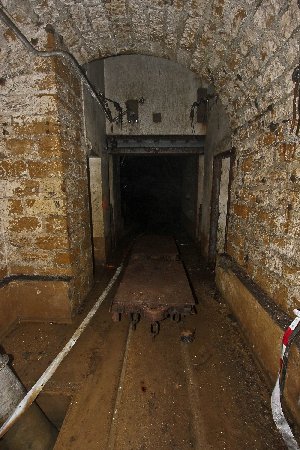
This is the ammunition handling area below
the main lift up into a triple 75mm artillery 'Bloc'.
|
Flat bed ammunition trucks run on the 60cm
railway from the 'M1' magazine over half a mile distant.
|
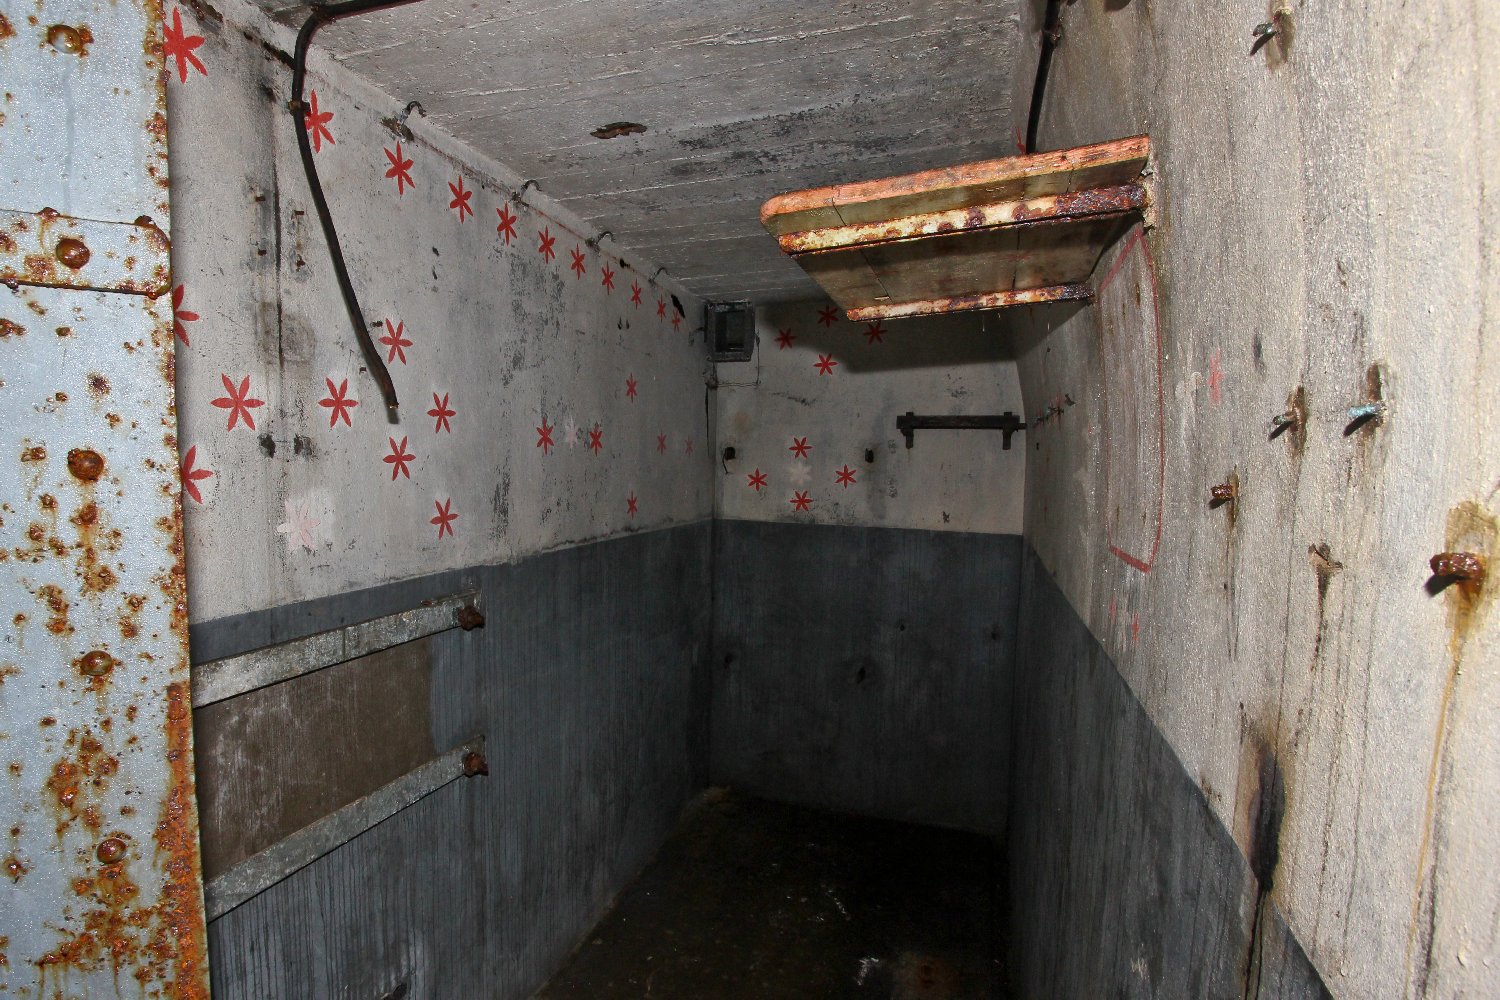
Starry starry night...the
next shell's gonna blow you to sh*te!
...with apolgies to Don
McClean!
|
 |
 |
 |
Part of the shell handling mechanism which
works in conjunction with an overhead monorail.
|
The main lift bottom
station is badly flooded.
|
247 steps and 30 metres closer to the
surface later we are at the top of the same lift and standing in the
command level of the artillery bloc.
|
 |
 |
 |
And one level higher still, and by now
above ground level, we are directly behind the artillery crenel in
the centre of the 3 gun bloc.
|
Back down at the bottom again and we leave
the bloc through the outer blast door.
|
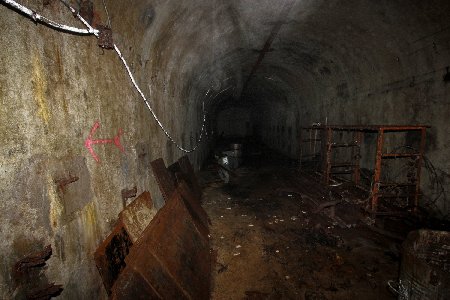
We have continued along the gare towards
the engine store at the end of the tunnel.
|
 |
 |
 |
|
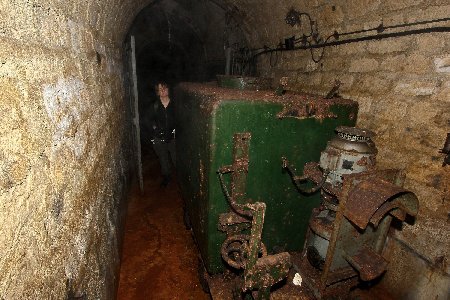
Beyond the gates is the
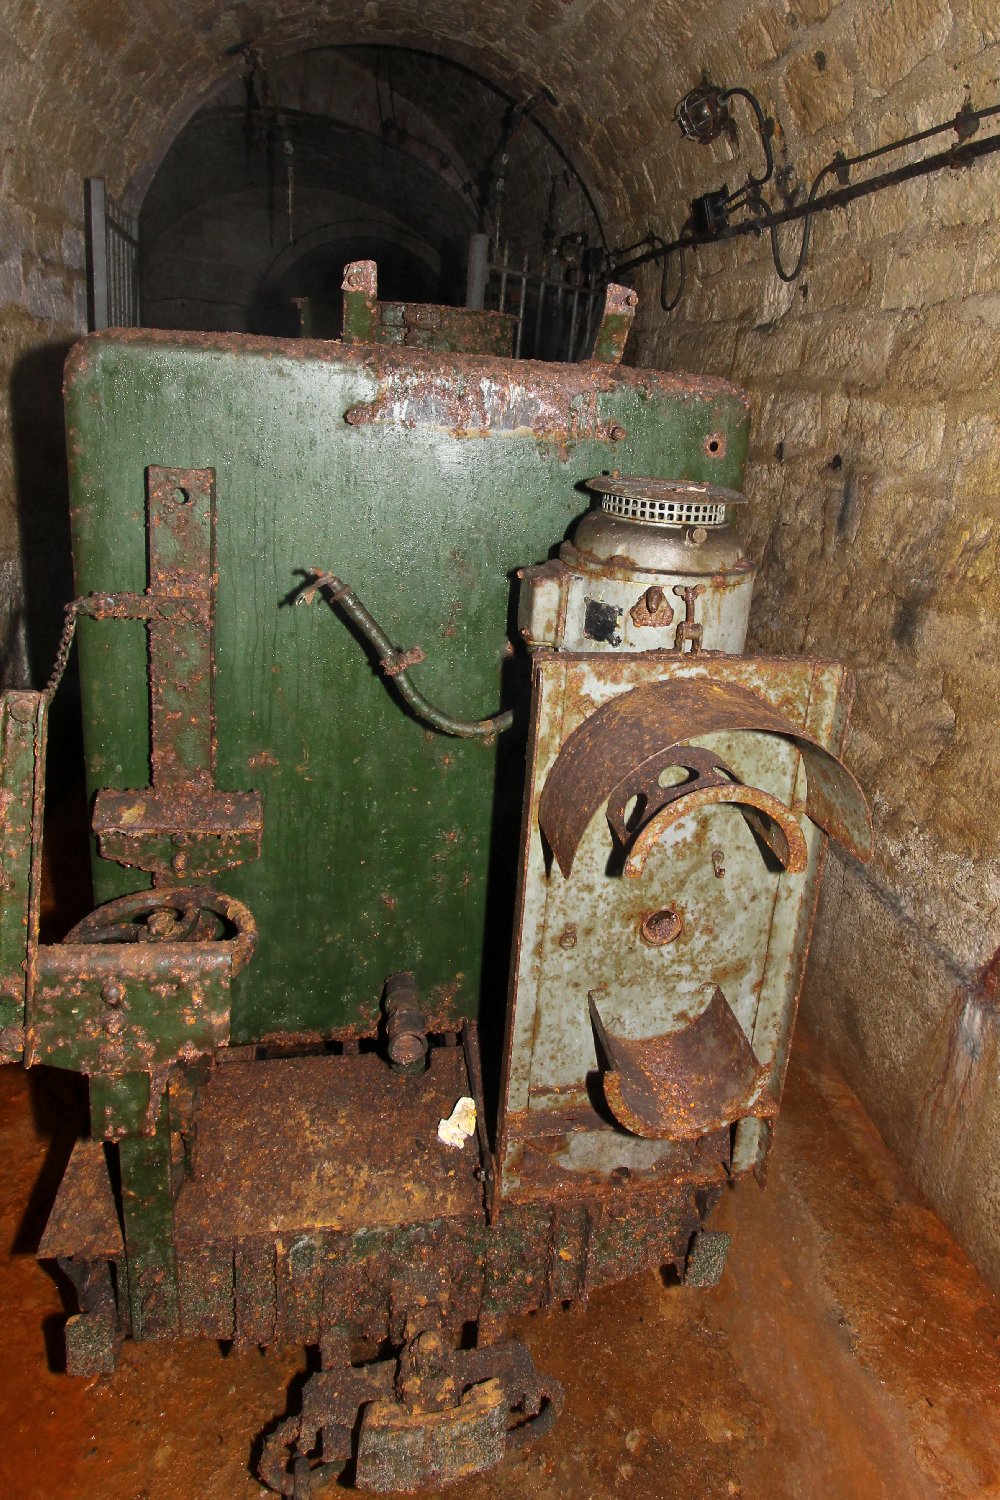
engine store room.
|
It doesn't look much like a locomotive but
it is, and it pulled ammunition, stores and personnel along the gare
powered by electricity.
|
I turned to warn TJ to watch her step
because there was a flooded inspection pit behind the loco... one
very wet leg later I took this photo!
|
 |
 |
 |
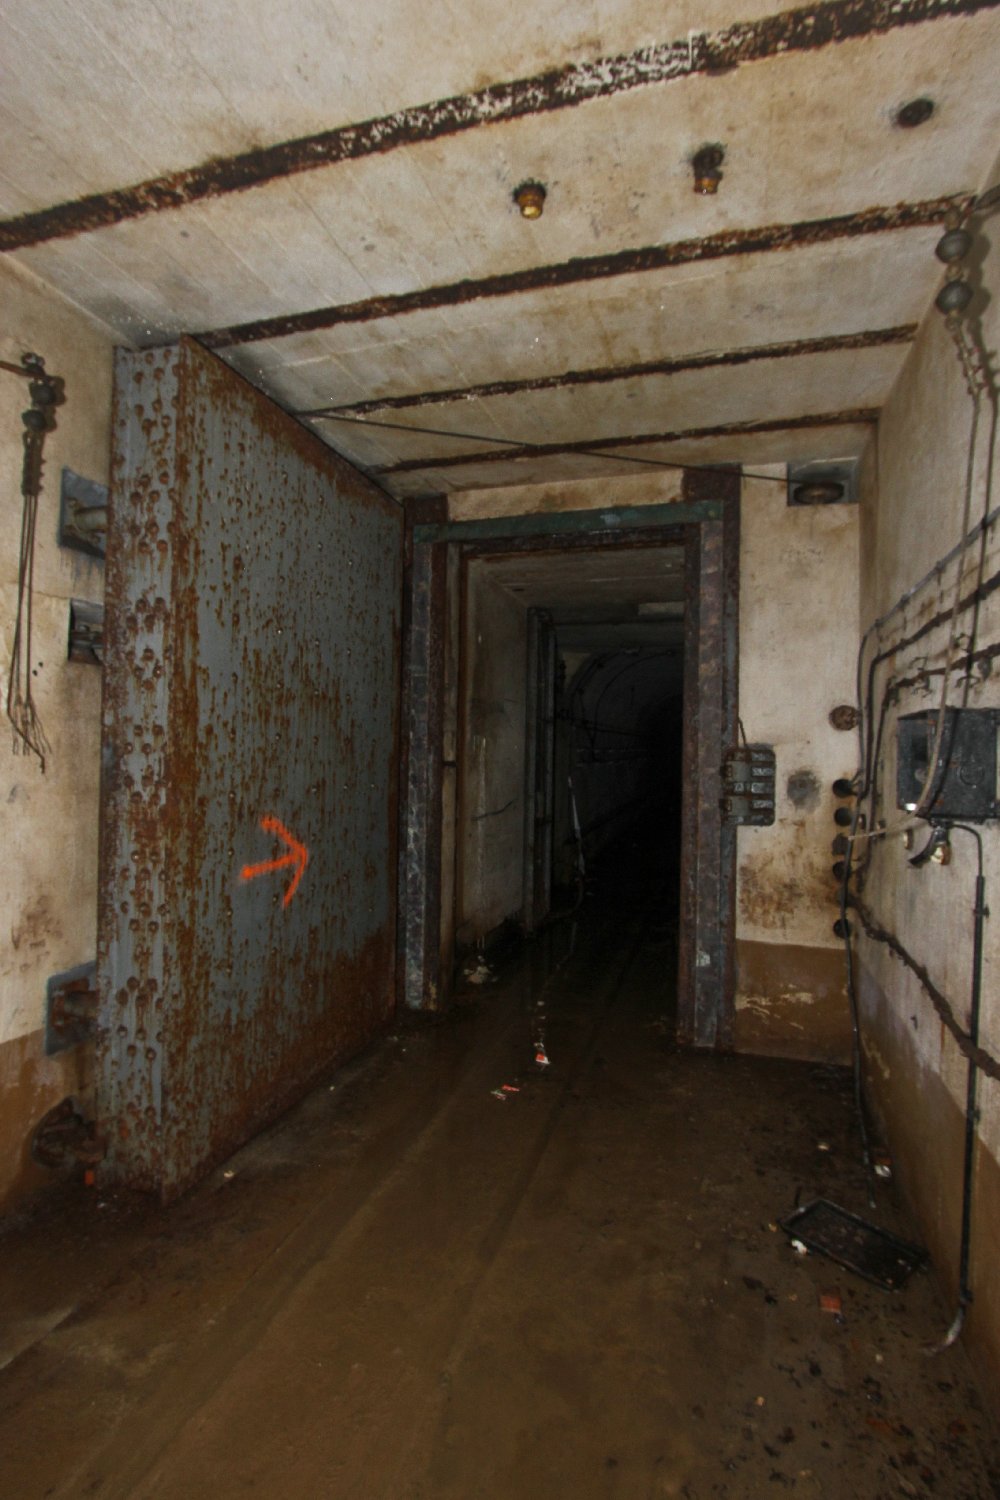
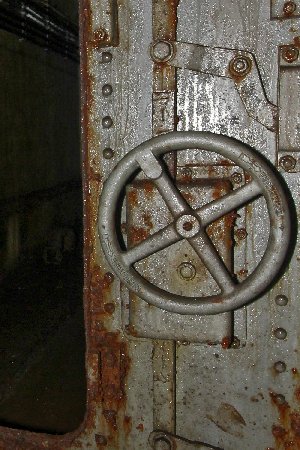
Another blast door leads us into another of
the fighting blocs.
|
The door mechanisms remind one of a submarine.
|
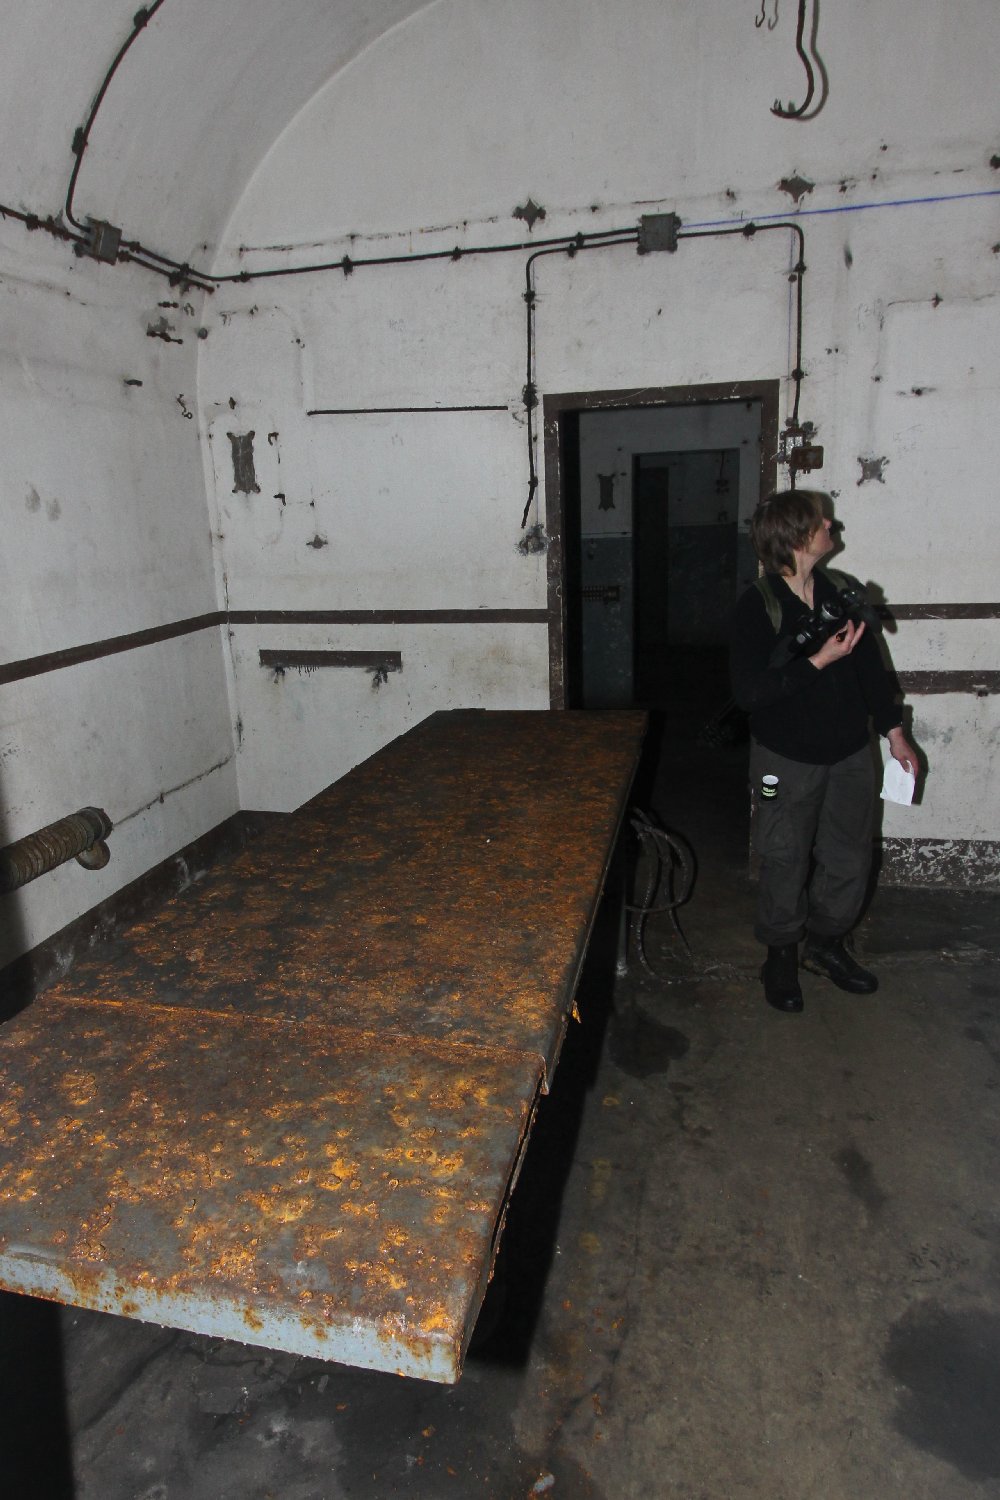
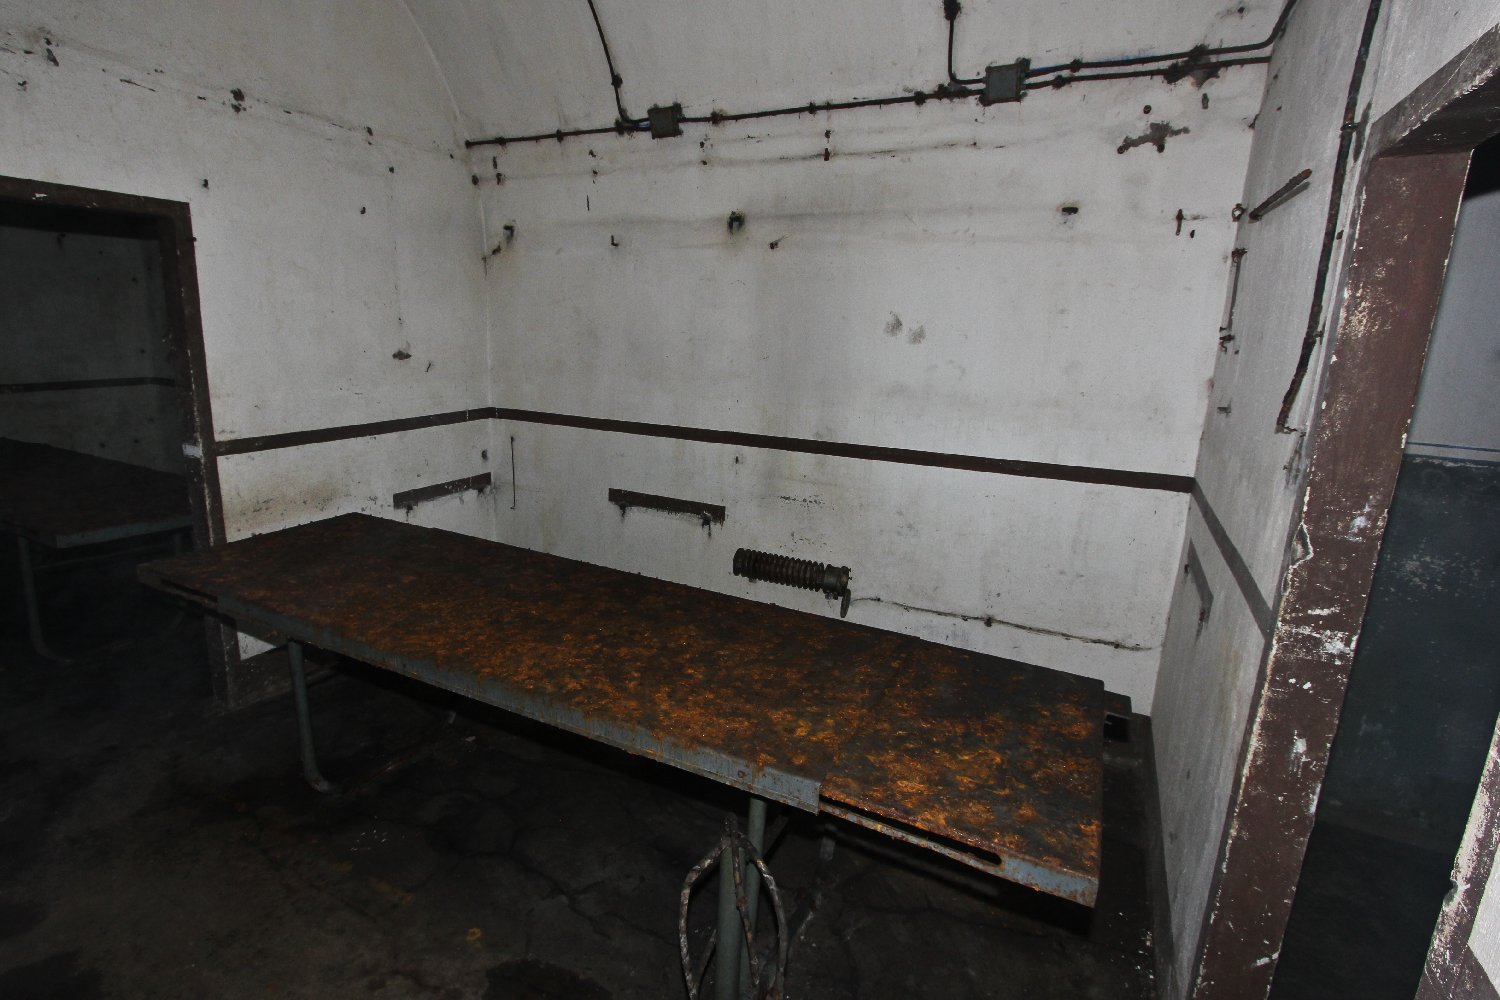
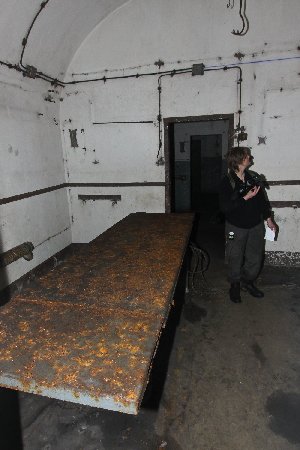
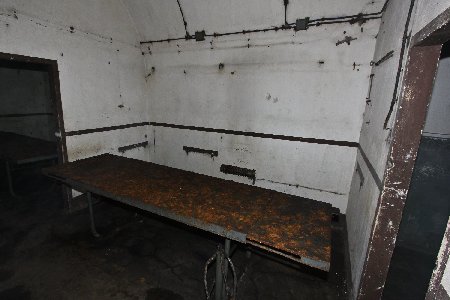
Part way along this bloc
access tunnel we came across this room with a huge table in the
middle.
|
 |
 |
 |
|
The table positively
shouts, "Operating theatre" but normally the infirmary was adjacent
to the barracks, so this remains a bit of an enigma.
|
More ventilation plant.
|
An end on view of one of
the enormous blast doors, presumably installed when the forts were
hardened against Soviet atomic attack in the 1950s.
|
 |
 |
 |
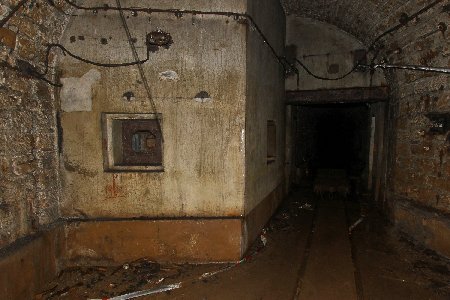
A passing point on the gare just short of the
magazine.
|
Way beyond the personnel
entrance now we continued towards the munitions entrance which is
protected with a machine gun installed in an armoured crenel.
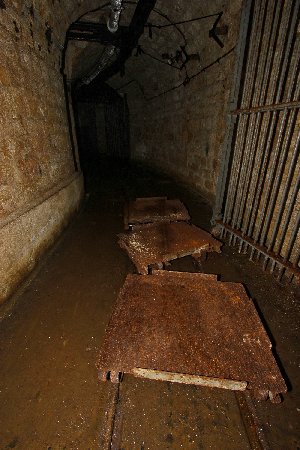
|
More 60cm flat bed ammunition trolleys.
|
 |
 |
 |
|
The M1 magazine railway
sidings. Ammunition was brought down in the lift and distributed
amongst the magazine compartments.
|
A magazine compartment door beyond which
there is a right angled wall to contain blast.
|
Yet more of the 60cm gauge railway trolleys.
|
 |
 |
 |
At the bottom of the ammunition lift.
|
On the way out of the
fort now, we are in a fighting compartment directly above the access
corridor.
|
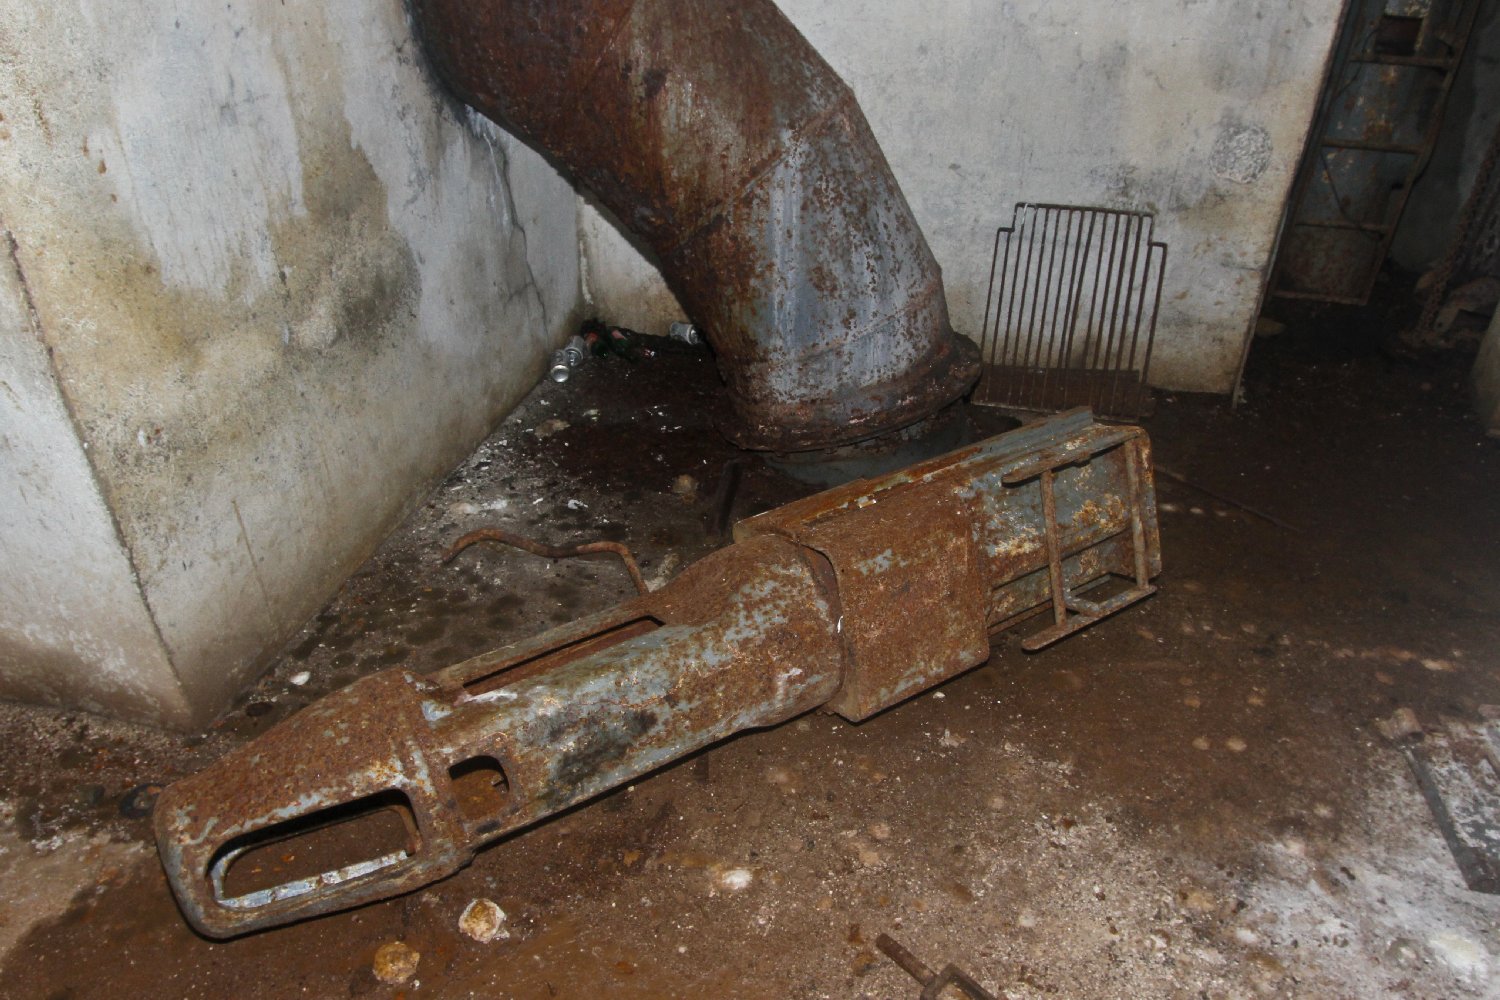
We found this odd
looking weapon dumped here. It's not at all clear what it is but it
looks about 135mm calibre.
|
 |
 |
 |
The access corridor back to the top sides
world!
|
Phew! Result!!!
|
Time to go and have a wander around the
bloc structures topsides.
|
 |
 |
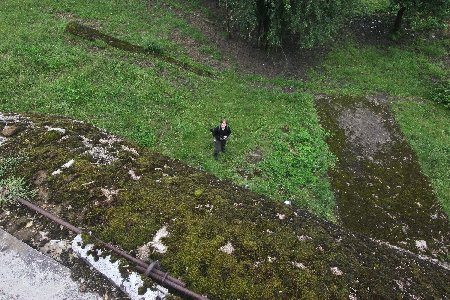 |
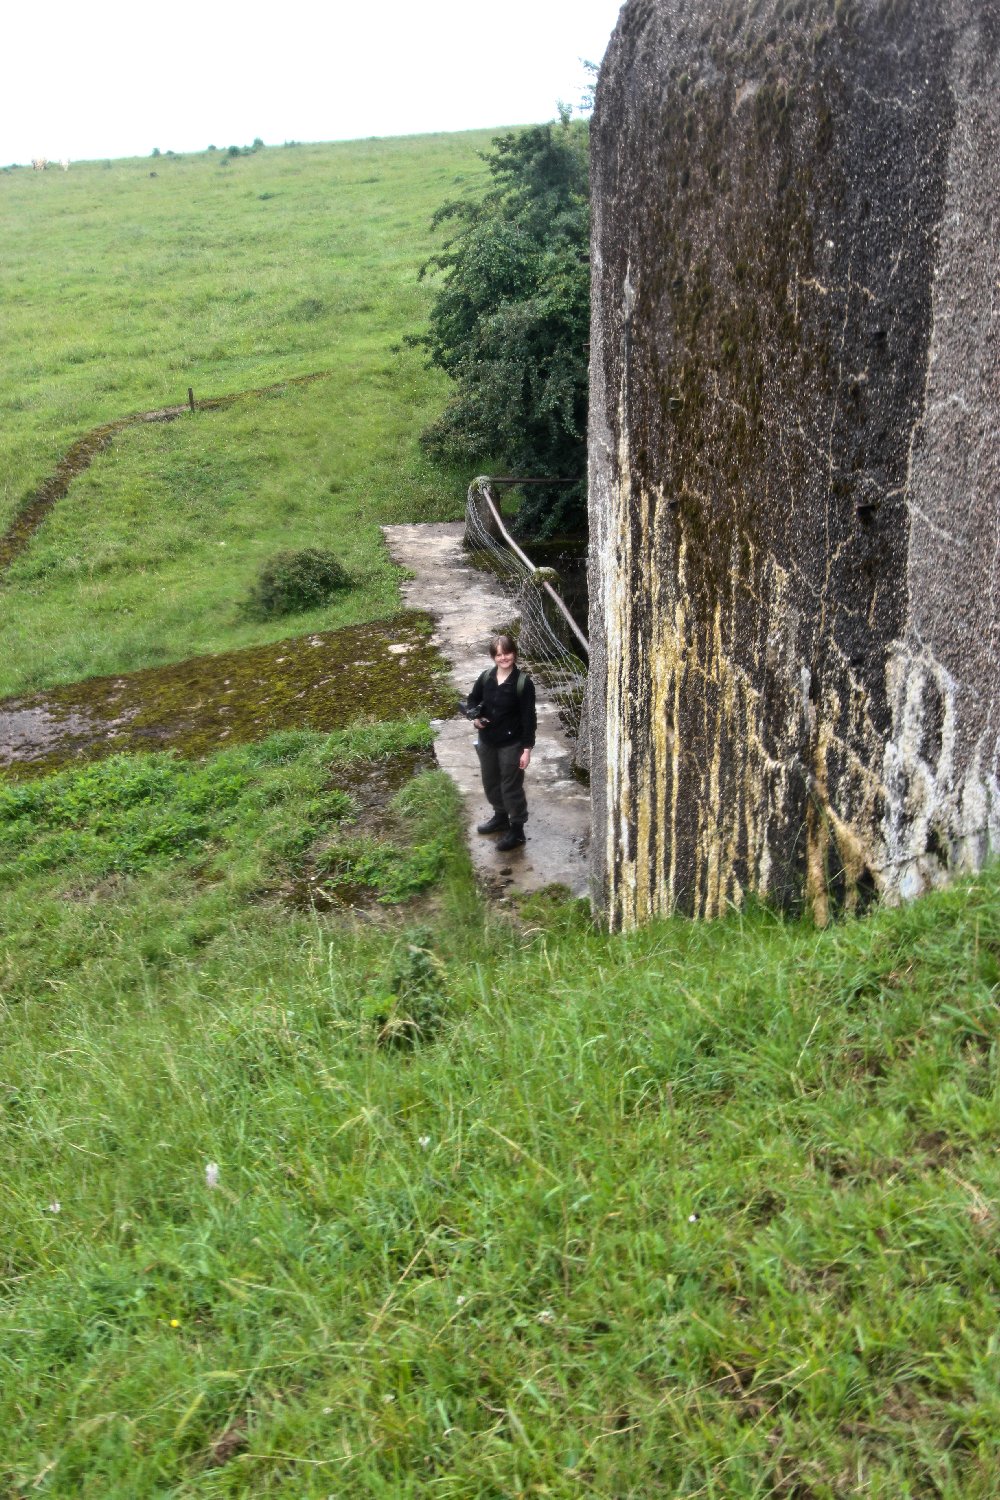
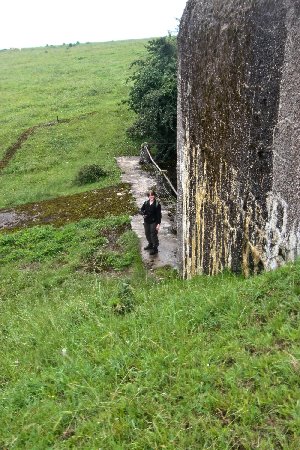
TJ is dwarfed by the concrete entrance
bloc.
|
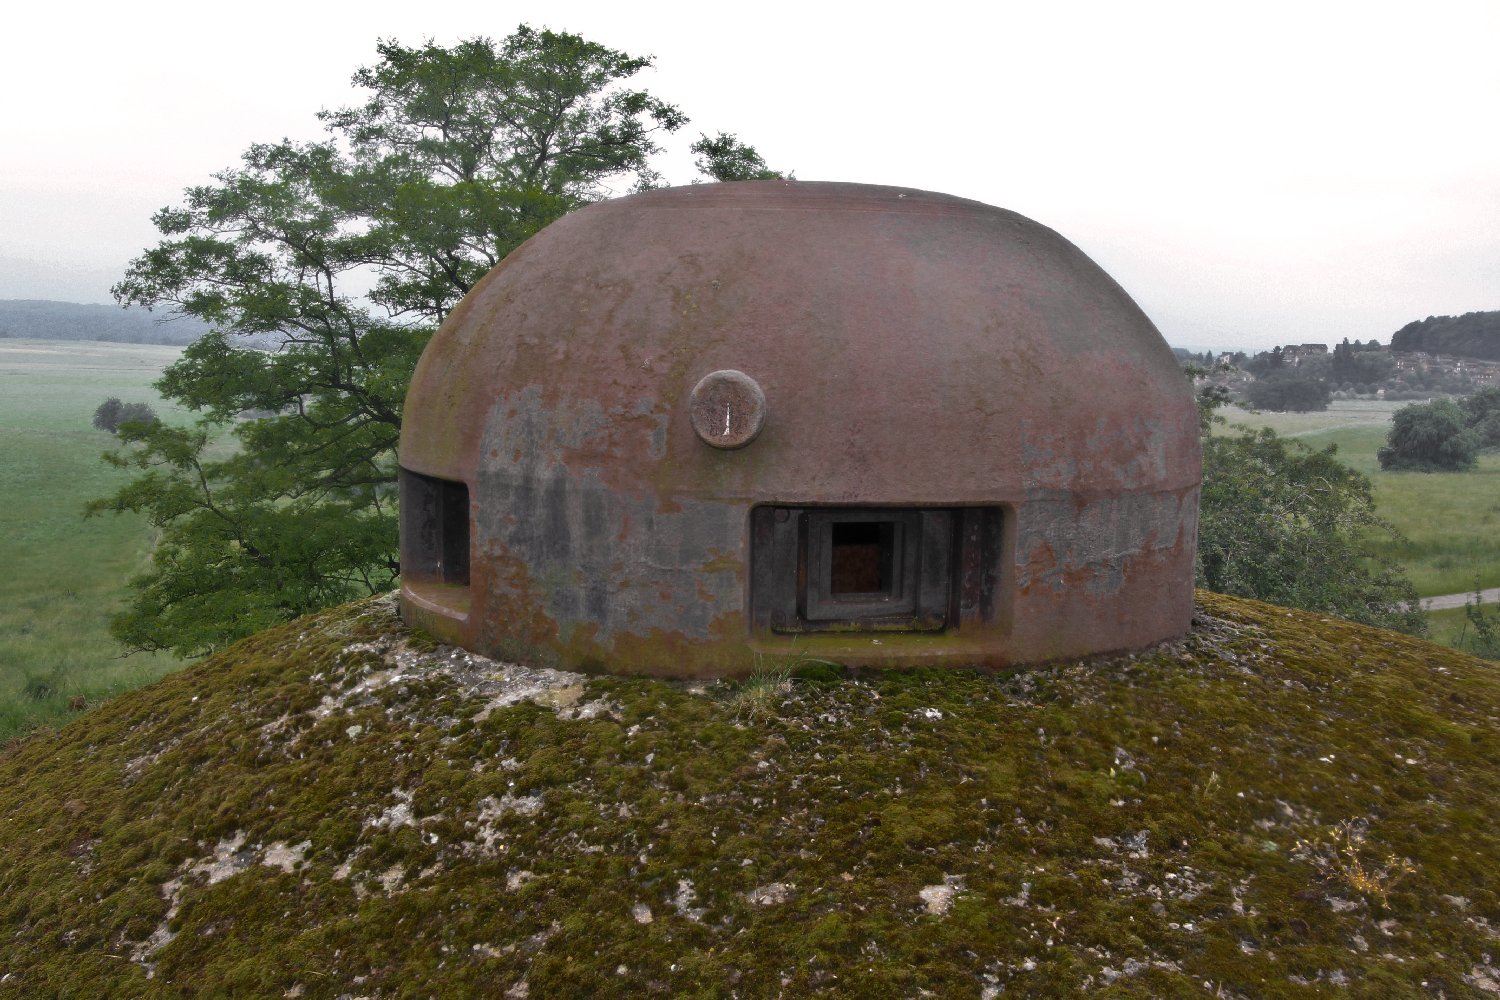
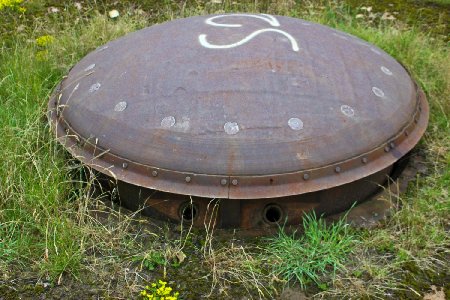
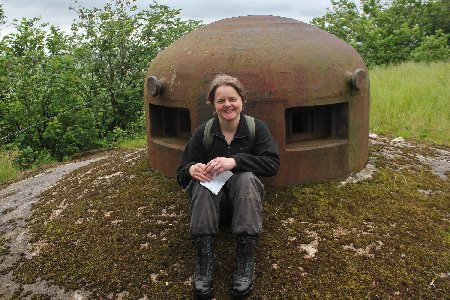
A GM cloche which was
used for observation and to mount machine guns.
|
Although this is shot
with a wide angle lens it really was very high up on the top of the
bloc.
|
 |
 |
 |
|
Looking back towards the
'EH'
entrance to the fort.
|
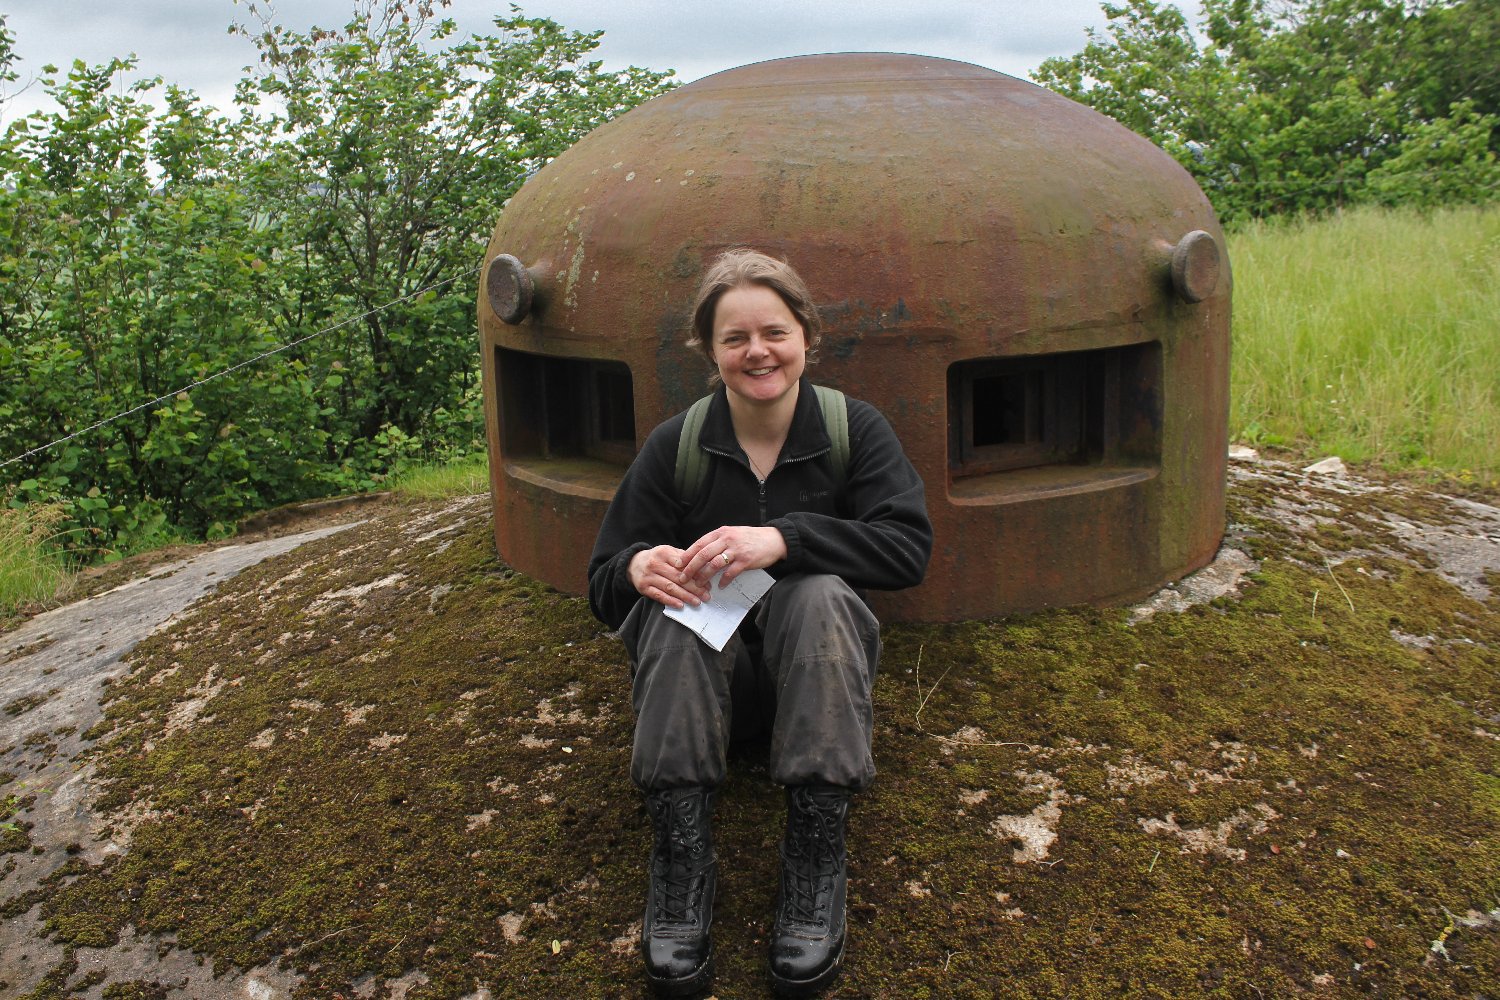
On the roof of Bloc 4 now, this is a double
85mm breach loading mortar turret.
|
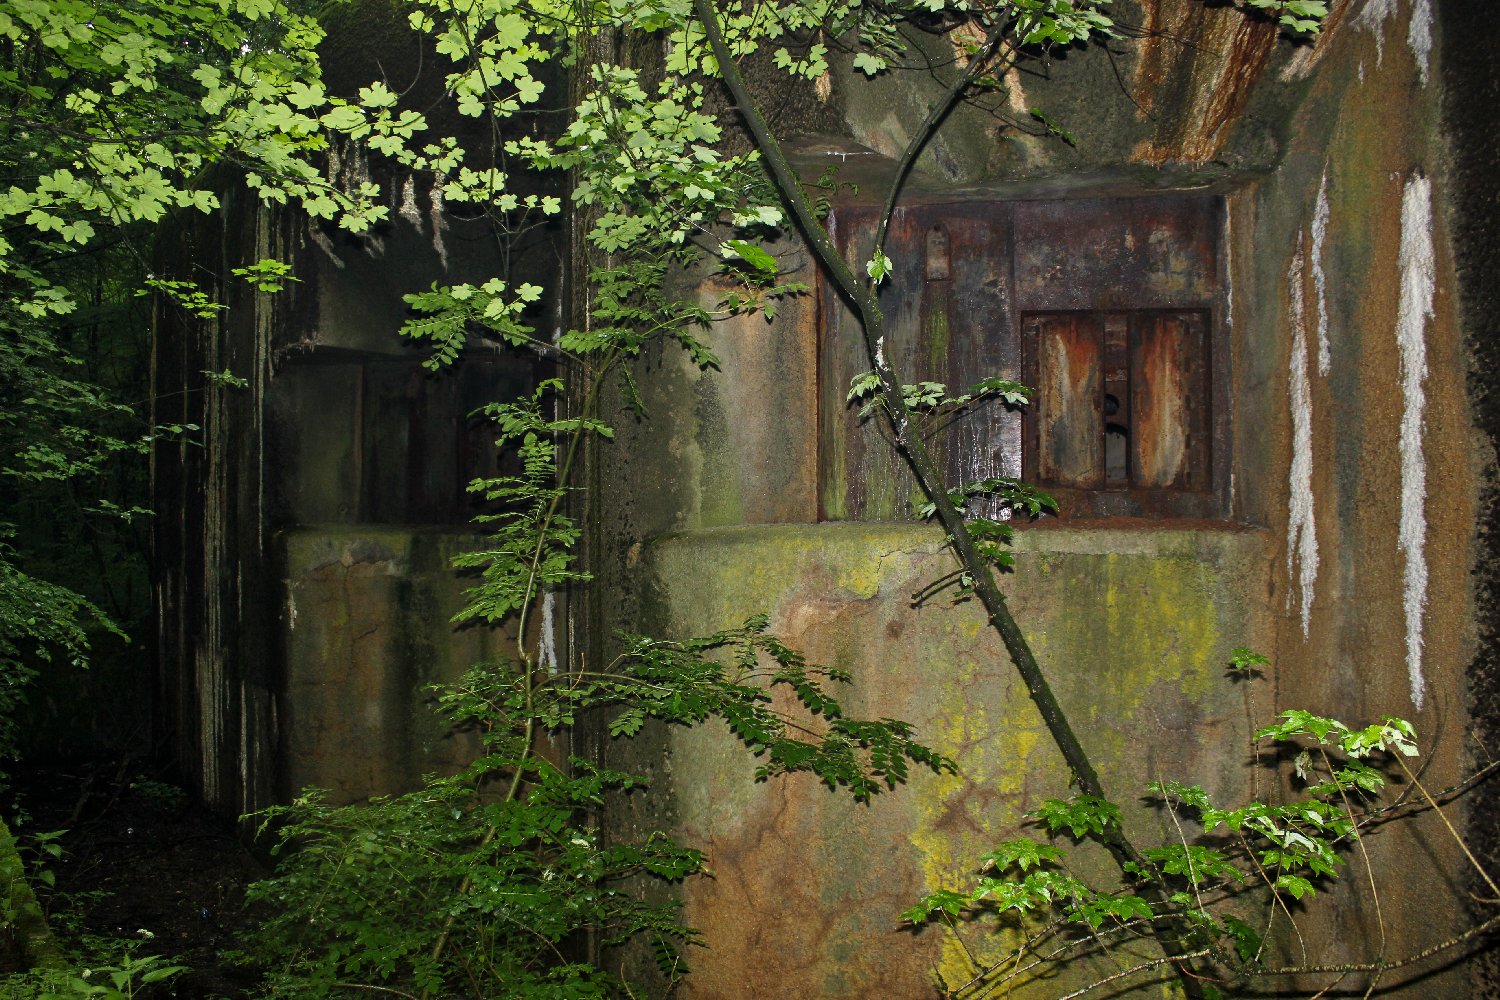
Bloc 5 is situated deep in a very dark and
heavily overgrown wood. This is the bloc we had ascended inside the
fort and is a type very similar in concept to the 'Bourges
Casemates' seen around Verdun.
|
 |
 |
|
|
Looking suitably smug,
here's TJ on the roof of Bloc 4 by the GM cloche. |
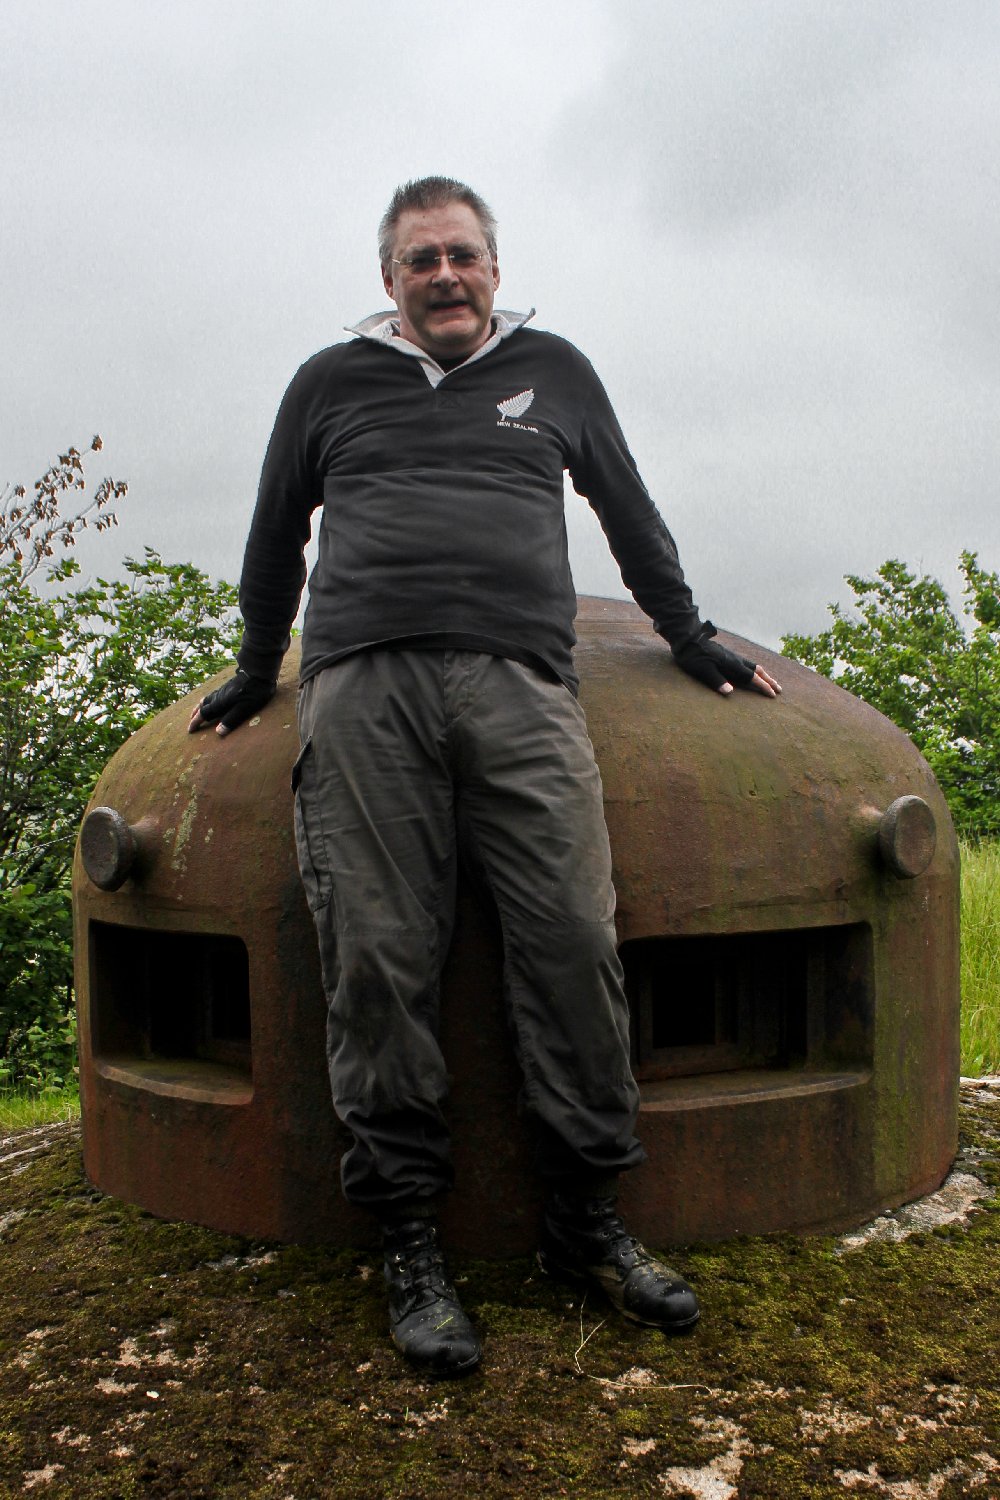
...and completely kn*ck*r*d, here's me!
|
CLICK ABOVE to return
to our urb-ex site main page...
|
|